
Attention! Turn off the corresponding lamp switch.
Headlights
Attention! For vehicles with retractable headlights, see Retractable Headlight Bulb Replacement.
1. Open the hood.
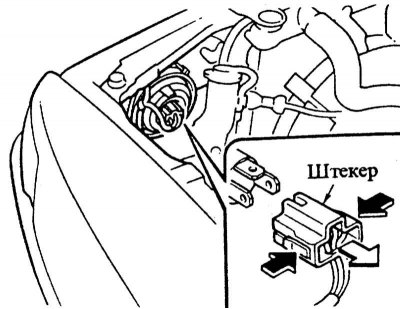
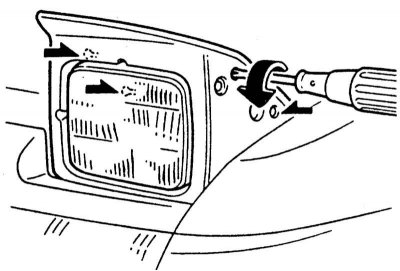
2. Disconnect the plug.
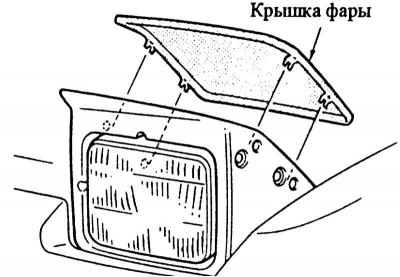
3. Remove cover.
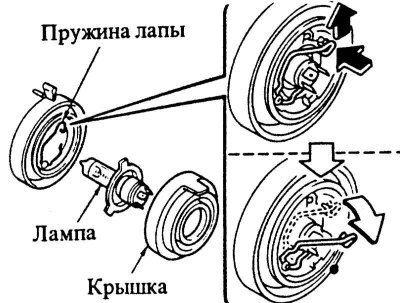
4. Disconnect the wire bracket for attaching the lamp to the latch and fold back.
5. Remove the defective lamp.
6. Insert a new lamp so that the protrusions fit into the corresponding recesses on the housing. At the same time, hold the lamp by the cartridge, and not by the flask.
7. Fold the spring clip forward and snap the latch.
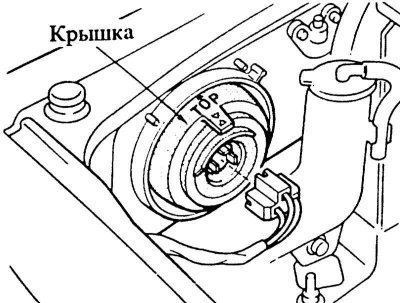
8. Install the cover on the back of the headlight so that the designation "TOR" was turned up.
9. Connect the plug to the socket.
10. Check the headlight adjustment in the workshop.
Front direction indicators
1. Vehicles up to 9/89: Unscrew the glass of the lantern. Slightly press the bulb into the holder, turn it 90°to the left and remove it.
2. Check the glass gasket for damage, replace if necessary.
3. Insert a new bulb, press it in slightly and turn to the right. Insert and screw the glass of the lantern.
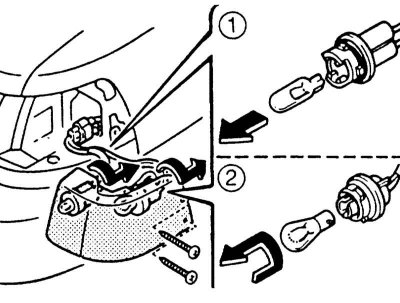
4. Vehicles since 10/89: Unscrew the glass of the lantern. Press bulb -2- lightly into socket, turn 90°to the left and remove.
5. Check glass gasket for damage, replace if necessary.
6. Insert a new bulb, press it in slightly and turn to the right. Insert and screw the glass of the lantern.
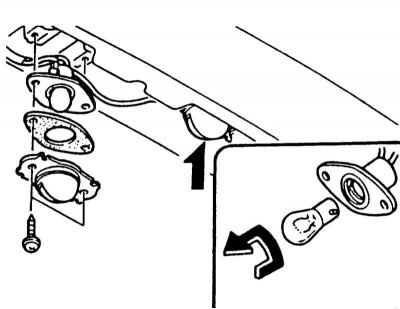
Front parking light
1. Vehicles up to 9/89: Unscrew the bolts on the glass of the lantern.
2. Remove the old bulb -3- from the socket, it is simply stuck in.

3. Insert and push in a new bulb.
4. Screw on the glass of the lantern. Replace cracked or damaged gasket.
5. Vehicles since 10/89: Unscrew the glass of the lantern. Remove the old lamp -1- from the cartridge, it is simply stuck in
6. Insert and push in a new bulb.
7. Screw on the glass of the lantern. Replace cracked or damaged gasket.
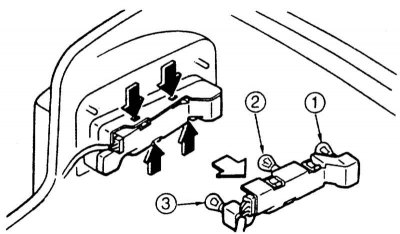
Rear lights

1. Vehicles up to 9/89: Remove the tail light cover. First, remove the pin of the latch with a small screwdriver and remove the latch.
2. Release clips -arrows- and remove bulb holder. Press the defective bulb lightly into the holder, turn it 90°to the left and remove it.
3. Insert a new bulb, press it in slightly and turn to the right. Insert lamp holder, push in and lock into place.
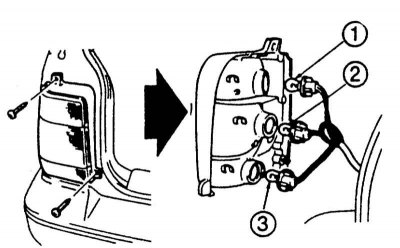
4. Sedan since 10/89: Loosen and remove the lamp holder. Slightly press the defective lamp into the holder, turn it 90 to the left and remove it. On models compact release the cover of the corresponding lamp in the trunk. Turn the bulb socket to the left and remove.
5. Insert a new bulb, press it in slightly and turn to the right. At sedan insert the lamp holder, press and snap into place. Compact: Insert cartridge and secure by turning to the right. Attach cover.
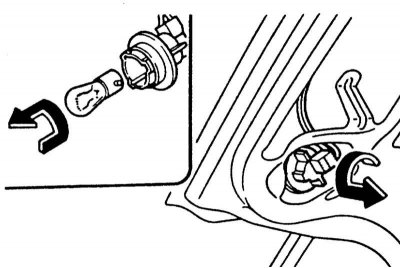
6. Wagon: Open tailgate. Unscrew the lantern and lay it aside.
7. Turn the corresponding lamp socket to the left and remove.
8. Press the old bulb lightly into the holder, turn 90°to the left and remove.
9. Insert a new bulb, press it in slightly and turn to the right.
10. Preliminarily replace the cracked gasket.
11. Insert cartridge and lock by turning to the right.
12. Install the lantern and screw it on. Close tailgate.
Rear fog lights
1. Cars from 10/89 y.: Press the old bulb lightly into the holder, turn it 90°to the left and remove it.
2. Insert a new bulb, press it in slightly and turn to the right.
3. Replace damaged or cracked gasket.
4. Insert cartridge and secure by turning to the right.
5. Install the cover on the MAZDA compact.
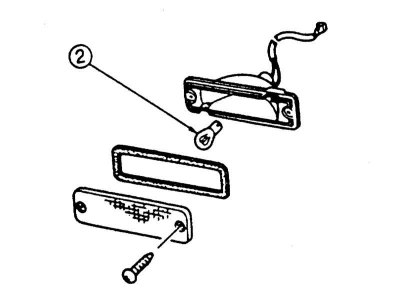
Side direction indicators
1. Unscrew the glass of the lantern (2 bolts). Remove the lamp from the socket, insert a new lamp, screw the glass.
License plate lights
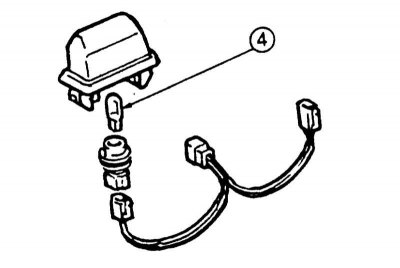
1. Vehicles up to 9/89: Remove the cover of the lamp, put something under the screwdriver so as not to scratch the surface.
2. Remove the lamp holder.
3. Remove the lamp from the socket. Insert a new lamp.
4. Insert cartridge.
5. Push in and snap the lamp body into place.
6. Vehicles since 10/89: Unscrew the lamp and take it out. Remove glass with gasket.
7. Press the defective bulb lightly into the holder, turn it 90°to the left and remove it.
8. Insert a new bulb, press it in slightly and turn it to the right. Insert the lamp holder, put on the gasket and glass, screw the lamp.
Replacing bulbs in retractable headlights
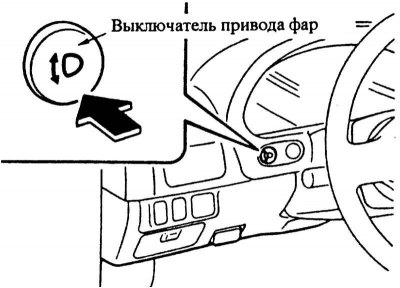
1. Pull out the headlights, to do this, actuate the switch.
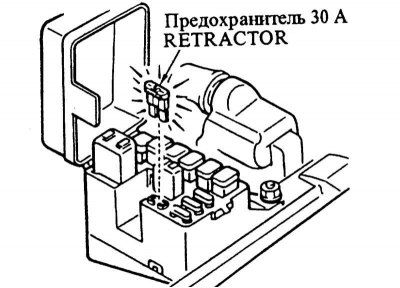
2. Open the cover of the fuse box in the engine compartment and remove the fuse for the retractable headlights.
Attention! Be sure to remove the fuse before changing the headlight bulbs, risk of injury!
3. Unscrew the 4 bolts of the headlight cover.
4. Pull the cover up, release from the headlamp and remove.
5. Replace the lamp as on other models.
6. Install and screw on the cover.
7. Insert a 30 A fuse.
8. Check the operation of the retractable headlights.