


Brake system of cars Mazda 323 (BF)

Detailed technical characteristics of the brake system
The vehicles use a service brake system with diagonally divided circuits. One hydraulic drive circuit ensures the operation of the right front and left rear brake...
The vehicles use a service brake system with diagonally divided circuits. One hydraulic drive circuit ensures the operation of the right front and left rear brake...

Front wheel brake mechanism parts
Front wheel brake mechanism parts: 1 - brake disc; 2 - brake pads; 3 - noise-absorbing and pressure pads; 4 - pressure spring; 5 - pad fastening pins; 6 - bracket; 7 -...
Front wheel brake mechanism parts: 1 - brake disc; 2 - brake pads; 3 - noise-absorbing and pressure pads; 4 - pressure spring; 5 - pad fastening pins; 6 - bracket; 7 -...

Replacing the front brake pads
Note: Replace the brake pads of both front wheels at the same time. Install the brake pads of the brand and type recommended by the manufacturer. Raise the front of the...
Note: Replace the brake pads of both front wheels at the same time. Install the brake pads of the brand and type recommended by the manufacturer. Raise the front of the...

Removal and installation the front brake caliper and brake disc
Remove the brake pads as described above. Disconnect the brake hose from the bracket, having first placed a container under the brake mechanism. Plug the brake hose...
Remove the brake pads as described above. Disconnect the brake hose from the bracket, having first placed a container under the brake mechanism. Plug the brake hose...

Rear wheel drum brake mechanism parts
Rear wheel drum brake mechanism parts: 1 - brake mechanism shield; 2 - pads; 3 - tension springs; 4 - mechanism for automatic adjustment of the gap between the pads and...
Rear wheel drum brake mechanism parts: 1 - brake mechanism shield; 2 - pads; 3 - tension springs; 4 - mechanism for automatic adjustment of the gap between the pads and...

Replacing rear drum brake shoes
Note: Replace the brake pads of both rear wheel brake mechanisms at the same time. Install the friction linings of the brand and type recommended by the manufacturer....
Note: Replace the brake pads of both rear wheel brake mechanisms at the same time. Install the friction linings of the brand and type recommended by the manufacturer....

Rear wheel disc brake mechanism parts
Rear disc brake mechanism parts: 1 - brake disc assembly with hub; 2 - brake pads; 3 - pressure pads; 4 - brake shoe springs; 5 - support; 6 - lower guide pin mounting...
Rear disc brake mechanism parts: 1 - brake disc assembly with hub; 2 - brake pads; 3 - pressure pads; 4 - brake shoe springs; 5 - support; 6 - lower guide pin mounting...

Replacing rear disc brake pads
Note: Replace the brake pads of both rear wheel brake mechanisms at the same time. Install the friction linings of the brand and type recommended by the manufacturer....
Note: Replace the brake pads of both rear wheel brake mechanisms at the same time. Install the friction linings of the brand and type recommended by the manufacturer....
Removal and installation the rear caliper
Remove the brake pads as described above. Disconnect the parking brake cable from the caliper. Disconnect the brake hose from the caliper and plug its hole. Remove the...
Remove the brake pads as described above. Disconnect the parking brake cable from the caliper. Disconnect the brake hose from the caliper and plug its hole. Remove the...

Brake master cylinder and vacuum booster
Master brake cylinder and vacuum booster: 1 - master brake cylinder; 2 - master cylinder reservoir; 3 - cork; 4 - sealing rings; 5 - brake fluid emergency level sensor;...
Master brake cylinder and vacuum booster: 1 - master brake cylinder; 2 - master cylinder reservoir; 3 - cork; 4 - sealing rings; 5 - brake fluid emergency level sensor;...

Removal and installation of the brake master cylinder
Warning! Brake fluid is an aggressive liquid. If brake fluid gets on the painted surfaces of the car body, remove it immediately. Remove the brake fluid from the...
Warning! Brake fluid is an aggressive liquid. If brake fluid gets on the painted surfaces of the car body, remove it immediately. Remove the brake fluid from the...
Removal and installation the vacuum booster
Remove the brake master cylinder ( see above ). Disconnect the hose from the amplifier. Working from inside the vehicle, remove the retaining clip and disconnect the...
Remove the brake master cylinder ( see above ). Disconnect the hose from the amplifier. Working from inside the vehicle, remove the retaining clip and disconnect the...
Checking the performance of the vacuum booster
Press the brake pedal several times with the engine off to create the same pressure in the vacuum booster cavities, close to atmospheric. Keeping the brake pedal...
Press the brake pedal several times with the engine off to create the same pressure in the vacuum booster cavities, close to atmospheric. Keeping the brake pedal...

Removal and installation the pressure regulator
Place the car on a lift. Mark the lines and disconnect them from the pressure regulator, after placing a container underneath to collect the brake fluid. Plug the lines....
Place the car on a lift. Mark the lines and disconnect them from the pressure regulator, after placing a container underneath to collect the brake fluid. Plug the lines....
Checking the performance of the pressure regulator
Connect one pressure gauge between the master brake cylinder and the pressure regulator, and another between the regulator and the working cylinder of the rear wheel...
Connect one pressure gauge between the master brake cylinder and the pressure regulator, and another between the regulator and the working cylinder of the rear wheel...

Parking brake parts
Parking brake: 1 - lever; 2 - handle; 3 - Parking brake release button; 4 - spring; 5 - front cable; 6 - lock nut; 7 - parking brake drive cable.
Parking brake: 1 - lever; 2 - handle; 3 - Parking brake release button; 4 - spring; 5 - front cable; 6 - lock nut; 7 - parking brake drive cable.
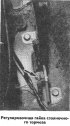
Adjusting the parking brake system
Press the brake pedal several times. By turning the adjusting nut in the parking brake drive lever, set the required lever stroke (see subsection " Detailed technical...
Press the brake pedal several times. By turning the adjusting nut in the parking brake drive lever, set the required lever stroke (see subsection " Detailed technical...
Bleeding the brake hydraulic system
Bleeding the brakes is necessary to remove air from the hydraulic drive. Air can get into the hydraulic drive due to depressurization of the system during repair or...
Bleeding the brakes is necessary to remove air from the hydraulic drive. Air can get into the hydraulic drive due to depressurization of the system during repair or...
This section is available on: russian, bulgarian, belarusian, ukrainian, serbian, croatian, romanian, polish, slovak, hungarian
More sections on repairs of other Mazda models
• Chassis: Brake system Mazda Capella 4 (1987-1992)
• Chassis: Brake system Mazda3 BK (2003-2009)
• Chassis: Brake system Mazda6 GG (2002-2008)
• Chassis: Brake system Mazda CX-5KE (2012-2017)
• Chassis: Brake system Mazda 121 (3) (1996-2003)
• Chassis: Brake system Mazda Capella 4 (1987-1992)
• Chassis: Brake system Mazda3 BK (2003-2009)
• Chassis: Brake system Mazda6 GG (2002-2008)
• Chassis: Brake system Mazda CX-5KE (2012-2017)
• Chassis: Brake system Mazda 121 (3) (1996-2003)
Link in different formats to this section
TEXTHTMLBB Code
- General information
- Introduction to guide
- User manual
- Maintenance
- Power unit
- Petrol engines
- Diesel engines
- Lubrication system
- Cooling system
- Ignition system
- Supply system
- Carburetor
- Injection system
- Exhaust system
- Transmission
- Clutch
- Car gearbox
- Chassis
- Front suspension
- Rear suspension
- Steering
- Brake system
- Wheels and tires
- Body
- Body elements
- Doors and windows
- Body Care
- Electrical equipment
- Equipment and devices
- Power devices
- Heating system
- Lighting and headlights
- Windshield wipers and washers
- Wiring diagrams (since 1987)
- Wiring diagrams (since 1991)
- General information
- Vehicle data
- Model «E» engine
- Engine repair
- Cooling and lubrication system
- Power and ignition system
- Model «B» engine
- Engine repair
- Cooling and lubrication system
- Ignition system
- Power system (carburetor)
- Power system (injector)
- Transmission
- Clutch
- Mechanical gearbox
- Automatic gearbox
- Front wheel drive
- Chassis
- Steering
- Front suspension
- Rear suspension
- Brake system
- Electrical equipment
- Equipment and devices
- Electrical circuits
- Wiring diagrams (station wagon)