
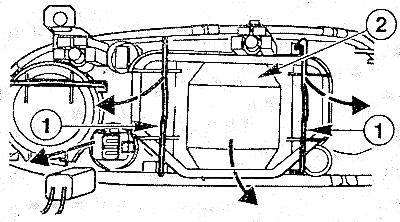
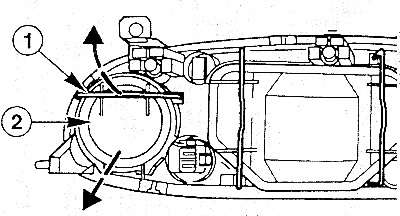
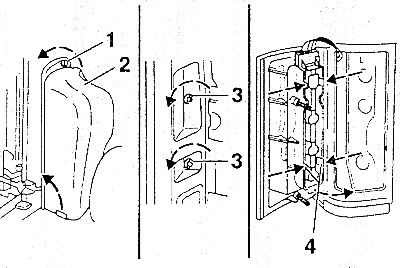
Headlights
Remove headlight.
 | 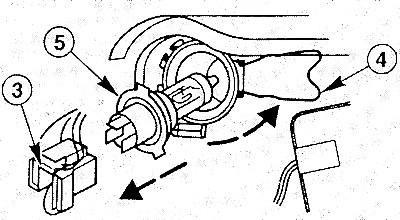 |
Pull off low beam headlight plug (3).
Pull out the wire clamp (4) up and push it to the side.
pull out the lamp (5).
Press the wire clamp back and secure the lamp.
Plug in the lamp plug.
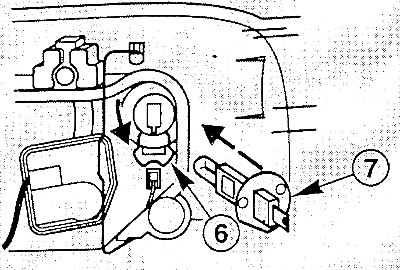
Remove the headlight bulb connector.
Pull out the wire clamp (6) aside and throw it away.
pull out the lamp (7).
Insert the bulb so that the protrusions on the base fit into the recesses on the headlight.
Press the wire clamp back and secure the lamp.
Plug in the lamp plug.
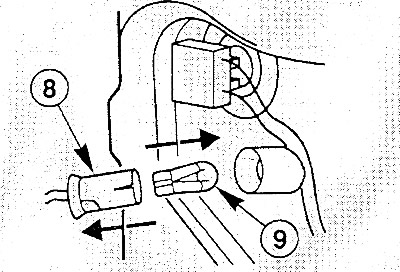
Pull out the chuck (8) side lighting lamps.
pull out the lamp (9) from the cartridge and replace it.
Insert the socket into* the lamp housing.
Install headlight cover and secure with wire clamp.
Install the headlight and adjust it in the workshop.
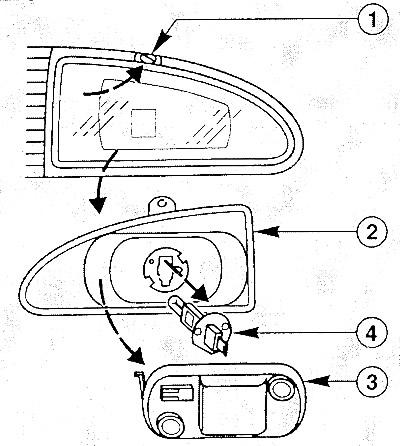
Front direction indicators
Fold up the wire clamp (1).
Remove cover (2) turn signal housing.
Turn the bulb socket to the left and remove it.
Lightly press the lamp into the socket, turn it to the right and fasten it.
Insert the cartridge into the lantern, turn it to the right.
Anti-fog headlight
Remove the screw (1) and pull out the bulb holder (2).
Unhook and remove cover (3).
Pull the plug from the lamp (4).
Unhook and fold out the wire clip.
Take out the lamp and replace it.
Insert the bulb so that the protrusions on its base fit into the recesses on the headlight.
Fold the wire clip back and secure the lamp.
Plug in the lamp plug.
Press and attach the cover.
Install the lamp holder and secure it with the screw.
Side turn signal
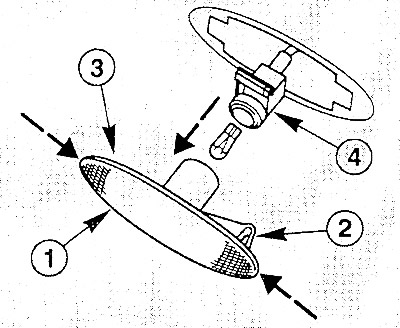
Press the lamp housing (1), overcoming the force of the plastic holder (2) forward or backward.
Attention: The plastic holder can be in the installed position at the front or at the back.
Press out the lamp housing from the other side (3) from the wing and take it out.
Separate the lamp body from the lamp socket (4), turning to the left.
Remove the bulb from the socket and replace it.
Insert the lamp housing first into the position (3) into the hole on the wing, and then to the position (2) (fastening bracket) and fix it.
Rear lights
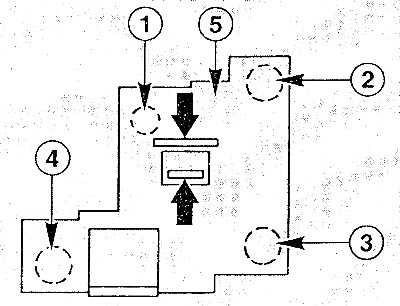
From the trunk, squeeze both tabs on the lamp mount (5) (arrows).
Pull out the lamp holder.
Press the defective lamp slightly into the holder, turn to the left and remove it.
One lantern contains the following lamps:
- 1 - overall lighting;
- 2 - braking signal;
- 3 - direction indicator;
- 4 - reversing light or rear fog lamp.
Insert the new bulb into the holder, press it down slightly and secure by turning to the right.
Insert the lamp socket and secure it.
Rear lights - Fiesta Courier
From the cargo compartment turn the swivel clamp (1) to the left.
Unhook the cover (2) below and remove it.
Unscrew the two nuts on the fender (3).
Slightly pull out the lower part of the lamp housing from the outside, press it down slightly and carefully remove it.
Compress the lower fastening tabs (4) and pull out the lamp mount a little, then squeeze the upper tabs and remove the lamp.
Press the damaged lamp slightly in the holder, turn it to the left and remove it.
From top to bottom, the following lamps are located: combined marker lamp/brake signal; turn signal; rear fog lamp; reverse light.
Insert a new bulb into the holder, press it down a little and turn it to the right.
Insert the lamp socket and secure it.
Check the rear light seal for damage and replace if necessary.
Insert the lantern and secure it with nuts.
Attach the inner cover at the bottom, press on from above and secure with the swivel clip.
License plate light
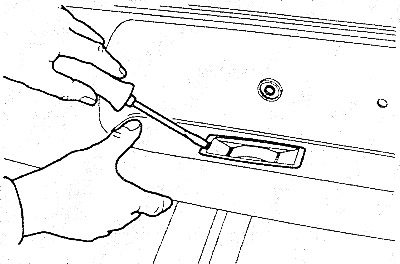
Pry off the light with a blunt screwdriver from the bumper.
Turn the bulb socket to the left and remove it.
Pull the bulb out of the socket and replace it.
Insert the chuck into the housing and secure by turning to the right.
Push the headlight into the bumper.
Interior lighting
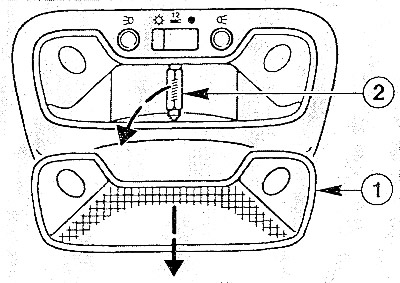
Turn off the flashlight.
Pry off the glass of the lantern (1) blunt screwdriver.
Caution: The flashlight can be hot, so use a cloth to remove it.
Pull out the soffit lamp with your fingers and replace it. At the same time, check the tightness of the fit in the clamps, if necessary bend them a little.
Insert lamp glass.