


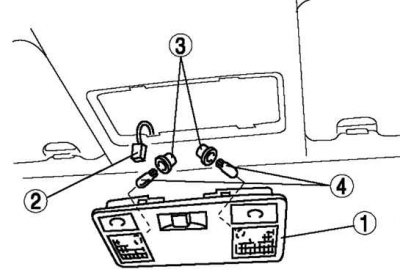
Fig. 7.42. Components of the front interior light: 1 – front light; 2 – connector; 3 – lamp socket; 4 – lantern lamp
Remove in the order shown in Figure 7.42.
Insert a taped flat-head screwdriver into the gap between the trim and the light.
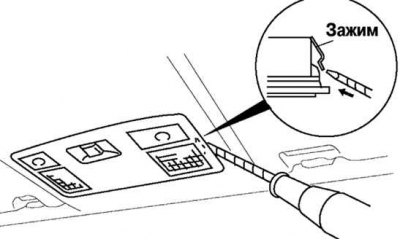
Fig. 7.43. Releasing the lamp mounting clamps
Press the hooks to remove the light (Fig. 7.43).
Checking the front interior light
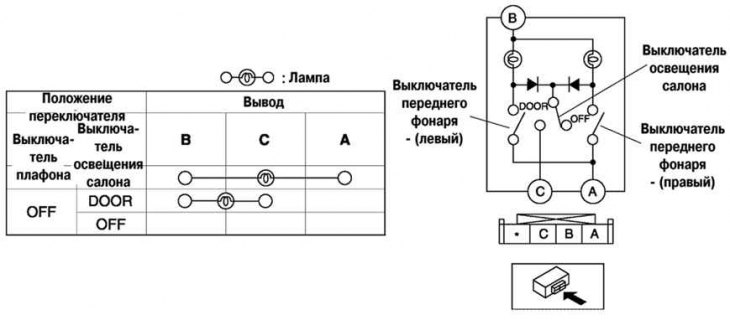
Fig. 7.44. Front interior light test diagram
Check the integrity of the circuit between the terminals of the front interior light using an ohmmeter (Fig. 7.44).
If the measurements do not correspond to the data given in table, replace the front light.