


Headlights with xenon lamps
Low/High Beam Lamp
It is forbidden to replace the bulbs in the dipped/high beam headlights yourself. To replace the bulb, contact an Authorized Mazda Dealer.
Daytime Running Lights
1. Make sure the ignition switch and central lighting switch are in the «OFF» («Turned off»).
2. Open the hood.
3. Disconnect the electrical connector from the lamp. To do this, press the tab of the connector lock with your finger and separate the parts of the connector.
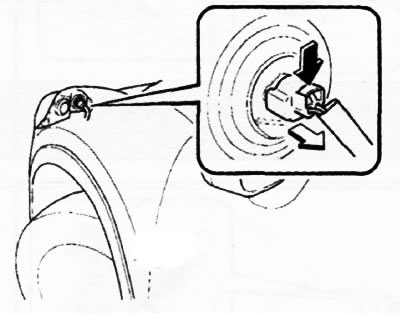
4. Turn the cartridge counterclockwise and remove the cartridge with the lamp from the headlight housing. Gently pull the bulb out of the socket in the reflector.
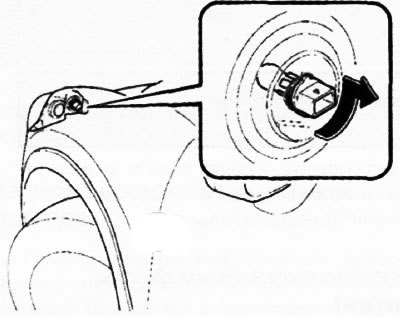
5. Install a new lamp and follow the above steps in reverse order.
Headlights with halogen lamps
Low beam headlights
1. Make sure the ignition switch and central lighting switch are in the «OFF» («Turned off»).
2. Open the hood.
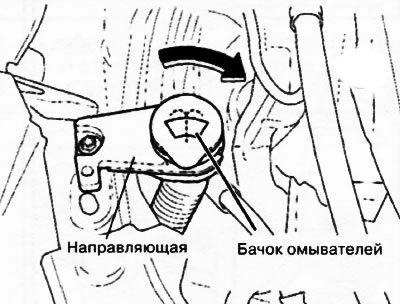
3. Right side: remove the washer reservoir from the rail.
4. Disconnect the electrical connector. To do this, press the tab of the latch with your finger and separate the parts of the connector.
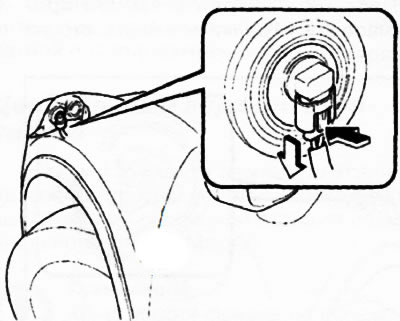
5. Turn the cartridge counterclockwise and remove the cartridge with the lamp from the headlight housing. Gently pull on the bulb and remove it from the socket in the reflector.
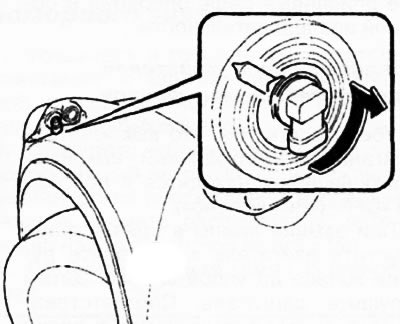
6. Install a new lamp and follow the above steps in reverse order.
High Beam/Daytime Running Lamps
1. Make sure the ignition switch and central lighting switch are in the «OFF» («Turned off»).
2. Open the hood.
3. Right side: remove the washer reservoir from the rail.
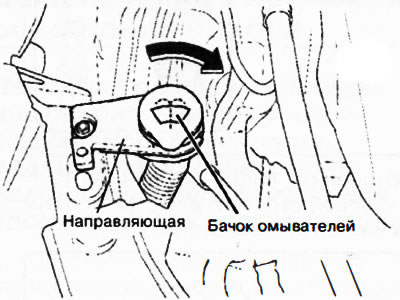
4. Remove the sealing cover.
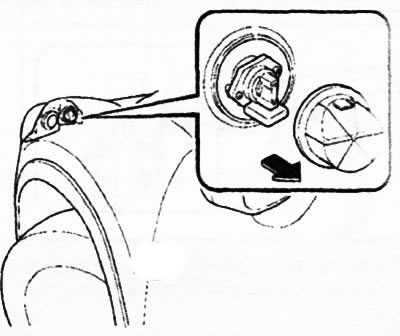
5. Turn the lamp socket counterclockwise and remove it from the lamp.
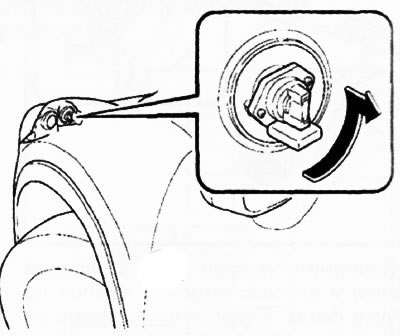
6. Install a new lamp and follow the above steps in reverse order.
Front turn signal/position lights
1. Make sure the ignition switch and central lighting switch are in the «OFF» («Turned off»).
2. When replacing the bulb in the right headlight, start the engine and turn the steering wheel all the way to the right. Then stop the engine. Accordingly, if you are replacing a bulb in the left headlight, turn the steering wheel all the way to the left.
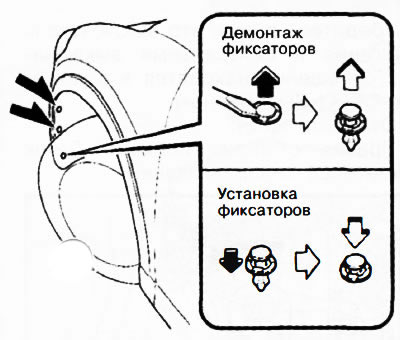
3. Pull out the cores of the plastic retainers and remove the retainers.
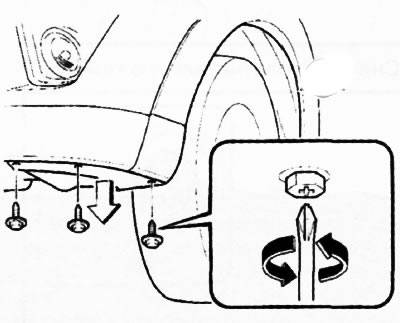
4. Loosen the screws by turning them counterclockwise and pull back the dirt cover partially.
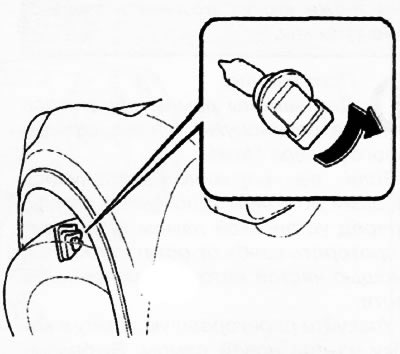
5. Turn the lamp socket counterclockwise and remove it from the lamp.
6. Remove the bulb from the socket.
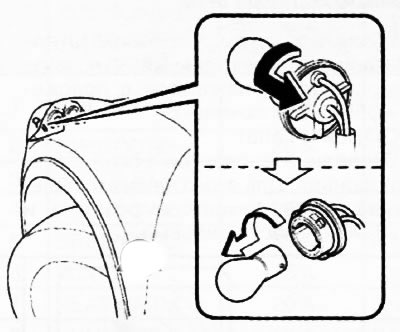
Front direction indicators
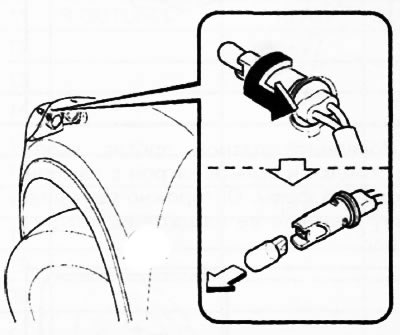
Marker lights
7. Install a new lamp and follow the above steps in reverse order.
Fog lights (option)
1. Make sure the ignition switch and central lighting switch are in the «OFF» («Turned off»).
2. When replacing the bulb in the right headlight, start the engine and turn the steering wheel all the way to the right. Then stop the engine. Accordingly, if you change the lamp in the left headlight, turn the steering wheel all the way to the left.
3. Pull out the cores of the plastic retainers and remove the retainers.
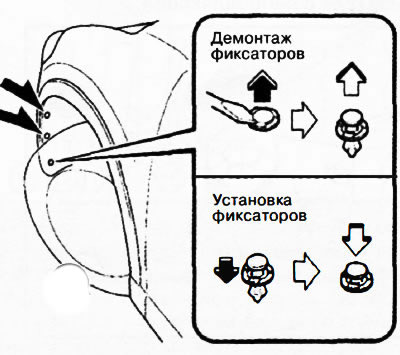
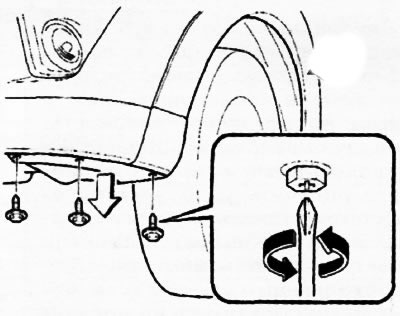
4. Loosen the screws by turning them counterclockwise and pull back the dirt cover partially.
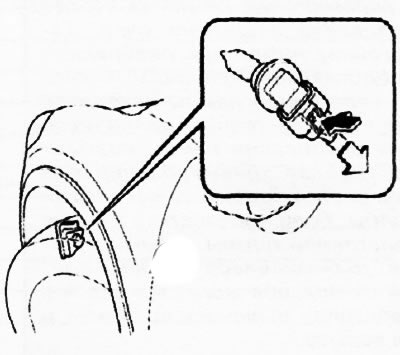
5. Disconnect the electrical connector. To do this, press the latch tab with your finger and separate the parts of the connector.
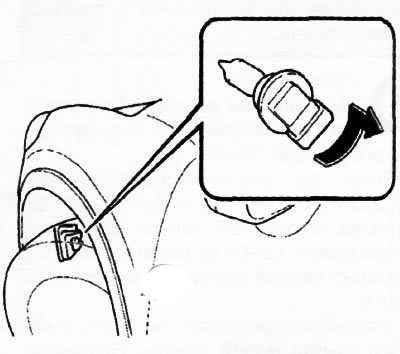
6. Turn the cartridge counterclockwise and remove the cartridge with the lamp from the headlight housing. Gently pull on the bulb and remove it from the socket in the reflector.
7. Install a new lamp and follow the above steps in reverse order.
Lanterns of lateral repeaters of indexes of turn
Due to the complexity of replacing LED elements, the work must be carried out at a service station of an authorized Mazda dealer.
Note: The design of the lantern does not provide for the possibility of replacing a separate LED element (LED elements are built into the lantern). Replace lamp assembly.
Brake/taillights, rear cornering lights, taillights (on liftgate), reversing lights
1. Make sure the ignition switch and central lighting switch are in the «OFF» («Turned off»).
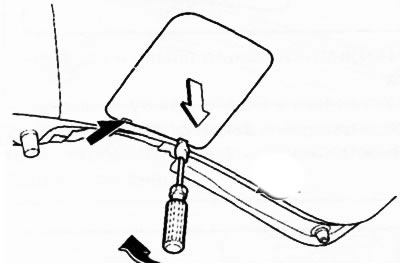
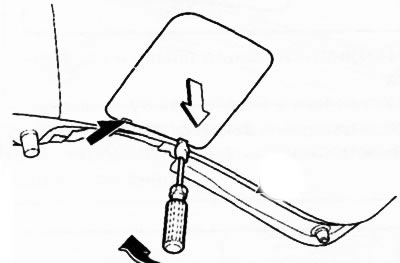
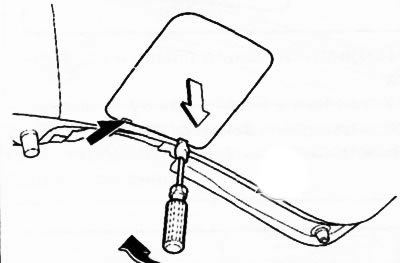
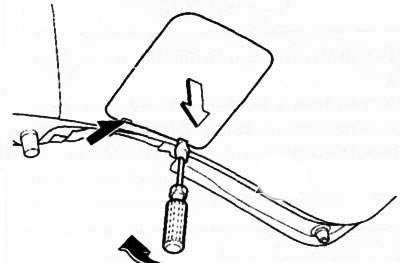
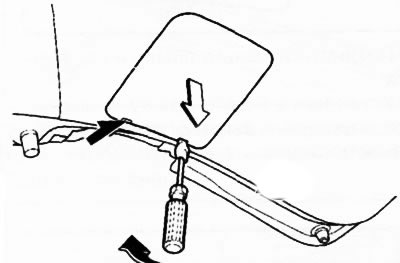
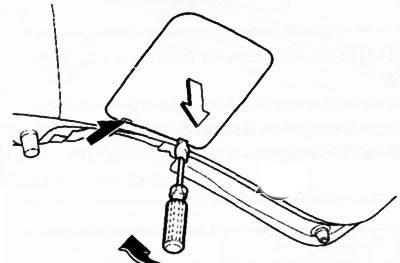
2. Liftgate: Remove the cover by prying it out with a flathead screwdriver wrapped in a rag.
Stop/tail lights, rear direction indicators
Rear marker lights (on liftgate), reversing lights
3. Turn the lamp socket counterclockwise and remove it from the lamp.
4. Remove the bulb from the socket.
Stop/tail lights
Rear direction indicators
Rear marker lights (on liftgate)
reversing lights
5. Install a new lamp and follow the above steps in reverse order.
Rear fog lamp
1. Check that the ignition switch and central lighting switch are in the «OFF» («Turned off»).
2. Pull out the cores of the plastic retainers and remove the retainers.
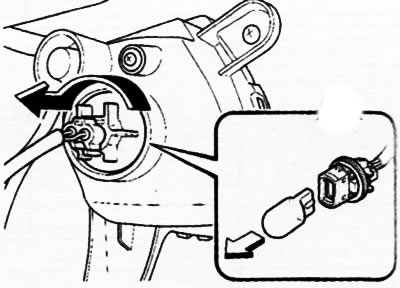
3. Turn the lamp socket counterclockwise and remove it from the lamp.
4. Remove the bulb from the socket.
5. Install a new lamp and follow the above steps in reverse order.
Center top brake light
Due to the complexity of replacing LED elements, the work must be carried out at a service station of an authorized Mazda dealer.
Note: The design of the lantern does not provide for the possibility of replacing a separate LED element (LED elements are built into the lantern). Replace lamp assembly.
License plate lights
1. Make sure the ignition switch and central lighting switch are in the «OFF» («Turned off»).
2. Wrap a small flathead screwdriver with a soft cloth (to avoid mechanical damage to the diffuser) and remove the diffuser by gently pressing on its edge with a screwdriver.
3. Pull and remove the lamp from the holder.
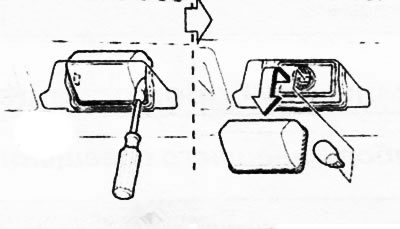
4. Install a new lamp and follow the above steps in reverse order.