


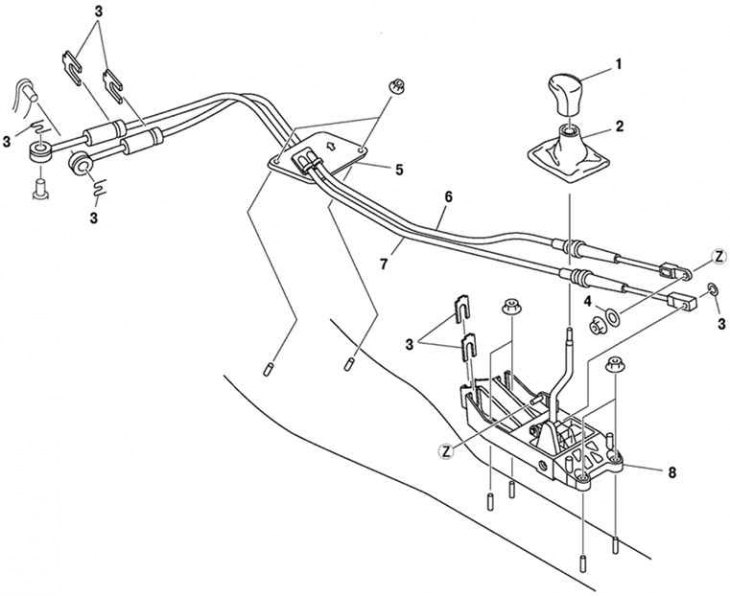
Fig. 3.29. Gear shift mechanism of the Mazda 6: 1 – gear shift lever; 2 – cover panel; 3 – clamp; 4 – washer; 5 – sealing plate; 6 – main shift drive cable; 7 – main gear selection cable; 8 – gear shift lever block
Remove the battery, its tray and the tray mounting bracket.
Remove the air filter element.
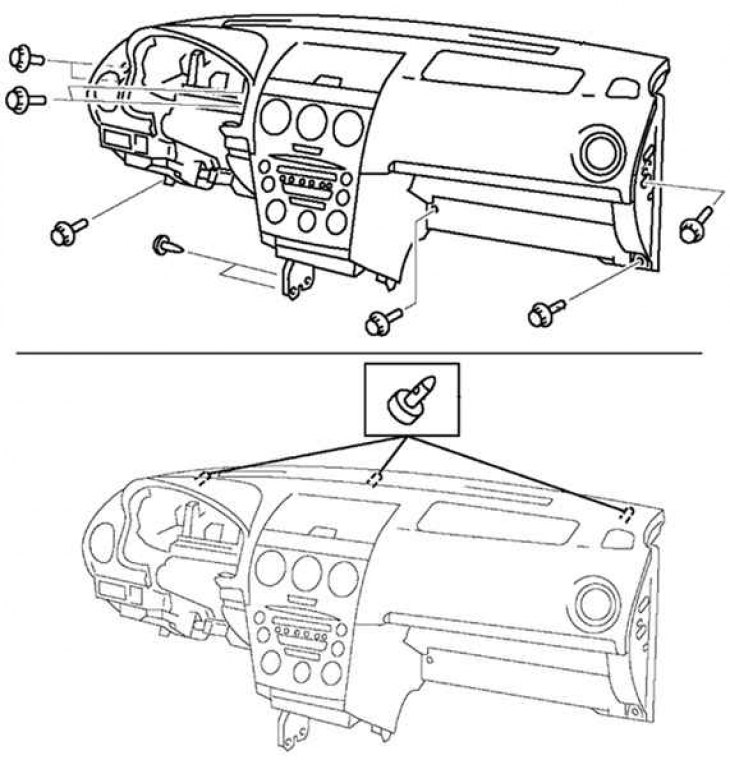
Fig. 3.30. Removing the instrument panel
After unscrewing seven bolts, two mounting screws and removing three pins, remove the instrument panel (Fig. 3.30).
The primary source is the website [www.MAZbook.ru]
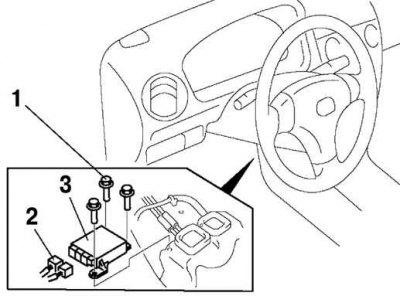
Fig. 3.31. Removing the stability enhancement system control module: 1 – bolts; 2 – power and control connectors; 3 – module
Remove the three mounting bolts and remove the stability enhancement system control module (Fig. 3.31).
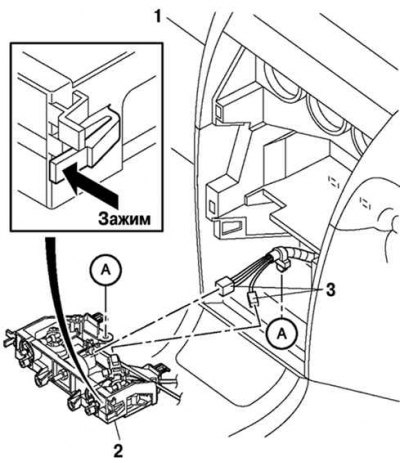
Fig. 3.32. Removing the climate control unit: 1 – air conditioner; 2 – control unit; 3 – power and control connectors
Remove the air conditioning control unit (Fig. 3.32).
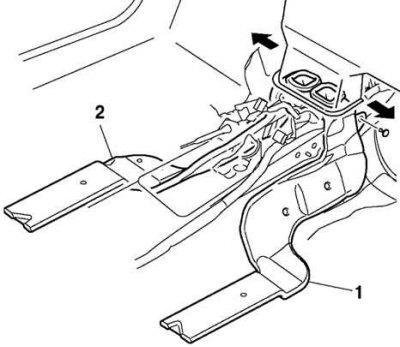
Fig. 3.33. Removing the lower air ducts: 1 – right air duct; 2 – left air duct
Remove the lower air ducts (Fig. 3.33).
Remove the shift lever and gear shift boot.
Remove the gear shift cables.
Remove the gear shift lever assembly.
Install in the reverse order of removal.
Install the air filter element.
After installation, make sure the gear shift lever can move smoothly to any position.