


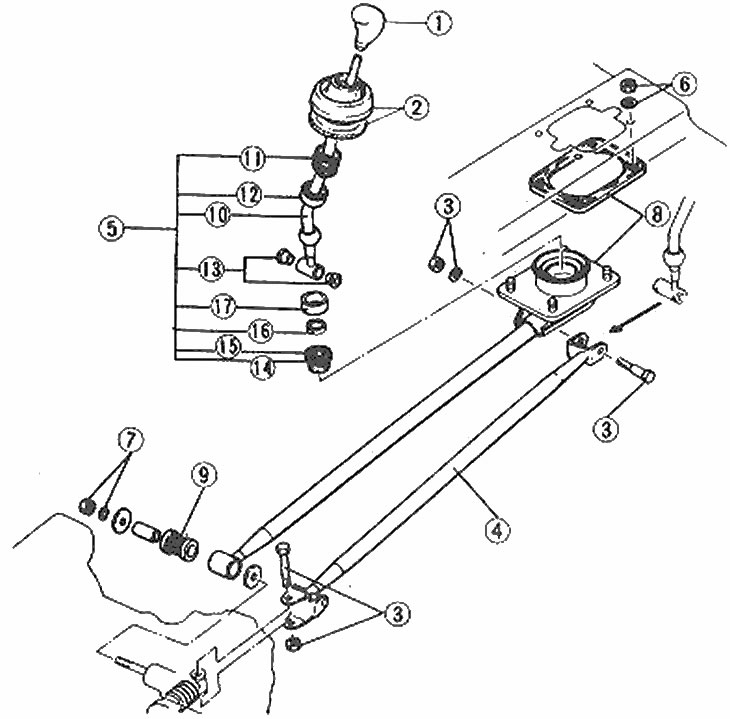
Gear shift lever assembly parts
1. Gear shift knob; 2. Case; 3. Bolts and nuts; 4. Drive rod; 5. Gear Shift Lever Components; 6. Bracket nuts; 7. Nut and washer; 8. Assembling the bracket and extension rod; 9. Bushing; 10. Gear shift lever; 11. Spring; 12. Upper support; 13. Bushings; 14. Case; 15. Plate; 16. Holder; 17. Lower support
1. From inside the vehicle, remove the gear shift knob, its boot, and the front and rear parts of the center console (Section 11).
2. Jack up and securely support the front of the vehicle on axle stands.
3. Remove the lock nuts and bolts and remove the drive rod from under the machine.
[The original article is on: www.MazBook.ru]
4. Remove the gear shift lever spring clip using a screwdriver (see illustration) and remove the lever assembly into the passenger compartment.
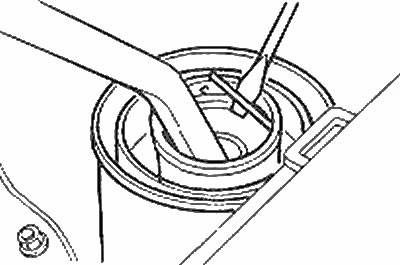
Release the gear shift lever spring clip using a screwdriver
5. Remove the lock nuts and bolts and remove the floor arm bracket assembly and extension rod.
6. Installation is carried out in reverse order. Apply lithium grease to the rubbing parts.