
Attention! The windshield may not be installed correctly if the seal is damaged or if the windshield is pushed out by air pressure when opening and closing the doors with the sliding windows up. Leave all windows open until the windshield is installed.
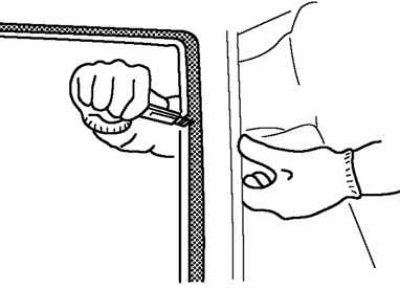
Pic. 8.43. Removing old sealant
Cut off the old sealant with a razor so that the thickness of the remaining sealant layer around the perimeter of the frame is 1-2 mm (pic. 8.43).
If the seal in some place has completely separated from the body, apply a certain amount of primer to this place after degreasing and let it dry for about 30 minutes. After that, apply a layer of sealant 2 mm thick.
Clean and degrease a strip approximately 50 mm wide around the perimeter of the windshield and the contact surface on the body.
When installing a reusable windshield, follow the procedure below:
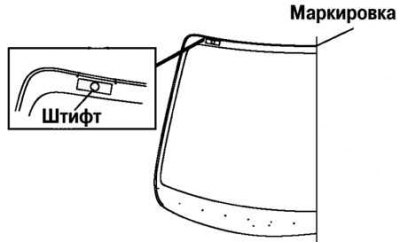
Pic. 8.44. Pin installation
Attach the pins in the places marked when removed (pic. 8.44).
Establish an edging of a windshield.
Apply glass primer to glass and body primer to body and frame, allow primer to dry for approximately 30 minutes.
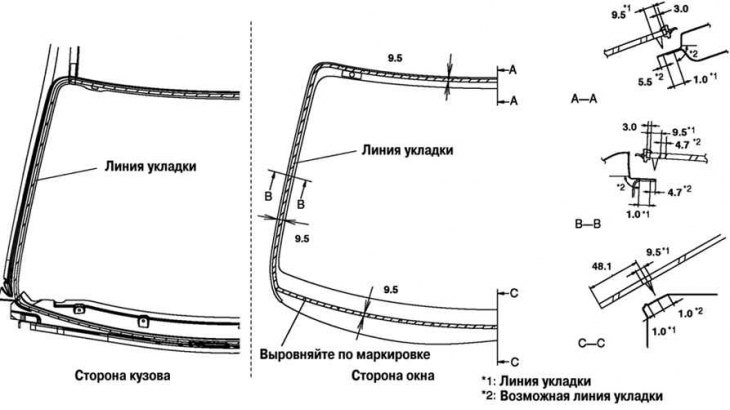
Pic. 8.45. General scheme of glass installation
Attention! Keep the contact surfaces free of dirt and grease, and do not touch the contact surfaces. Otherwise, the primer will not have sufficient adhesion to glass and body surfaces, which may lead to leakage.
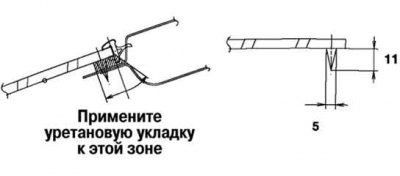
Pic. 8.46. The scheme of applying sealant to the glass surface
Apply sealant to the glass surface as shown in Figure 8.46.
Insert the pins into the body, then install the windshield.
Press the pins on the windshield until they engage the tabs on the body.
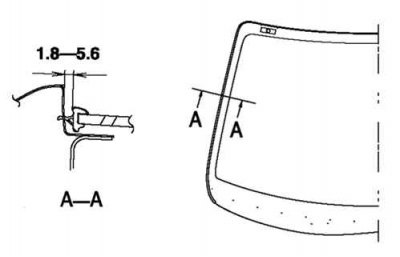
Pic. 8.47. Protrusion clearance
Apply pressure around the perimeter of the glass so that the clearance of the protrusion of the glass edging corresponds to the norm (pic. 8.47).
Install the components in the reverse order of removal
Allow the sealant to fully cure.
The time of complete polymerization of the sealant: 24 hours.