
Remove the following items:
- windshield wiper arm with brush;
- front grille;
- rearview mirror;
- Rain sensor (Vehicles with an automatic windshield wiper);
- pad front rack;
- sun visor;
- navigation lantern.
Take aside the upholstery of the roof.
Apply protective tape to the edge of the case.
Apply protective tape to the dashboard to prevent damage to it.
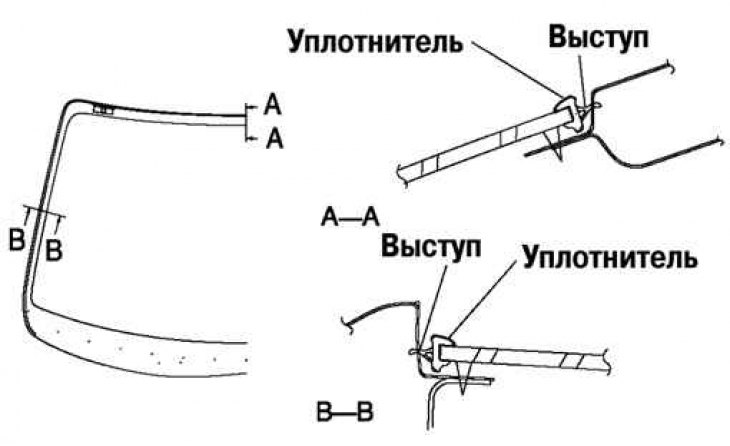
Pic. 8.38. Windshield Seal Cut Lines
Cut the protrusion of the windshield edging with a razor (pic. 8.38).
Note. Vehicles with an automatic windshield wiper have a sensor that is built into the windshield. If the sensor fails, it must be replaced along with the windshield. Once the rain sensor has been set up for the first time, it cannot be used with another automatic windshield wiper sensor, so the rain sensor must also be replaced with a new one.
Windshield Reuse
Remove the base.

Pic. 8.39. Windshield Seal Cut Lines
Cut the seal around the perimeter of the glass using a seal remover (pic. 8.39).
Pull out the seal.
Remove the windshield.
Windshield Reuse
Note. Before removing the windshield, mark the position of the glass by applying tape to the windshield and body panels.
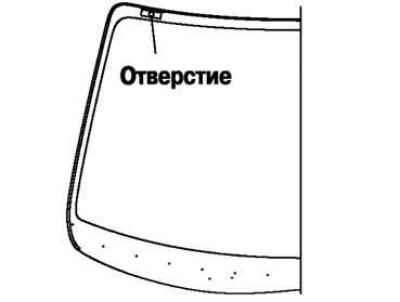
Pic. 8.40. Hole in seal
Using an awl, make a hole in the seal from inside the car (pic. 8.40).
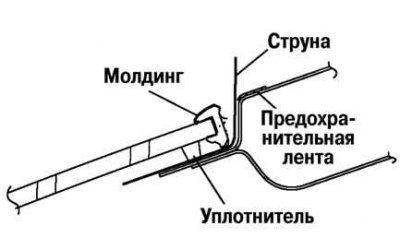
Pic. 8.41. Setting the string
Pass the special tool through the hole (string), cutting it to the desired length (pic. 8.41).
Wrap the ends of the special tool (string) around the rods.
Note. Cut through the seal using the device as a saw, the string must work along its entire length in order to prevent it from breaking due to local overheating.
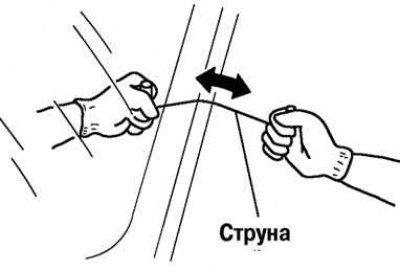
Pic. 8.42. Seal cutting
Holding one end of the special tool (string) and pulling out the other, cut off the seal around the perimeter of the windshield.
Note. Since the top of the pin is glued to the seal, cut it off with a special tool (string).
Cut out the pins.
Remove the windshield.
Mark pin positions and remove pins from windshield.
Remove the windshield trim.