


2. Grasp the shaded areas in the figure and pull the A-pillar trim in the direction of the arrow (1) to detach clips A and B.
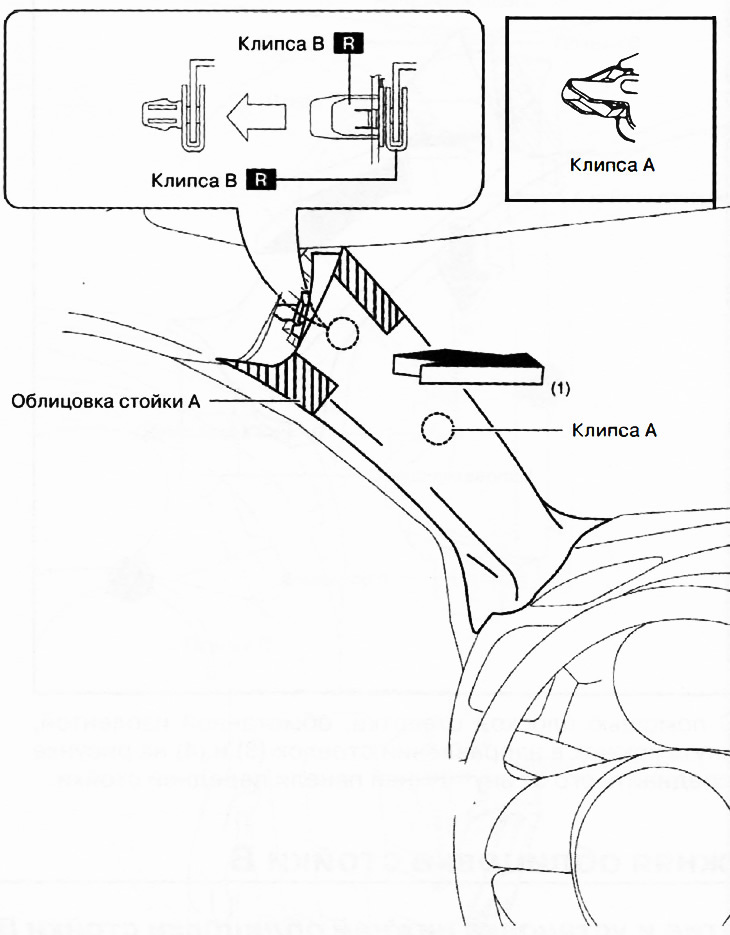
Note:replace the part with a new one after each removal.
3. Use nippers to cut the sealing tape that connects clip B to the sleeve.
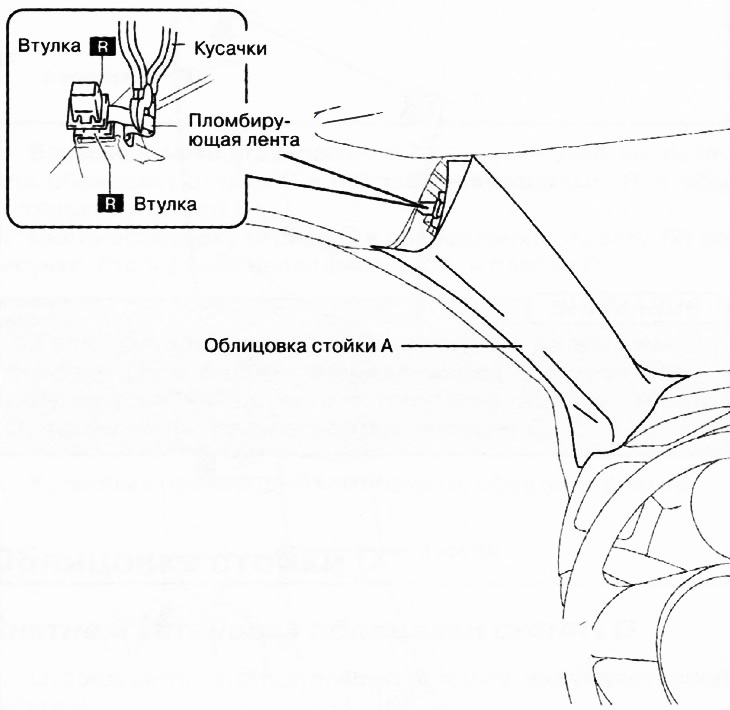
Note:replace the part with a new one after each removal.
4. Pull the A-pillar trim in the direction of the arrow (2) and remove the trim, disconnecting it from the C guides.
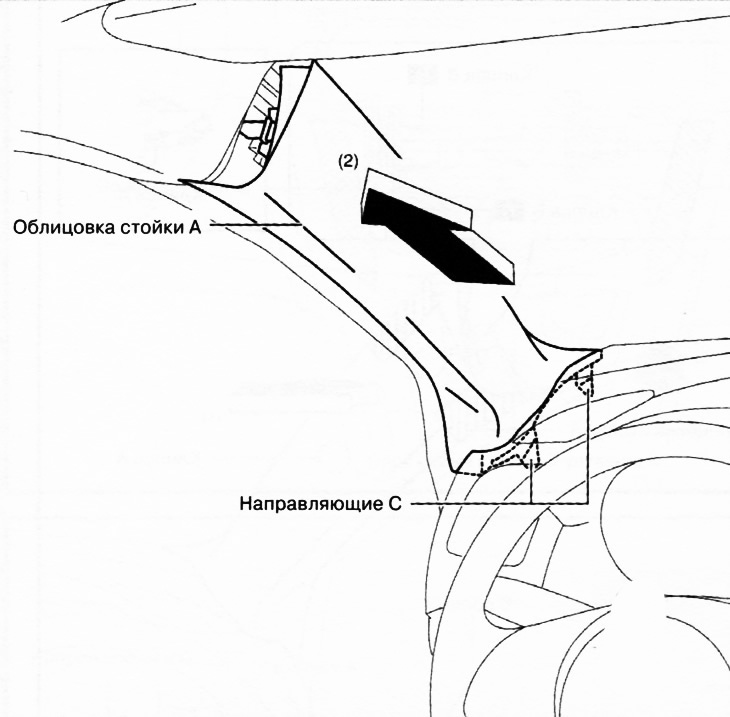
5. Using a flat-head screwdriver wrapped in electrical tape, move the hook in the direction of the arrows (3) and (4) in the figure and detach it from the inner panel of the front pillar.
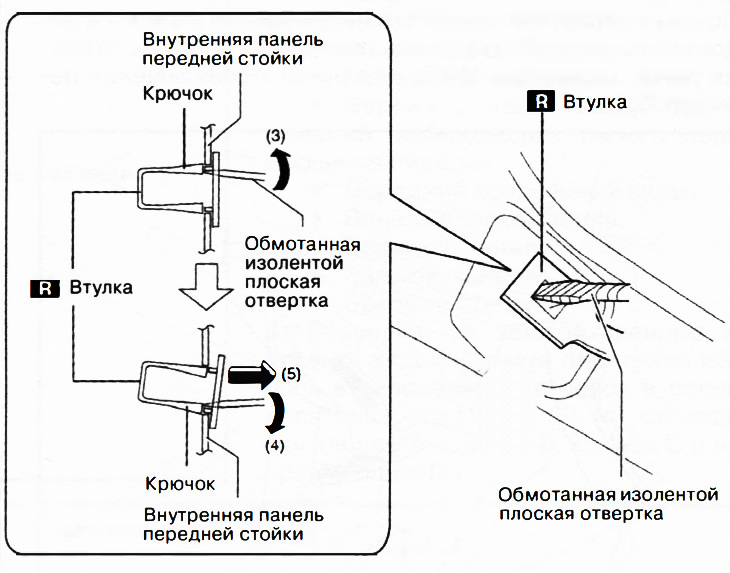
Note:replace the part with a new one after each removal.
6. Remove the sleeve in the direction of the arrow (5) in the figure.
7. When installing the A-pillar, it is necessary to install new B-clips and bushings on the A-pillar trim in advance.
8. Installation is carried out in the reverse order of removal.