
2. Remove the following parts:
- Front console box.
- Versions with manual transmission: shift knob.
- Switch panel.
- Top panel.
3. Loosen screws A.
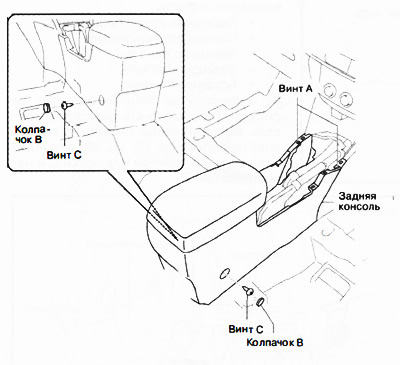
4. Remove caps B and unscrew screws C.
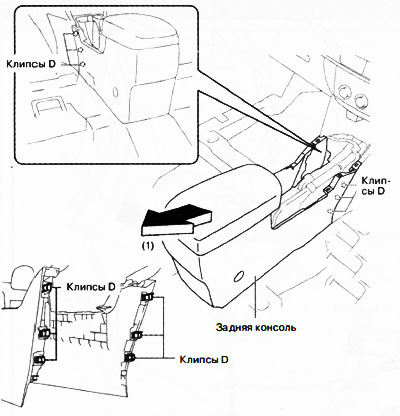
5. Pull the rear console in the direction of the arrow (1), to detach clips D.
6. Disconnect the center outlet and USB/accessory connectors.
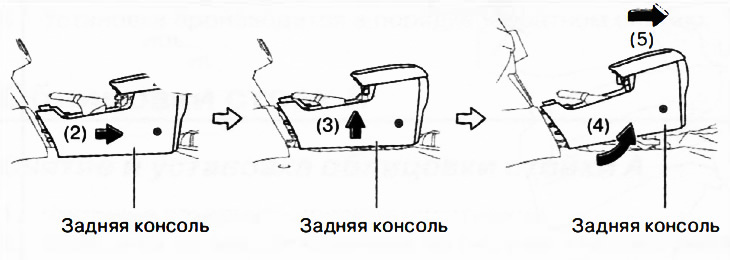
7. Remove the rear console in the direction of the arrows in sequence (2), (3), (4), (5) on the image.
8. Installation is made in an order, the return to removal.
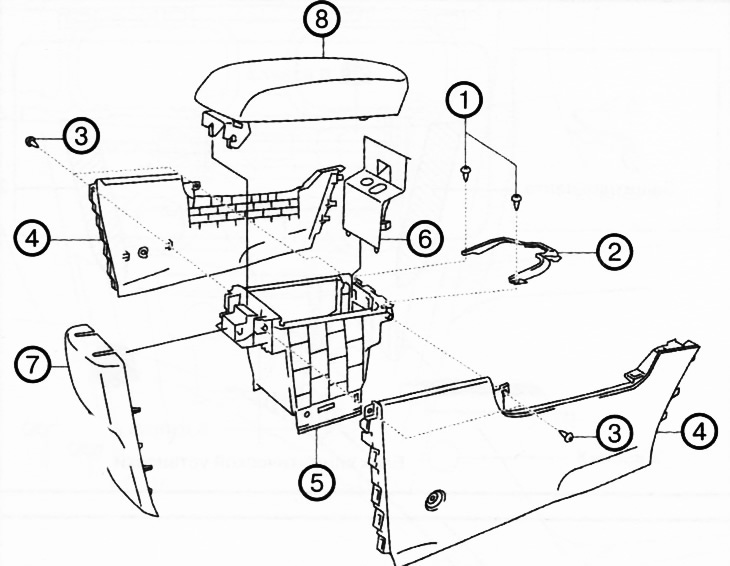
1. Screws A.
2. Rear console bracket.
3. Screws B.
4. Sidebar.
5. Rear console box.
6. Upper console.
7. Rear console cover.
8. Rear console cover.