2. Remove the following parts:
- Wiper blades.
- Hood grille.
- Wiper drive.
- Front door sills.
- Front side panels.
- Glove box.
- Dashboard bottom cover.
- decorative panel.
- Central panel.
- Audio unit (versions with audio system).
- Front console box.
- shift knob (versions with manual transmission).
- Switch panel.
- Top panel.
- Rear console.
- Side walls.
- front console.
- gear lever (ITUC) or selector lever (AKP).
- Hood release lever.
- bottom panel.
- Navigation system block.
- Air conditioning unit.
- Steering column cover.
- Driver airbag module.
- Steering wheel.
- Steering shaft.
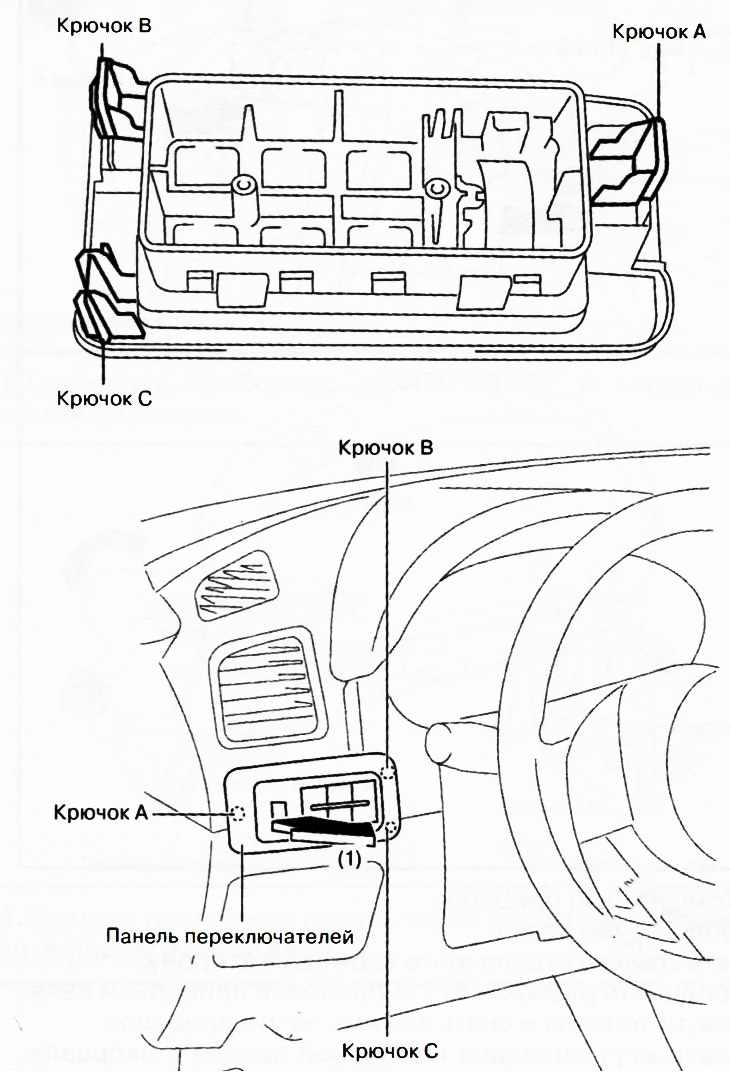
- Switch panel.
Note. To remove the switch panel, insert your hand from the underside of the bottom panel (versions without navigation system) or via the installation area of the navigation unit (version with navigation system), push the switch panel in the direction of the arrow (1) in the figure and remove it by disconnecting the hooks A, B and C. Disconnect the switch connector.
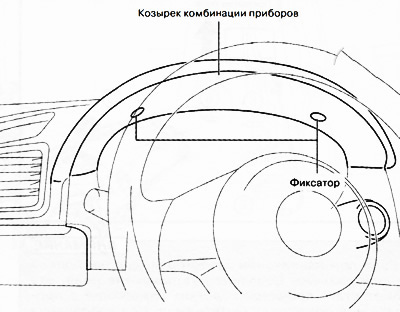
Instrument cluster visor.
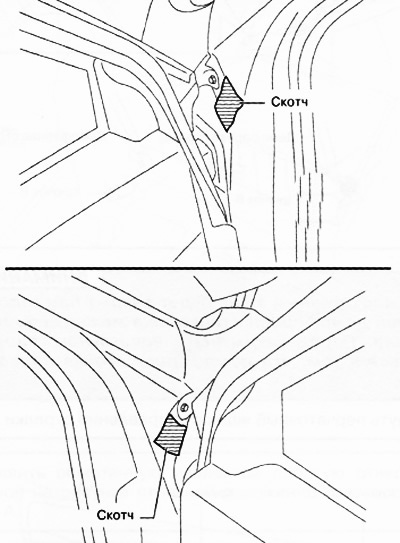
Note.
- To remove the visor of the instrument cluster, it is necessary to remove the clips with a Phillips screwdriver. To remove the latches, you do not need to put pressure on them, the Phillips screwdriver should turn without effort.
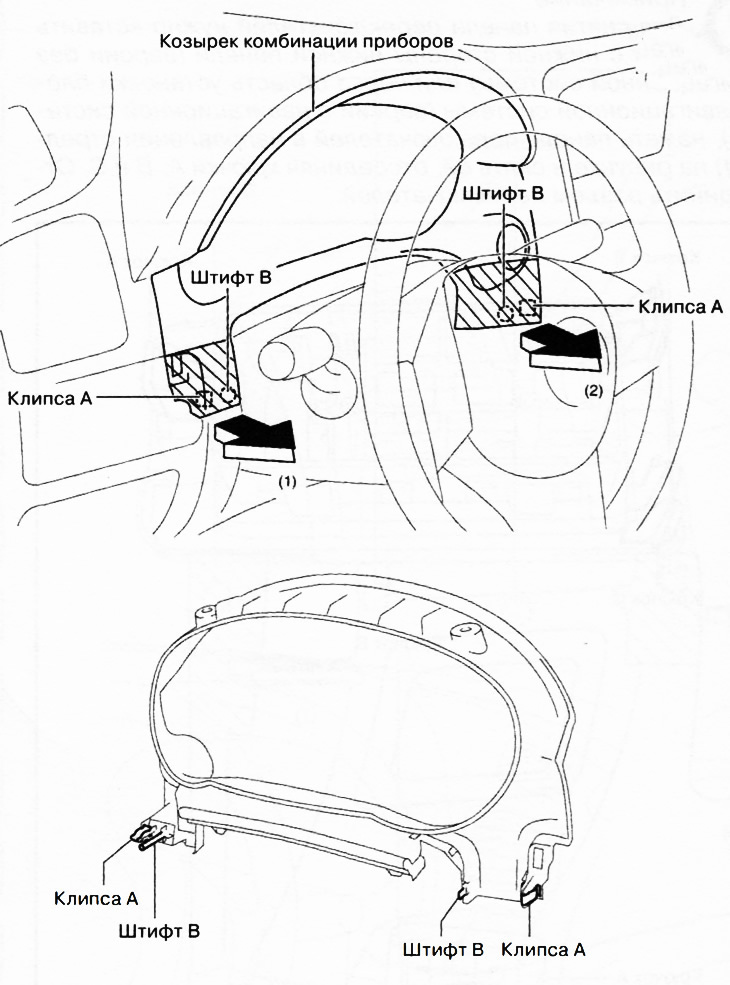
- Taking hold of the areas shaded in the figure, remove the visor of the instrument cluster in the direction of the arrows in the sequence (1), (2), to detach clips A and pins B.
- Instrument combination.
- A-pillar trims.
3. Remove the parking brake cover to the side.
4. Disconnect the dashboard wiring harness connectors in the tunnel area and remove the wiring harness clips.
5. Remove the instrument panel wiring harness in the direction of the arrow in the figure, bypassing the floor covering.
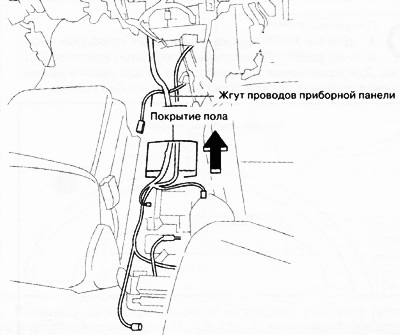
Attention. If the connectors catch on the floor when you remove the instrument panel wiring harness, this may cause short circuits in the wiring or damage to the connectors. When removing the instrument panel wiring harness, the floor covering must be raised to prevent the connectors from snagging.
6. Remove bolts A and nuts B shown in the figure.
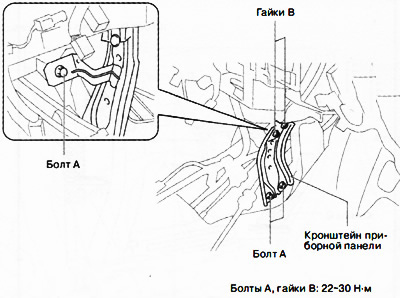
7. Remove the dashboard bracket.
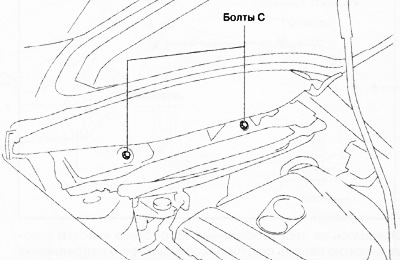
8. Remove bolts C.
9. Disconnect the dashboard wiring harness connectors.
10. Remove caps.
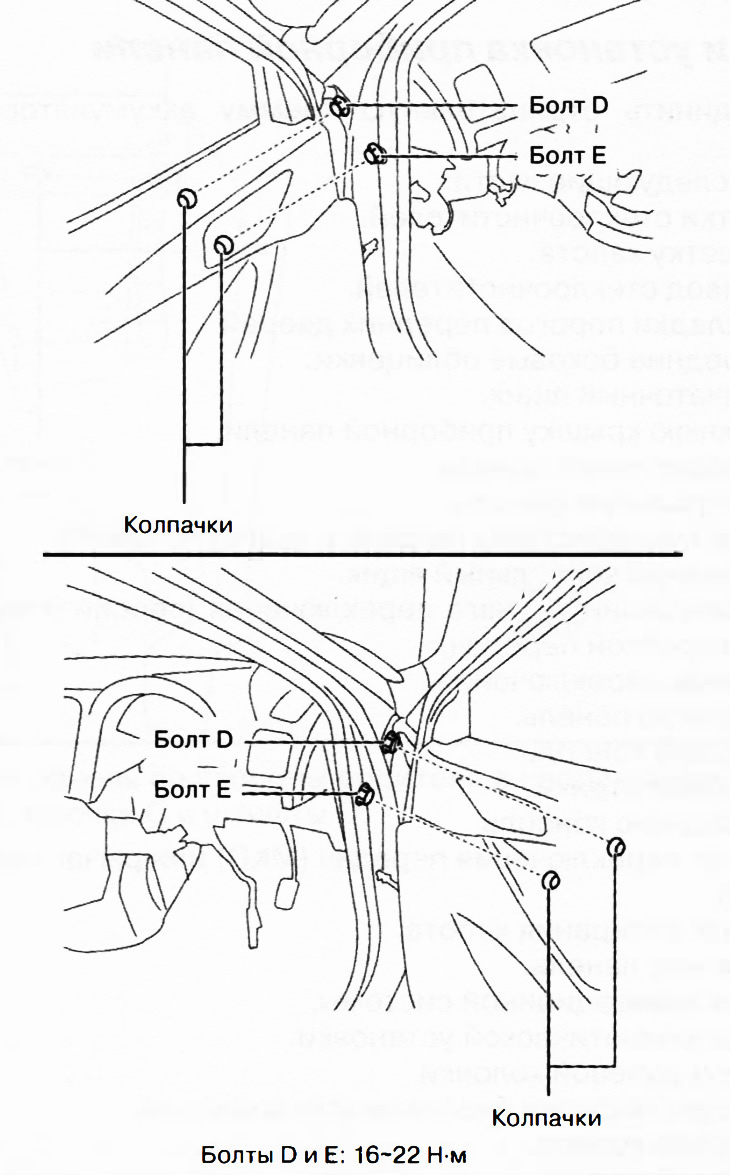
11. Remove bolts D and E.
Attention. Bolts D cannot be completely removed as they will rest against the front doors. If the front door is closed with bolt D removed, the door cover may be bent or damaged. After removing the dashboard from the passenger compartment, you need to fix the removed bolts D on the car body with adhesive tape so that they do not stick out.
12. Pry off the dashboard in the direction of the arrow (1) in the figure and remove from the guide pins.
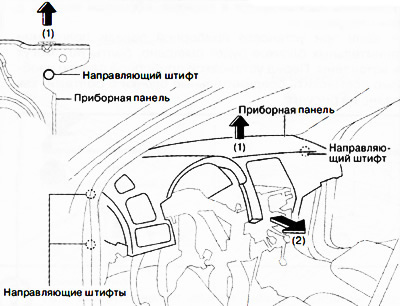
13. Turn the instrument panel 90°in the direction of the arrow in the figure.
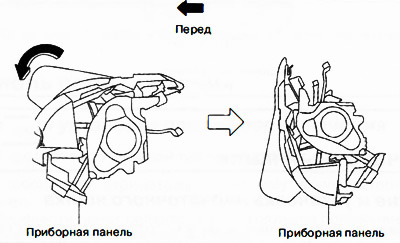
14. Remove the dashboard through the opening of the driver's or front passenger's door.
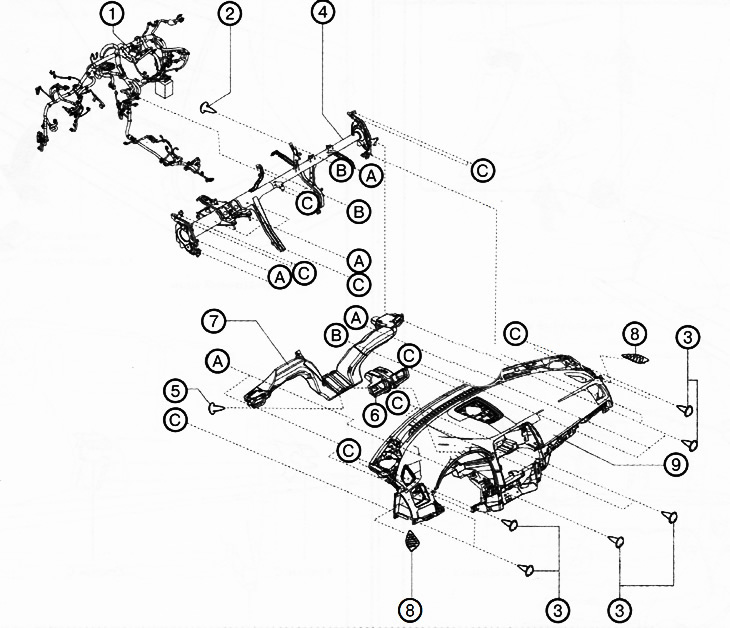
1. Wiring harness.
2. Screws A.
3. Screws B.
4. Dashboard beam.
5. Screws C.
6. Air duct No. 1.
7. Air duct No. 2.
8. Window grilles.
9. Dashboard.
15. Installation is carried out in the reverse order of removal, taking into account the following:
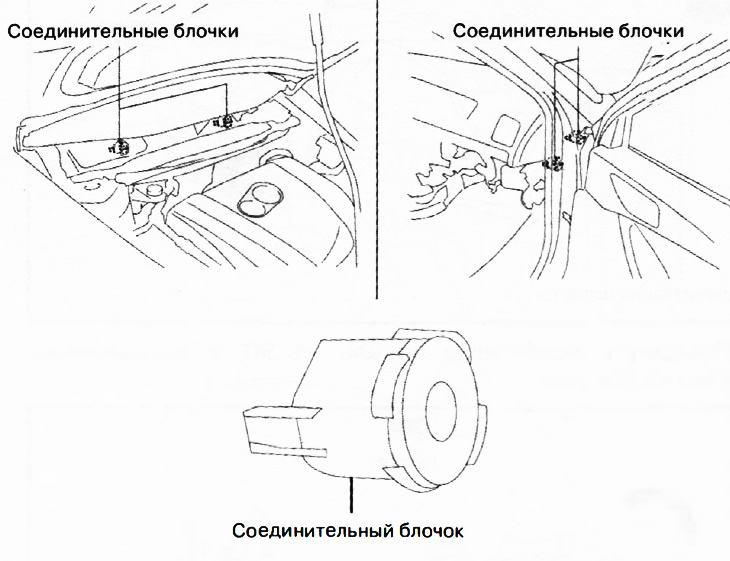
If the position of the connecting blocks is shifted when installing the instrument panel, the bolts cannot be inserted. Before installing the dashboard, you must align the connecting blocks with the bolts as shown in the figure.