
2. Pulling the damper strut in the direction of the arrow (2) in the figure, unhook B.
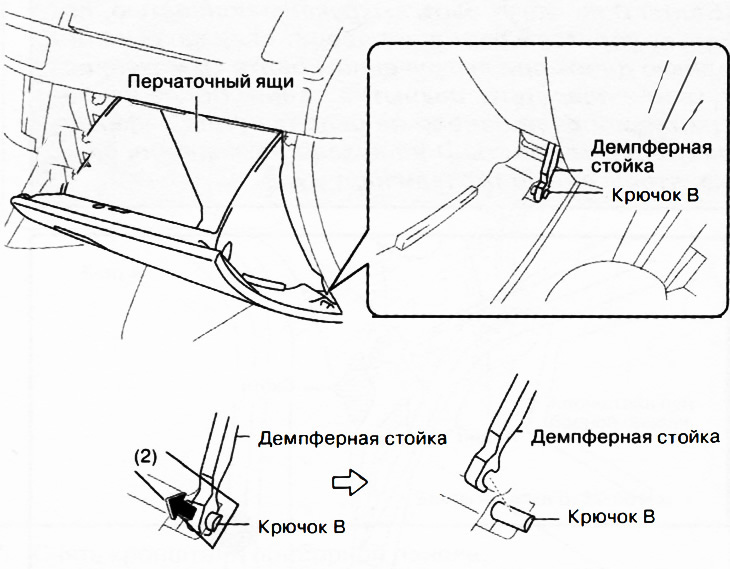
Attention. If the glove box is closed while the damper strut is disconnected, it may be damaged. Before closing the glove box, make sure that the damper strut is connected.
3. Pull the glove box in the direction of the arrow (3).
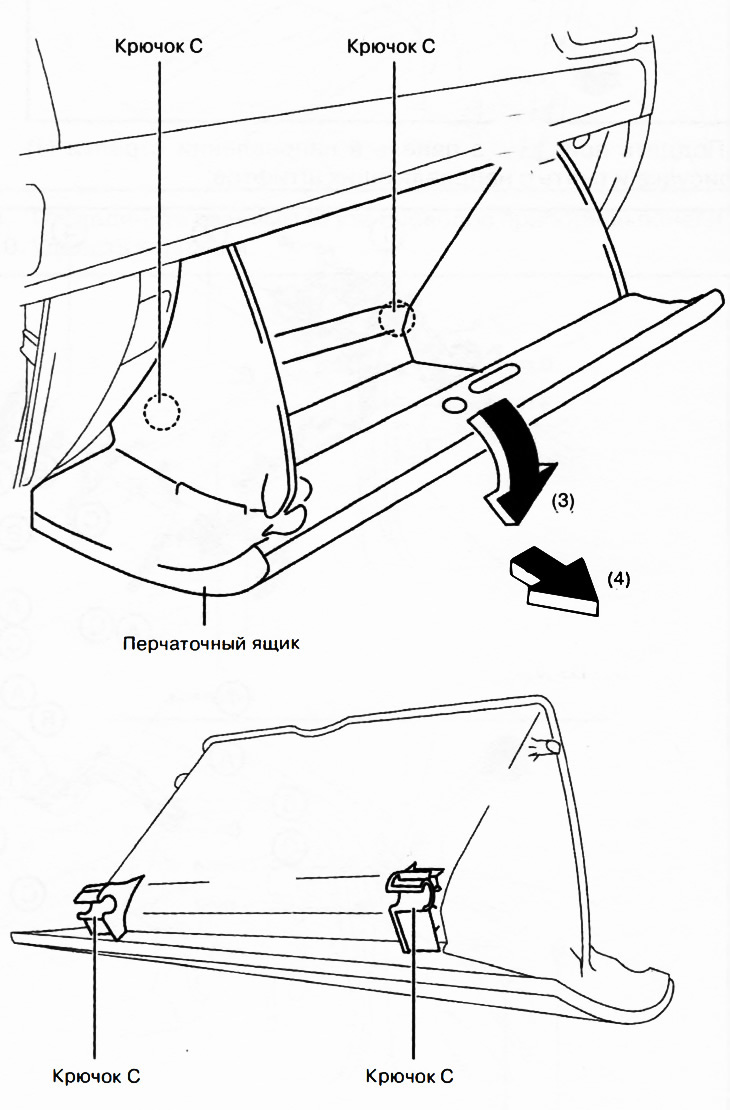
4. Pull the glove box in the direction of the arrow (4) and remove by disconnecting the hooks C.
5. Installation is made in an order, the return to removal.