
Versions with automatic transmission
1. Disconnect the negative battery terminal.
2. Move the selector lever to the neutral position.
3. Remove the front console box.
4. Taking the area shaded in the figure, remove the switching panel in the direction of the arrows in the sequence (1), (2), detaching clips A and hook B.
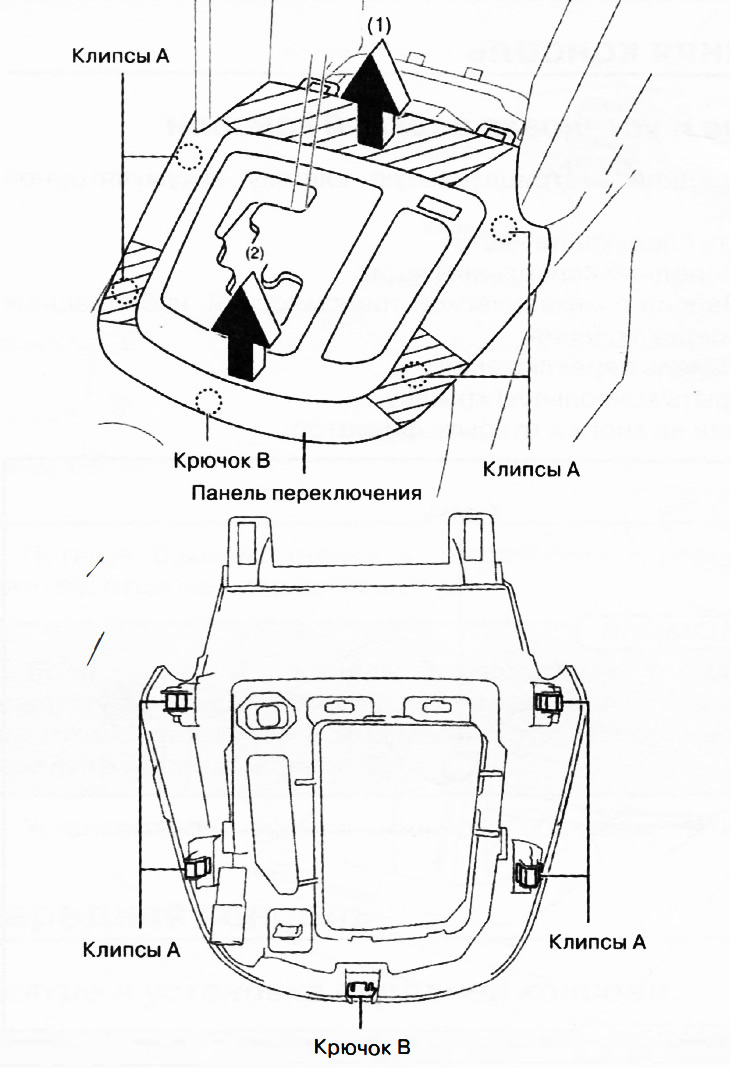
5. Disconnect the connector.
6. Installation is made in an order, the return to removal.
Versions with manual transmission
1. Disconnect the negative battery terminal.
2. Remove the knob of the gear lever.
3. Grasping the areas shaded in the figure, remove the switching panel in the direction of the arrows in the sequence (1), (2), detaching clips A, pin B and hook C.
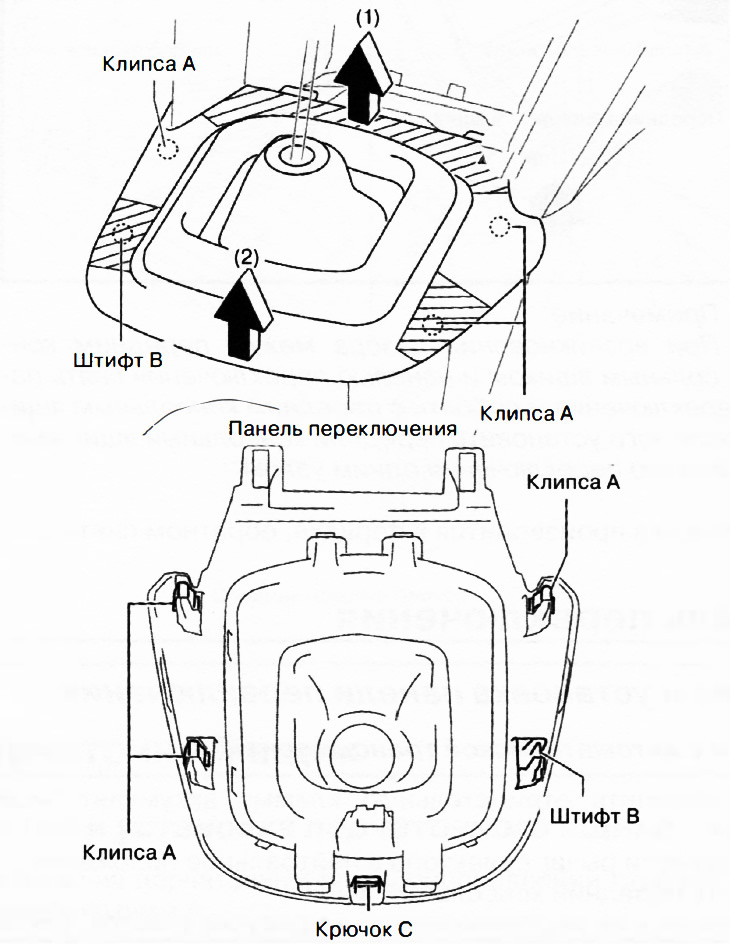
4. Installation is made in an order, the return to removal.