


2. Insert a flat-head screwdriver wrapped with electrical tape into the service hole at the locations shown in the figure.
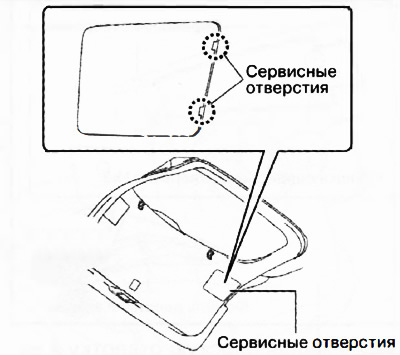
3. Using a flat-head screwdriver, move it in the direction of the arrow (1) in the figure to remove the service hole cover and detach the service hole cover strips from the trunk lid trim.
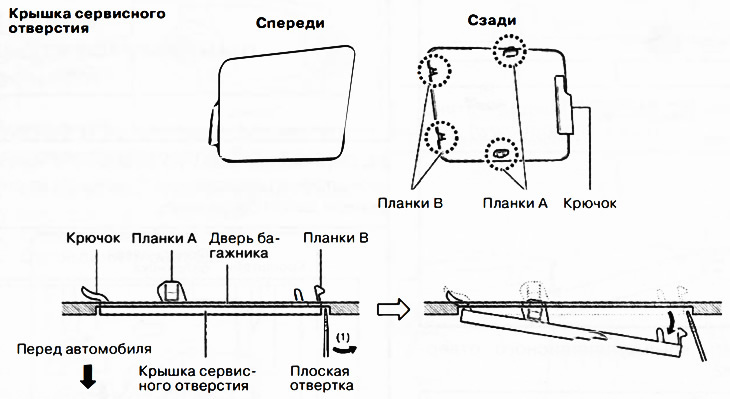
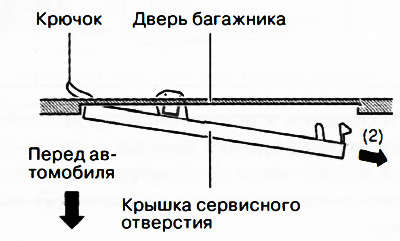
4. Remove the service hole cover in the direction of the arrow (2) in the figure, removing the service hole cover hook from the trunk lid trim.
(The article is copied from the website mazbook.ru)
5. Remove the service hole cover.
6. Insert a flat-head screwdriver into the service hole in the position shown in the figure.
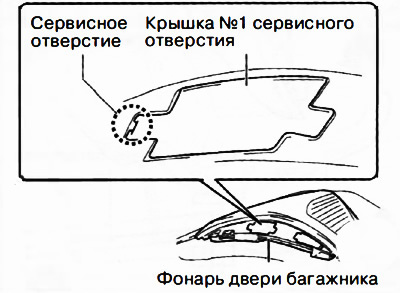
7. Using a flat-head screwdriver, move it in the direction of the arrow (3) in the figure to remove the service port cover No.1 and detach the service port cover strips No.1 from the bracket.
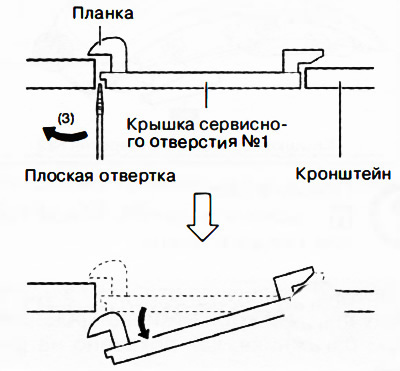
8. Remove the cover of service hole No.1.
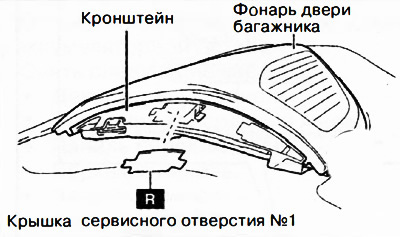
Note:replace the part with a new one after each removal.
9. Insert a flat-head screwdriver into the service hole in the position shown in the figure.
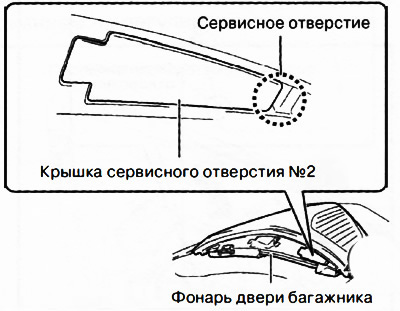
10. Using a flat-head screwdriver, move it in the direction of the arrow (4) in the figure to remove the service hole cover No.2 and detach the service hole cover strip No.2 from the bracket.
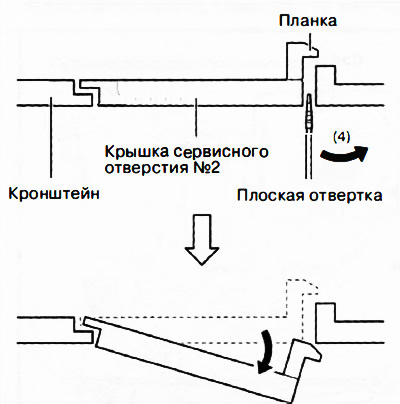
11. Remove the cover of service hole No.2.
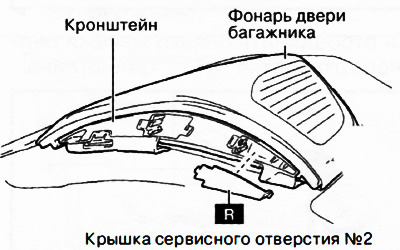
Note:replace the part with a new one after each removal.
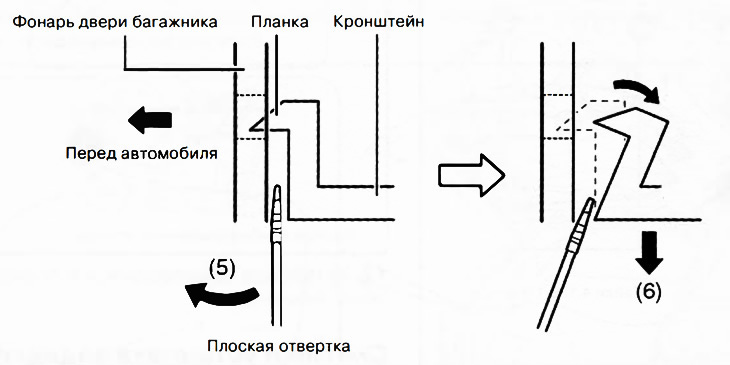
12. Insert a flat-head screwdriver into the gap between the bracket strip and the trunk lid light as shown in the figure.
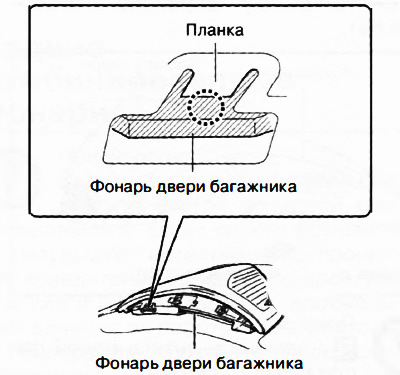
13. Using a flat-head screwdriver, move it in the direction of the arrow (5) in the figure to remove the bracket in the direction of the arrow (6) in the figure, pressing the bracket bar and disconnecting it from the tailgate light.
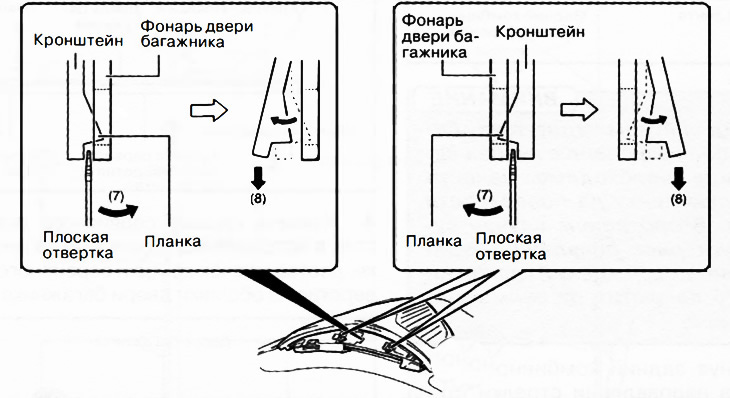
14. Insert a flat-head screwdriver into the gap between the bracket strip and the trunk lid light as shown in the figure.
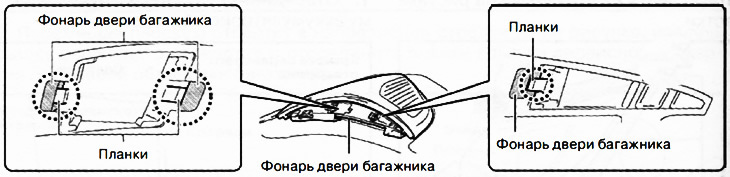
15. Using a flat-head screwdriver, move the bracket in the direction of the arrow (7) in the figure and detach the bracket strips from the tailgate light.
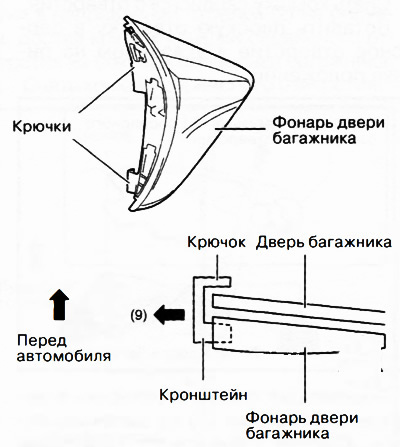
16. Disconnect all bracket strips and the tailgate light and remove the bracket hooks from the tailgate light in the direction of the arrow (9) in the figure.
17. Remove the bracket.
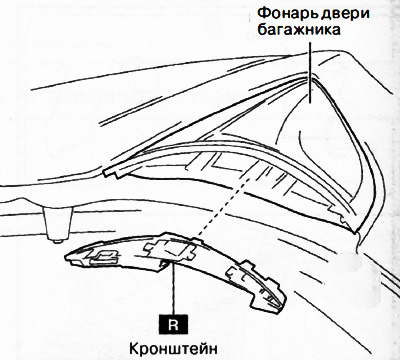
Note:replace the part with a new one after each removal.
18. Turn the socket in the direction of the arrow (10) in the figure and remove it from the trunk lid light in the direction of the arrow (11) in the figure.
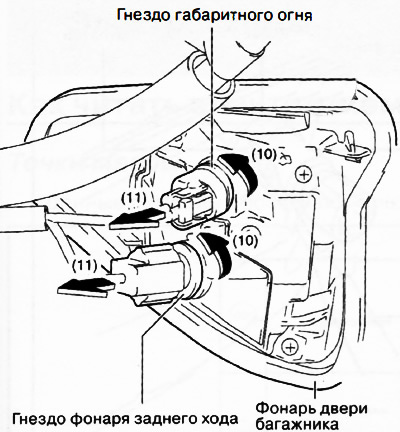
19. Unscrew the cap nut.
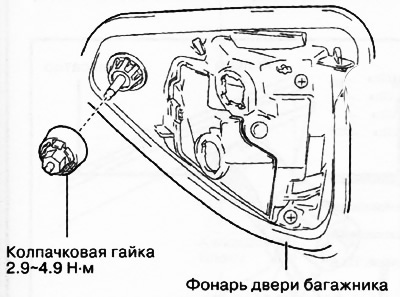
20. Push the light in the direction of the arrow (12) in the figure and remove it from the trunk door.
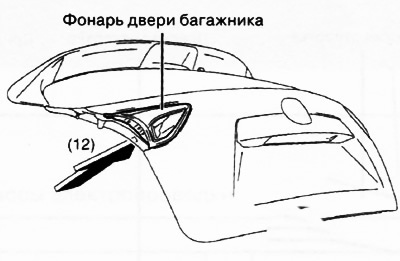
Caution. When removing from the tailgate, the lamp may fall and be damaged. During the removal process, it is necessary to support the tailgate lamp from the lens side with your hand.
21. Installation is carried out in the reverse order of removal.