
Note. Fogging or condensation inside the front combination headlight can occur naturally due to temperature differences between the outside and inside of the headlight. This does not affect the operation of the headlight, since the temperature inside the headlight rises after switching on.
1. Disconnect the negative battery terminal.
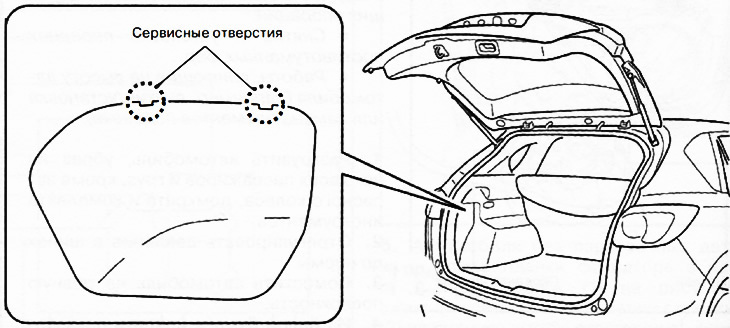
2. Insert a tape-wrapped flathead screwdriver into the service hole at the locations shown in the illustration.
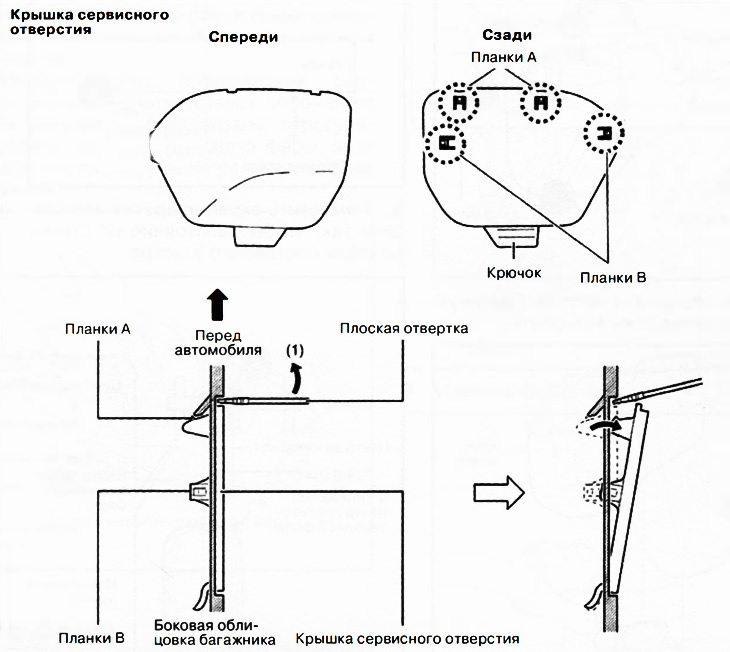
3. Move the flat head screwdriver in the direction of the arrow (1) in the illustration, remove the service hole cover and disconnect the service hole cover strips from the trunk side trim.
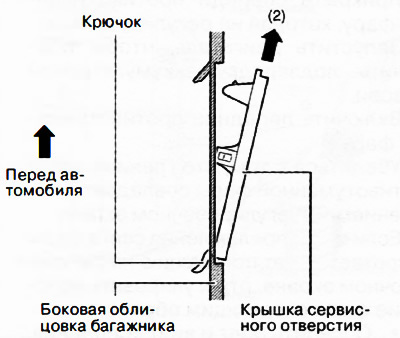
4. Remove the service port cover in the direction of the arrow (2) in the figure by removing the hook of the service hole cover from the trunk side trim.
5. Remove the service port cover.
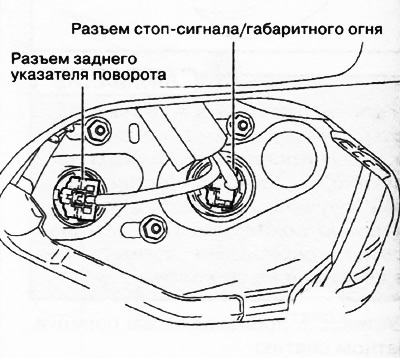
6. Disconnect connectors.
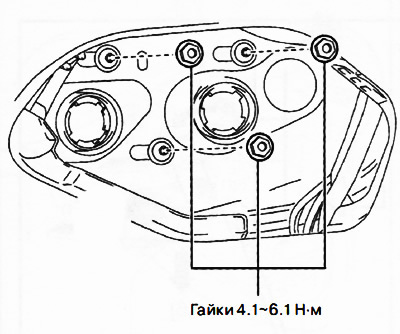
7. Loosen the nuts.
8. To prevent scratches or damage, apply protective tape to the areas shown in the illustration.
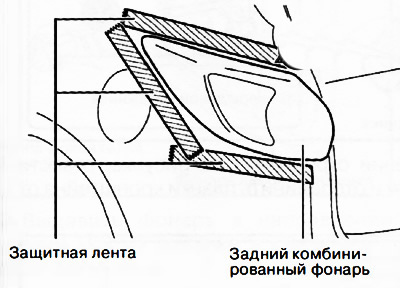
Attention. Before removing the rear combination lamp from the vehicle body, protective tape must be applied to the surface of the body. Otherwise, there is a risk of scratches or damage to the paintwork from the removed lamp.
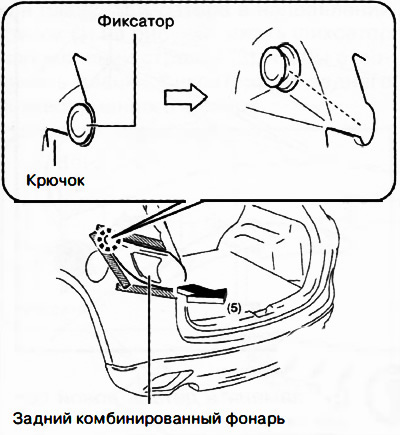
9. Pulling the rear combination lamp in the direction of the arrow (5) in the illustration, remove the hook of the rear combination lamp from the retainer.
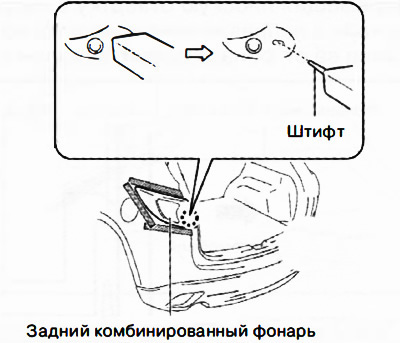
10. To take a pin of the back combined lantern.
11. Remove the rear combination lamp.
12. Installation is made in an order, the return to removal.