
Attention. Improper handling of gas discharge headlights can cause electric shock. Before servicing gas discharge headlights, be sure to read the relevant safety precautions (see above in this chapter).
Note. Fogging or condensation inside the front combination headlight can occur naturally due to temperature differences between the outside and inside of the headlight. This does not affect the operation of the headlight, since the temperature inside the headlight rises after switching on.
Removal and installation of the forward combined headlight assy
1. Disconnect the negative battery terminal.
2. Remove the front bumper from the car.
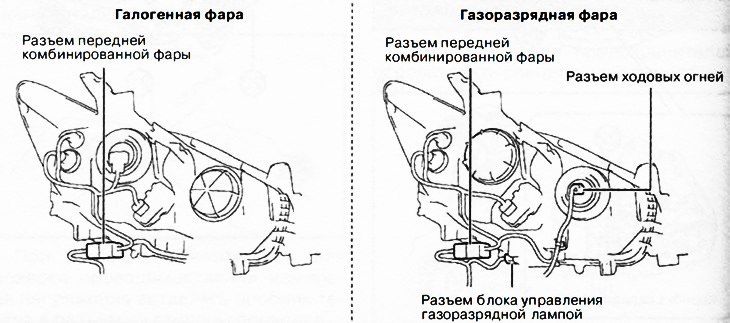
3. Disconnect the connectors from the front combination headlight.
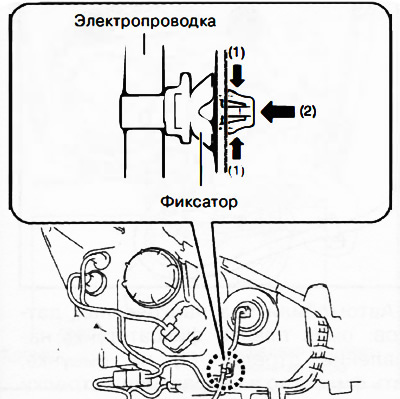
4. Squeezing the latch bars in the direction of the arrows (1) in the figure, press the latch in the direction of the arrow (2) in the illustration to disconnect the wire from the front combination headlight.
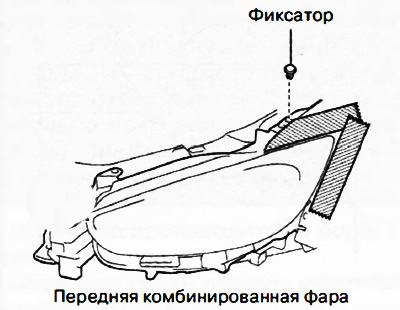
5. Remove the retainer.
6. To prevent scratches or damage, apply protective tape to the areas shown in the illustration.
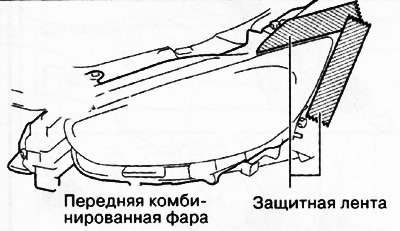
Attention. Before removing the front combination headlight from the vehicle body, apply protective tape to the surface of the body. Otherwise, there is a risk of scratches or damage to the paintwork from the headlight being removed.
7. To turn away bolts.

8. Remove clips.
9. Pulling the front combination headlight in the direction of the arrow in the figure, remove its pins from the body.
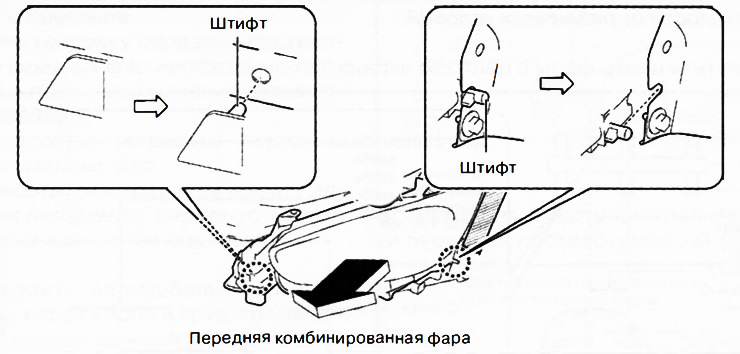
10. Remove the front combination headlight from the vehicle.
11. Installation is made in an order, the return to removal.
12. After installation, adjust the direction of the headlights.
Headlamp adjustment
Note. The headlights must be adjusted after performing the following operations:
- Removal and installation of the forward combined headlights.
- Work affecting vehicle height (e.g. removal/installation or replacement of suspension elements).
1. Unload the car, removing all passengers and cargo from it, except for the spare wheel, jack and tool kit.
2. Adjust tire pressure to normal.
3. Place the vehicle on a level surface.
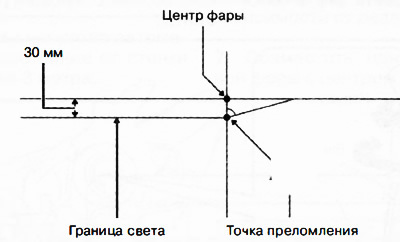
4. From white paper, create the screen shown in the figure.
5. Place the screen in front of the car so that the distance from the wall to the headlight is 3 meters.
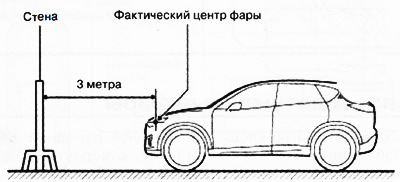
6. Measure the height of the center point of the headlight.
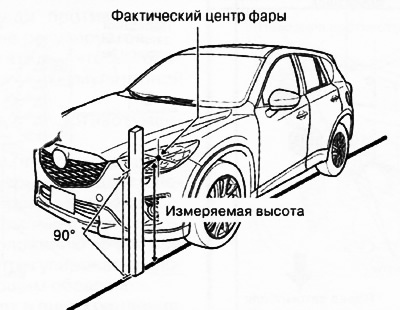
Note. It is necessary to measure the height of the center point of the headlight at which adjustment will be made, since the height of the vehicle may differ depending on various conditions.
7. Align the center of the headlight with the center of the screen.
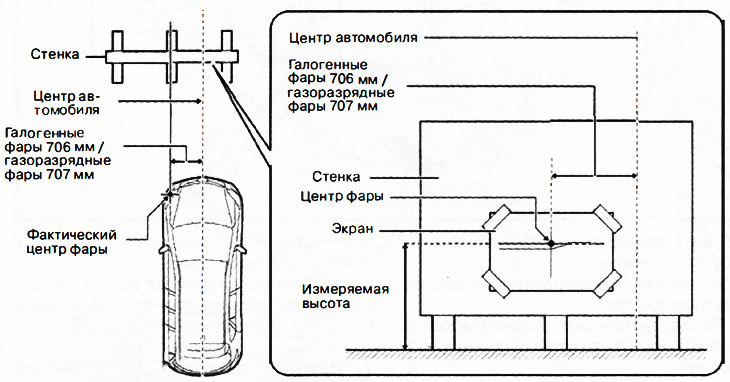
8. Cover the front headlight, which is not adjustable.
9. Start the engine to recharge the battery.
10. Turn on the low beam headlights.
11. Vehicles with manual headlight leveling: Set the headlight level switch to position [0].
12. Verify that the actual headlight refraction point matches the position on the adjustment screen.
13. If the refraction point of the headlight does not correspond to the position on the adjustment screen, adjust the direction of the headlight by turning the appropriate adjustment screws.
