
Since 10/89, issue.
Removing
1. Disconnect the ground cable from the battery.
Attention! This erases the data from the engine fault memory or the radio's security code. Before disconnecting the battery, read the instructions in Section Removing and installing the battery.
2. Remove the glove box, see chapter Wheels and tires, car body, car painting, car care, Chapter Instrument panel/center console.
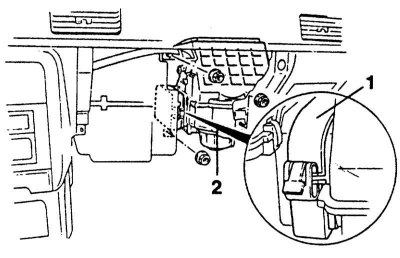
3. Unscrew fan housing -2-.
4. Loosen the fastening bracket and remove the sealing plate -1- together with the fan assembly.
5. Dismantle the fan assembly or unscrew the pre-resistors.
Installation
1. Mount and screw the fan.
2. Compress the sealing plate and secure with the fastening bracket.
3. Connect the mass cable to the battery.
4. If available, set the clock and set the radio's security code.
From 9/85 to 9/89, issue.
Removing
1. Disconnect the ground cable from the battery.
Attention! This erases the data from the engine fault memory or the radio's security code. Before disconnecting the battery, read the instructions in Section Removing and installing the battery.
2. To remove facing at the bottom of the panel of devices.
3. Remove the glove box, see chapter Wheels and tires, car body, car painting, car care, Chapter Instrument panel/center console.
4. Remove the black steel holder at the top of the glove box.
5. Remove the air duct between the heater box and the fan unit.
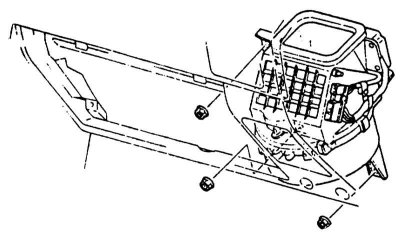
6. Unscrew 3 nuts securing the fan housing.
7. Remove the intake air damper cable.
8. Disconnect the multi-pin plug.
9. Remove the fan.
Installation
1. Mount and screw the fan.
2. Connect the multi-pin plug.
3. Install the air intake flap cable.
4. Put on the air channel.
5. Install the steel holder in the glove box.
6. Install the glove compartment.
7. Install the bottom trim.
8. Connect the mass cable to the battery.
9. If available, set the clock and set the radio's security code.