


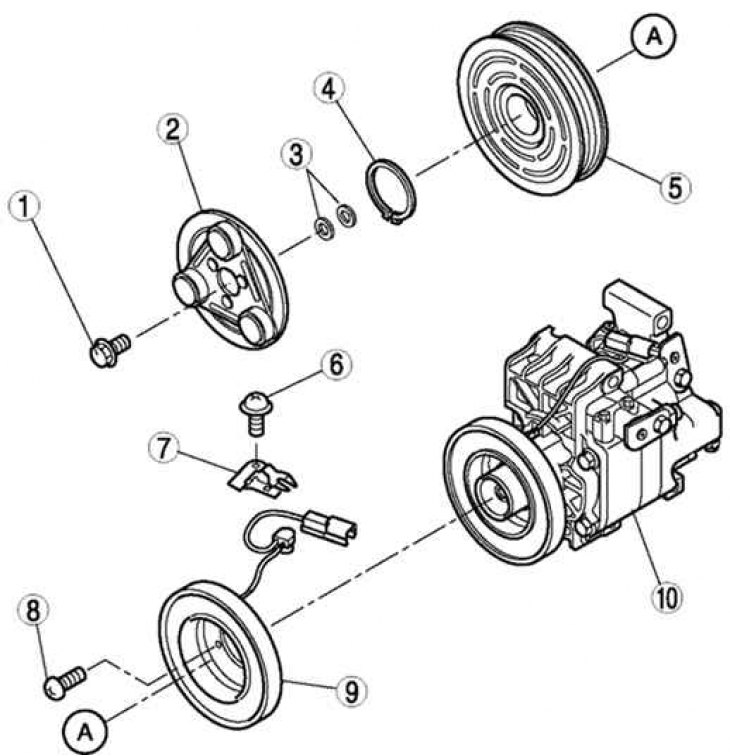
Fig. 8.69. Disassembling the overrunning clutch: 1 – bolt; 2 – pressure plate; 3 – gasket; 4 – retaining ring; 5 – Air conditioning compressor pulley; 6 – screw; 7 – clamp; 8 – screw; 9 – stator and thermal protection device; 10 – air conditioning compressor housing
Disassemble in the order shown in Figure 8.69.
Removal the overrunning clutch bolt
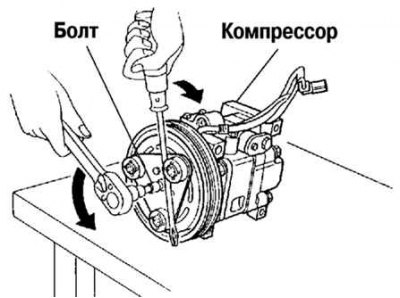
Fig. 8.70. Removing the overrunning clutch bolt
When removing and installing the bolt, hold the pressure plate as shown in Figure 8.70.
When installing a new air conditioning compressor, replace the bolt.
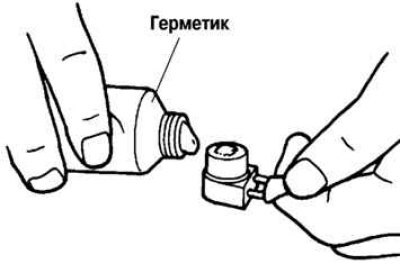
Fig. 8.71. Removing sealant from the compressor side
[Text taken from an online platform: MAZBOOK.RU]
After removing the stator and thermal protector, completely remove the sealant from the compressor side of the air conditioning system (Fig. 8.71).
Apply approximately 1g of silicone sealant before installation (sealant KE-347W or similar) onto the contact surface of the thermal protection device, then carefully install it onto the air conditioning compressor without leaving any gaps.
When installing a new stator and thermal protection device, replace the screw.
When installing a new stator and thermal protection device, replace the clamp.
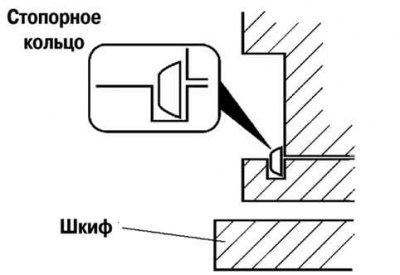
Fig. 8.72. Retaining ring replacement diagram
When installing a new pressure plate, air conditioning compressor pulley, stator or compressor housing, replace the retaining ring (Fig. 8.72).