


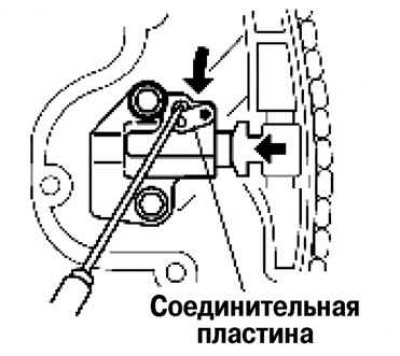
Fig. 2.256. Chain tensioner connecting plate
Slowly pull the plunger back in the direction shown in Figure 2.256, keeping the connecting plate recessed.
Release the connecting plate while pressing the plunger.
Release the pressure on the plunger slightly and move the plunger back and forth 2-3 mm.
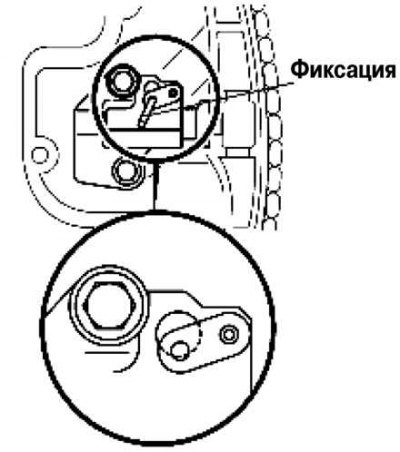
Fig. 2.257. Fixing the connecting plate and the plunger of the chain tensioner
[The original article is posted on: www.MAZbook.ru]
Insert a thick wire or paper clip approximately 1.5mm thick into the holes of the connecting plate and the tensioner body (the holes must be aligned) for fixing the connecting plate and plunger (fig. 2.257).