
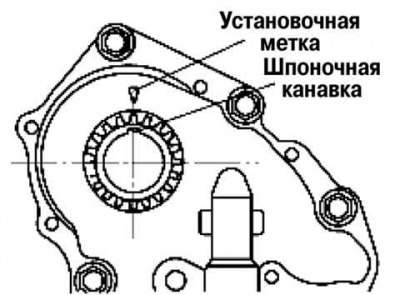
Pic. 2.260. Aligning the alignment keyway of the crankshaft sprocket with the alignment mark
Align the keyway of the crankshaft sprocket with the alignment mark, then set the piston of the first cylinder to the TDC position (pic. 2.260).
Align the alignment marks on the camshaft sprockets so that they form a straight line when aligned with the top horizontal surface of the cylinder head.
Install the timing chain.
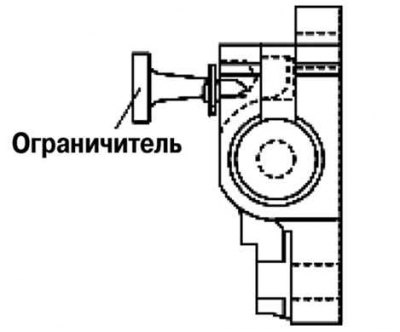
Pic. 2.261. Removing the limiter
After installing the chain adjuster, remove the wire or paper clip installed in the chain tensioner and tension the timing chain. Remove the installed limiter when installing a new chain tensioner (pic. 2.261).
Check that the timing chain has no slack, and then recheck that the sprockets are properly installed.
Turn the crankshaft clockwise two turns, and then check the timing of the opening and closing of the valves.
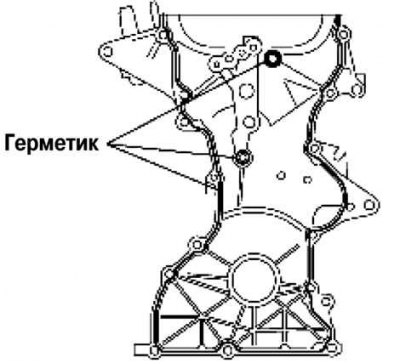
Pic. 2.262. Places for applying sealant to the front cover of the engine
Apply silicone sealant to the front cover of the engine, as shown in Figure 2.262.
Attention! Install the engine front cover 10 minutes after applying silicone sealant.
Bead thickness of applied sealant: 2–4 mm.
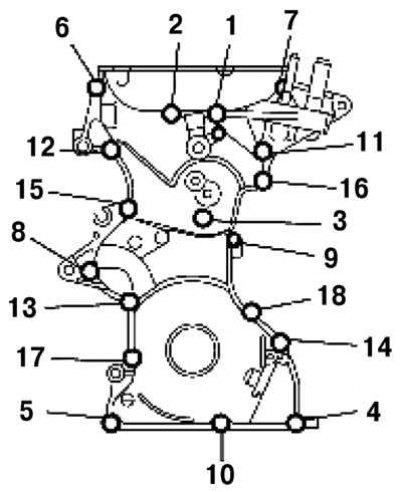
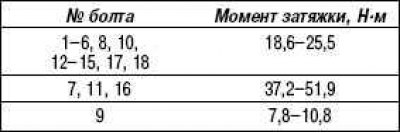
Pic. 2.263. The order of tightening the bolts of the front cover of the engine
Tighten bolts of fastening of a forward cover of the engine in the order shown in drawing 2.263.
Install the #1 bolt using a new sealing washer.
Apply clean engine oil to the front oil seal.
Insert the front oil seal into the engine front cover by hand.
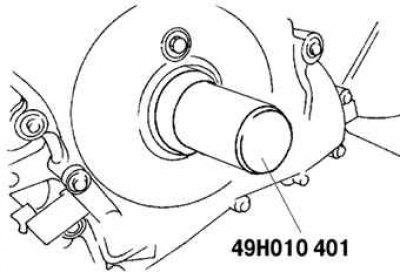
Pic. 2.264. Pressing in the front seal
Press in the front oil seal using a special tool and a hammer (pic. 2.264).
Depth of pressing: from the front cover of the engine - 0–0.5 mm.
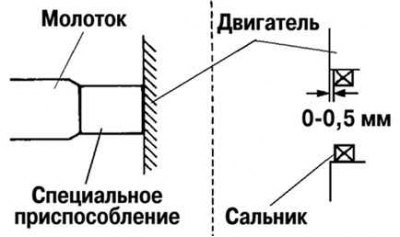
Pic. 2.265. Scheme of pressing in a new front oil seal