MazBook.ru
English Русский
Български
Беларускі
Український
Српски
Hrvatski
Română
Polski
Slovenský
Magyar
• Bookmark • Sitemap • Contacts •   
Cars Opel Cars Ford Cars Volkswagen Cars Audi Cars Kia Cars Renault Cars Peugeot


Familia Capella Mazda3 Mazda6 CX-? Others Articles
Capella 3 (1982-1992, petrol) Capella 3 and 4 (1982-1992) Capella 4 (1987-1992) Capella 5 (1991-1997) Capella 6 (1997-2005, petrol)

Checking and adjusting the ignition timing (Mazda Capella GC)

  • Home
  • Mazda Capella
  • Capella GC (1982-1992)
  • General information
  • Maintenance
  • Checking and adjusting the ignition timing
0
1. Locate the timing mark indicator plate located near the crankshaft pulley. The T mark indicates top dead center (TDC). The dial on the indicator plate has a 2° increment and should have the correct alignment mark for your model. If this is not the case, count from the T mark the required number of degrees to TDC and apply an installation mark. If the alignment marks are applied as shown in the figure, then instead of a plate the model is equipped with an alignment indicator and instead of two notches on the pulley there is one. Do not use top dead center (TDC) to set ignition timing.

2. Find the notch on the balancer or crankshaft pulley and mark it with chalk or a stroke of paint (photo).
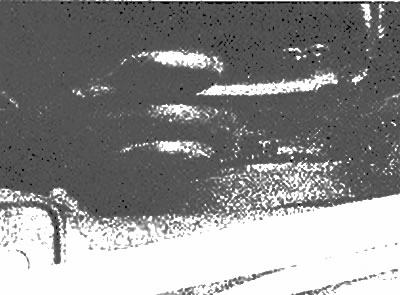
The alignment marks are quite difficult to see, so they should be marked with white paint

The alignment marks are quite difficult to see, so they should be marked with white paint


3. Start the engine, warm it up to normal operating temperature and turn it off. Turn off all lights and other additional electrical equipment, disconnect the electrical connector of the radiator cooling fan.

4. With the ignition off, connect the stroboscope input contact to spark plug No. 1 (use a jumper wire). Connect the strobe light power wires according to the manufacturer's instructions (photo).


5. Start the engine, point the strobe light at the timing notch on the crankshaft pulley and note which of the timing marks the notch on the pulley aligns with (photo).
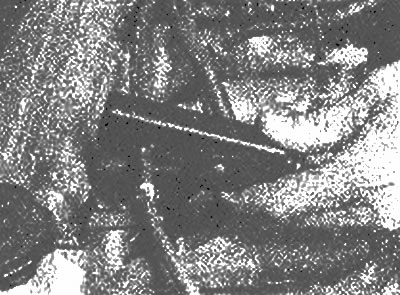
Connect the strobe light to spark plug wire #1

Connect the strobe light to spark plug wire #1
Connect the strobe light to the battery

Connect the strobe light to the battery

6. If the notch does not align with the corresponding mark, loosen the distributor bolt and rotate the distributor until the notch aligns with the correct timing mark.
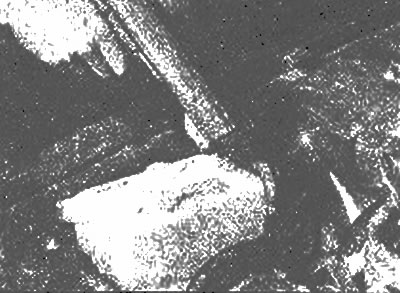
Point the strobe light at the alignment marks

Point the strobe light at the alignment marks


7. Tighten the distributor bolt and recheck the ignition timing.

[The article is copied from the website www.mazbook.ru]

8. Turn off the engine and disconnect the strobe light. Reconnect the spark plug wire and all previously disconnected electrical components.
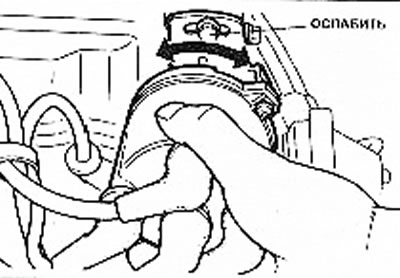
Adjust the ignition timing by turning the distributor

Adjust the ignition timing by turning the distributor
This article is available at: russian, bulgarian, belarusian, ukrainian, serbian, croatian, romanian, polish, slovak, hungarian
This text was checked by: Evdokia Filimonova
Share with friends on social networks:

Previous
Capella 3 » Maintenance
Next

Checking the fuel vapor extraction system
Checking the exhaust gas recirculation (EGR) valve
Checking and replacing the crankcase ventilation valve
Replacing the oxygen sensor
Replacing the air filter element and crankcase ventilation filter
Inspection and replacement of spark plugs
Checking and replacing spark plug wires, distributor cap and rotor
Adjusting the valves and checking the tightness of the cylinder head…
Compression check
Checking the additional air supply system
More articles on repairing other Mazda models
Checking and adjusting the ignition timing Mazda Familia 6 (1989-1994)
Checking the ignition timing setting Mazda3 BK (2003-2009)
Checking the ignition timing setting Mazda6 GG (2002-2008)
Checking the ignition timing Mazda CX-5KE (2012-2017)
Checking and adjusting valve clearance Mazda 121 (3) (1996-2003)
Link in different formats to this article
Comments and feedback from visitors
No comments yet


How much will 45 + 12 ?


Capella 6 (1997-2005, petrol) 
  • General information
  • Introduction to guide
  • User manual
  • Troubleshooting
  • Maintenance
  • Power unit
  • 4-cylinder engines
  • 6-cylinder engines
  • Engine overhaul
  • Cooling and ventilation
  • Power and exhaust systems
  • Engine electrics
  • Control system
  • Transmission
  • Mechanical gearbox
  • Automatic gearbox
  • Clutch and drive shafts
  • Chassis
  • Brake system
  • Car suspension
  • Steering
  • Body
  • Exterior (external elements)
  • Interior (internal elements)
  • Doors, windows and locks
  • Electrical equipment
  • Equipment and devices
  • Electrical circuits
Capella 5 (1991-1997) 
  • General information
  • User manual
  • Maintenance
  • Helpful hints
  • Power unit
  • Petrol engines 1.6 and 1.8
  • Petrol engines 2.0
  • 2.5 petrol engines
  • Overhaul engines 1.6 and 1.8
  • Overhaul engines 2.0 and 2.5
  • Diesel engine 2.0
  • Engine electrics
  • Cooling system
  • Air conditioner
  • Carburetor Nikki 30/34
  • Power system (1.6 and 1.8)
  • Power system (2.0 and 2.5)
  • Control system
  • Transmission
  • Mechanical gearbox
  • Automatic gearbox
  • Clutch and axles
  • Chassis
  • Brake system
  • Suspension and wheels
  • Steering
  • Body
  • Exterior (external elements)
  • Interior (internal elements)
  • Doors and windows
  • Electrical equipment
  • Equipment and devices
  • Electrical circuits
Capella 4 (1987-1992) 
  • General information
  • Introduction to manual
  • Vehicle specifications
  • Power unit
  • Engine repair
  • Lubrication system
  • Cooling system
  • Fuel system (carburetor)
  • Fuel injection (FE)
  • Fuel injection (DOHC)
  • Fuel system (diesel)
  • Ignition system
  • Transmission
  • Clutch
  • Gearbox
  • Drive shafts
  • Chassis
  • Front suspension
  • Rear suspension
  • Steering system
  • Brake system
  • Electrical equipment
  • Equipment and devices
  • Electrical circuits
Capella 3 and 4 (1982-1992) 
  • General information
  • User manual
  • Maintenance
  • Power unit
  • Gasoline engine
  • Engine overhaul (gasoline)
  • Diesel engine
  • Cooling and heating
  • Supply system
  • Ignition system
  • Emission reduction
  • Transmission
  • Clutch
  • Mechanical gearbox
  • Automatic gearbox
  • Drive shafts
  • Chassis
  • Brake system
  • Suspension and wheels
  • Steering
  • Body
  • Exterior (external elements)
  • Interior (internal elements)
  • Electrical equipment
  • Equipment and devices
  • Power devices
  • Electrical circuits
Capella 3 (1982-1992, petrol) 
  • General information
  • User manual
  • Maintenance
  • Troubleshooting
  • Late models
  • Power unit
  • Engine in car
  • Engine overhaul
  • Cooling and heating system
  • Fuel and exhaust system
  • Engine electrical system
  • Emission control system
  • Transmission
  • Mechanical gearbox
  • Automatic gearbox
  • Clutch and drive shafts
  • Chassis
  • Brake system
  • Suspension and wheels
  • Steering
  • Body
  • Exterior (external elements)
  • Interior (internal elements)
  • Electrical equipment
  • Equipment and devices
  • Lighting and lamps
  • Electrical circuits
MazBook.ru © 2018–2026 · Mobile version · Articles and news · Sitemap: EN BG BY UA RS HR RO PL SK HU · Feedback · Site search · Add to bookmarks Familia 5 (BF) · Familia 6 (BG) · Capella 3 (GC) · Capella 3 and 4 (GC) · Capella 4 (GD) · Capella 5 (GE) · Capella 6 (GF) · Mazda3 BK · Mazda6 GG · CX-5KE · Mazda 121 (3) · Mazda BT-50 (1) ·
By continuing to use the site, you agree to the use of cookies 🔐