


Attention! The internal components of the hydraulic unit of the anti-lock braking system can be damaged if the unit falls on a hard surface. Take care not to drop the hydraulic unit of the anti-lock braking system. Replace the hydraulic unit of the anti-lock braking system if it is affected.
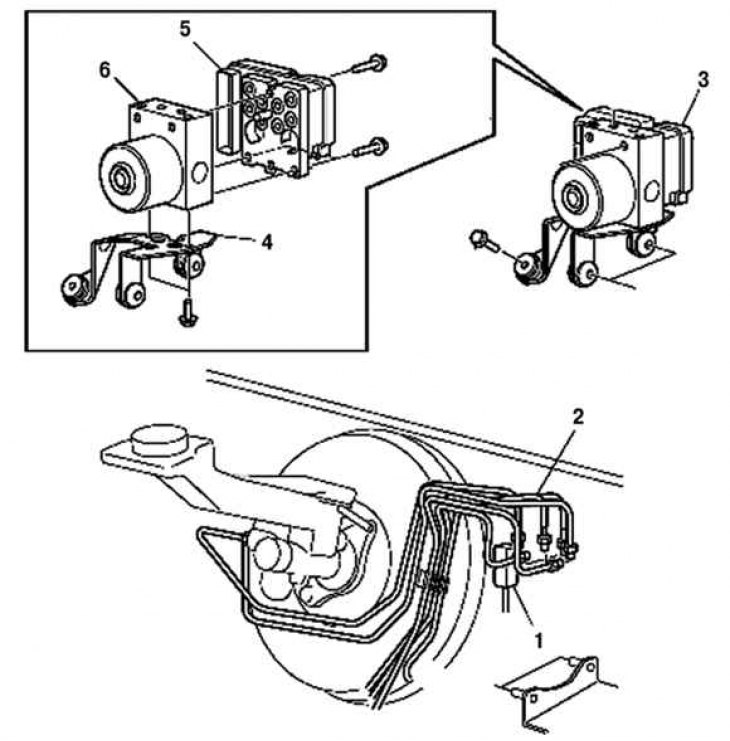
Fig. 6.61. Hydraulic unit of the anti-lock braking system: 1 – connector; 2 – brake line; 3 – Anti-lock braking system hydraulic unit, bracket; 4 – bracket; 5 – Anti-lock braking system control unit; 6 – hydraulic unit of anti-lock braking system
Remove the battery and battery tray.
Remove the hose (models with manual transmission).
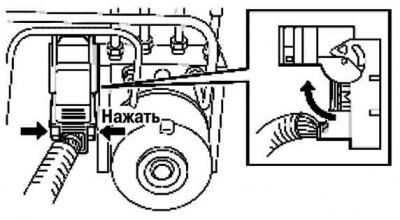
Fig. 6.62. Disconnecting the connector
Lift the connector cover in the direction of the arrow, while pressing on the cover tab (Fig. 6.62).
Pull the connector towards the front of the vehicle and remove it.
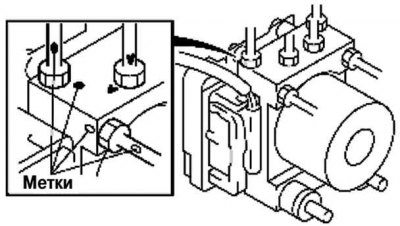
Fig. 6.63. Applying installation marks on the brake line and hydraulic unit of the anti-lock braking system
Apply a timing mark to the brake line and the hydraulic unit of the anti-lock brake system (Fig. 6.63).
Wrap the connector with protective tape to prevent brake fluid from getting inside.
Remove the brake line.
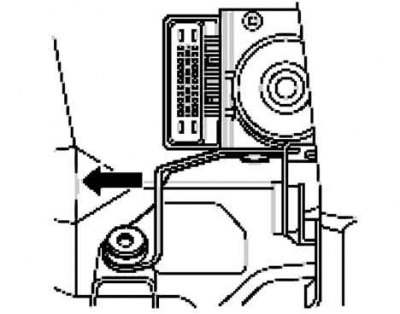
Fig. 6.64. Removing the hydraulic unit of the anti-lock braking system
As shown in Figure 6.64, move the bracket in the direction of the arrow and remove the ABS hydraulic unit assembly and bracket from the body.
Installation
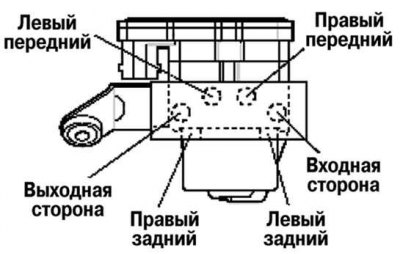
Fig. 6.65. Diagram of connection of brake line to hydraulic unit
Align the marks made before removal and connect the brake line to the ABS hydraulic unit as shown in Figure 6.65.
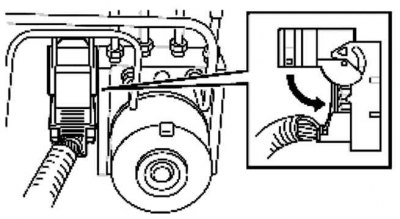
Fig. 6.66. Checking the reliability of the connector cover installation
After connecting the connector, check the reliability of the connector cover installation (Fig. 6.66).