
Removal and installation of components of system of release
Attention. A hot engine and exhaust system components can cause various burns. Shut off the engine and wait until it cools down before removing the exhaust system components.
1. Disconnect the negative battery terminal.
2. Remove the components of the exhaust system in the sequence shown in the figures.

Front wheel drive versions (2WD):
1. Main muffler.
2. Insulator.
3. Staple.
4. Heated oxygen sensor.
5. Tunnel cross member.
6. Three way catalytic converter.
Note:replace the part with a new one after each removal.
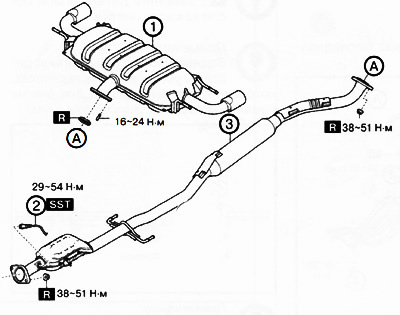
Versions with all-wheel drive (4WD):
1. Main muffler.
2. Heated oxygen sensor.
3. Three way catalytic converter.
Note:
: replace the part with a new one after each removal.
: use a special tool or attachments.
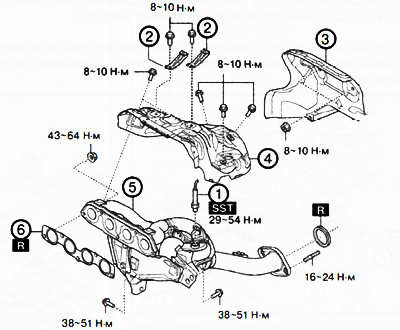
1. Air-fuel mixture sensor.
2. Clamps.
3. Insulator.
4. Exhaust manifold insulator.
5. Exhaust manifold (with heated three-way catalytic converter).
6. Gasket of the exhaust manifold.
Note:
: replace the part with a new one after each removal.
: use a special tool or attachments.
Note: The rear exhaust insulator is mounted on rivets that need to be drilled to remove the insulator with a 5mm drill bit.

Note:
- The exhaust manifold must be removed with the bracket installed underneath.
- To remove the exhaust manifold, remove the front cross member.
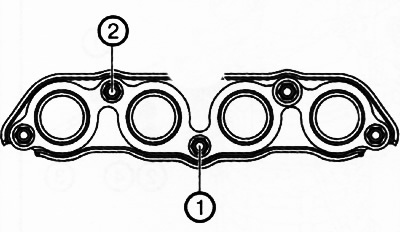
3. To install the exhaust manifold, you must first hand-tighten the nuts (1) And (2), shown in the figure. Then tighten the nuts (1) And (2) torque 33-53 Nm.
4. Tighten the nuts by hand (3), (4) And (5) exhaust manifold mounts shown in the picture. Then tighten the nuts (3), (4) And (5) moment 43-64 Nm.
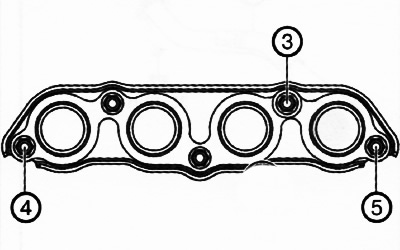
5. Tighten the exhaust manifold nuts (1) And (2), shown in the figure above, with a torque of 43-64 Nm.
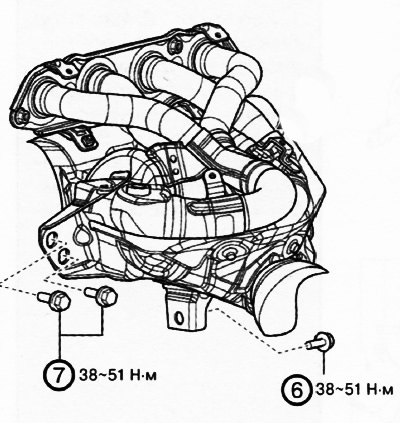
6. Screw on (6) And (7), shown in the figure. Tighten bolt first (6), and then bolt (7) moment 38-51 Nm.
7. Further installation is carried out in the reverse order of removal.