
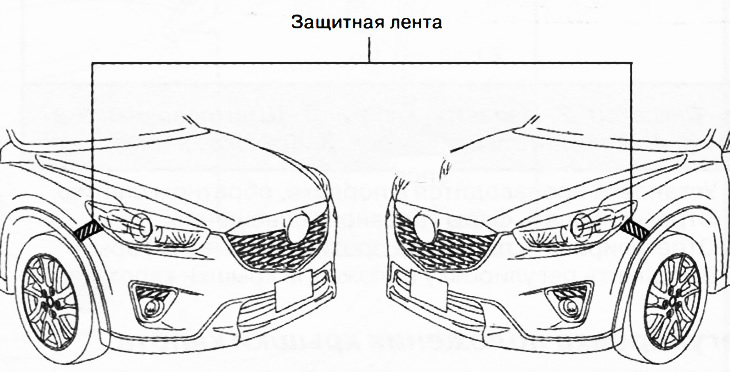
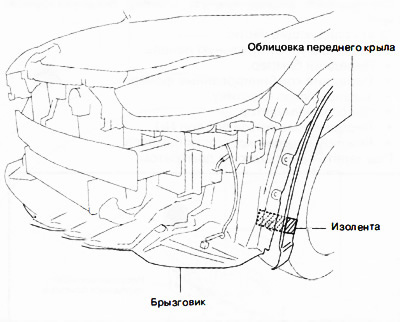
Attention. To prevent scratches and damage to the paint layer, apply a protective tape to the positions indicated in the figure.
1. Disconnect the negative battery terminal.
2. Remove clips A.
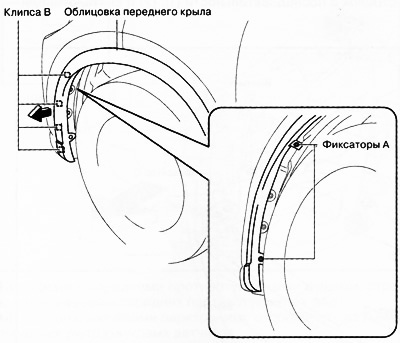
3. Pulling the front fender trim in the direction of the arrow in the figure, detach the trim by removing the clips B.
Attention. After removing clips B, insert a rag between the front fender and fender lining to prevent damage to the fender and clips.
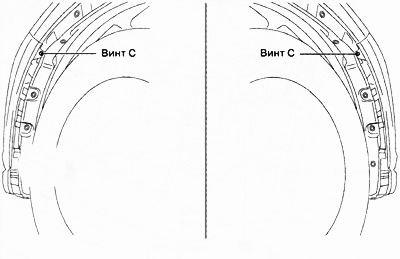
4. Loosen screws C on the left and right sides.
5. Loosen screws D.

6. Remove the fasteners F.
7. Remove the top sealing panel:
Remove fasteners A.
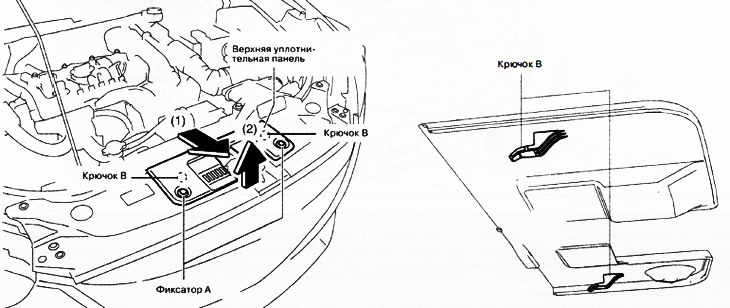
Pull the upper sealing plate in the direction of the arrows in sequence (1), (2) and remove by disconnecting the hooks B.
8. Remove clips G.
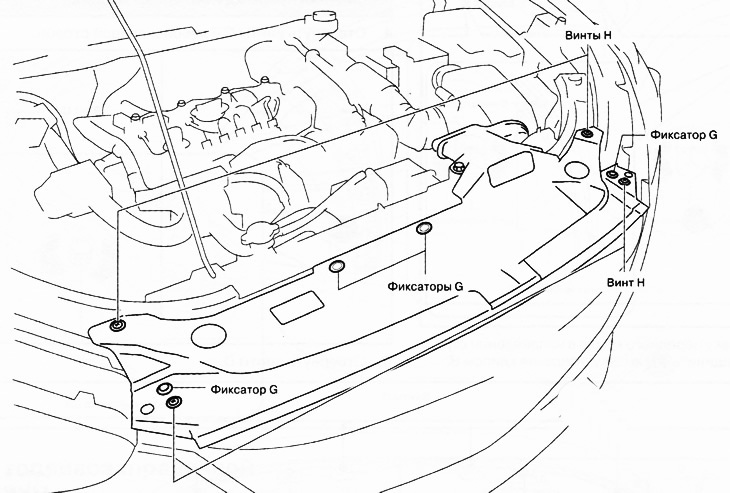
9. Loosen screws H.
10. Pulling the front bumper in the direction of the arrow (1) in the illustration, detach the strips 1.
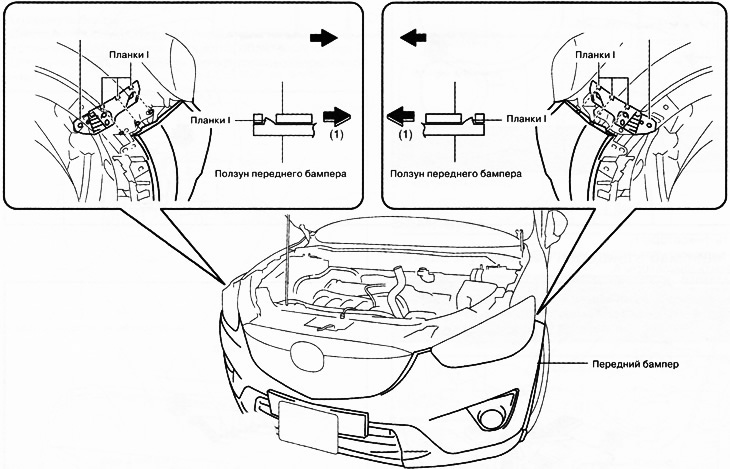
Attention. The front bumper is firmly attached to the sliders. If you unhook the bumper from the sliders forcibly, it may fall and be damaged. Be careful when removing the front bumper. Take appropriate measures to prevent the front bumper from falling.
11. Remove the front bumper from the sliders.
12. Pull the front bumper in the direction of the arrow (2) in the figure and remove it by releasing the guides G.

13. Versions with front fog lights: Disconnect the front fog light connectors.
14. Versions with parking sensors: disconnect the connectors of the front ultrasonic sensors.
15. Versions with headlight washers: Disconnect the headlight washer hoses.
Attention. When the front bumper is removed, it may hit the fender liner and cause damage and/or injury. Secure the front fender trim with electrical tape.
16. Installation is made in an order, the return to removal.
17. Versions with fog lights: adjust the front fog lights.
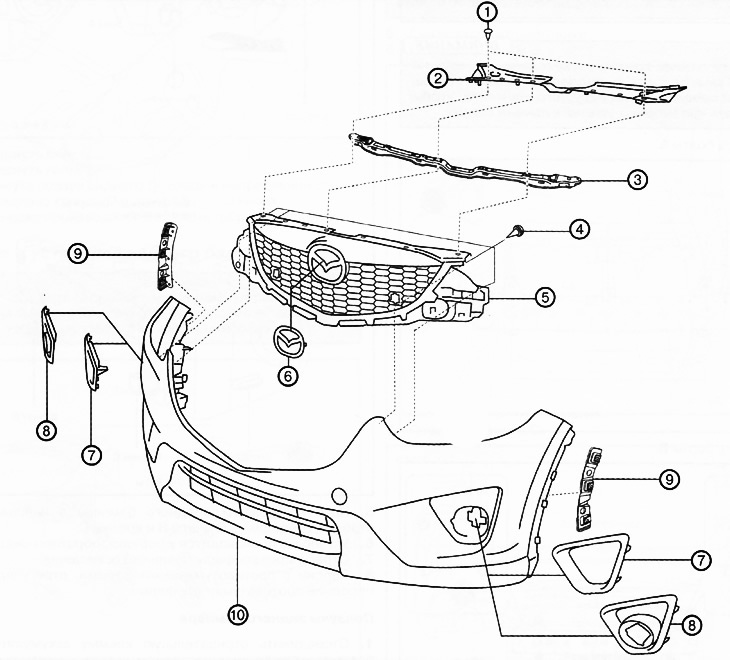
1. Rivets.
2. Grille bracket.
3. Front bumper holder.
4. Screw.
5. Radiator grille.
6. Emblem.
7. Cover holes for fog lights (versions without fog lights).
8. Cover holes for fog lights (versions with fog lights).
9. Brackets.
10. Front bumper.