


Contents: Removal ⇓ Installation ⇓
Removal
1. Loosen the wheel nuts of a vehicle parked on the ground.
2. Change the position of the wheel disk relative to the hub so that the balanced wheel can be installed in its original position.
3. Raise the front of the vehicle.
4. Remove the wheel.
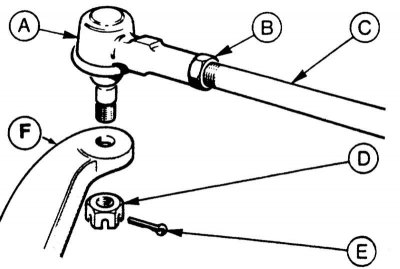
5. Unscrew the steering rod end "A" from the steering knuckle arm "F", to do this remove the cotter pin "E" and unscrew the lock nut "D", "B" is the lock nut, "C" is the steering rod.
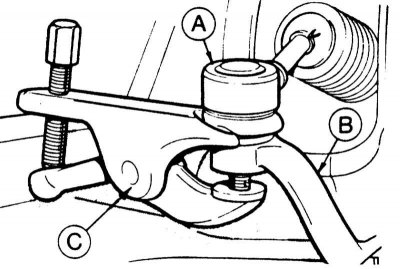
6. Press out the steering rod end "A" with a standard puller "C". "B" is the steering knuckle arm.
7. Loosen the lock nut and unscrew the tip from the steering rod.
Attention! Mark the number of turns to screw the joint in the same position when installing.
Installation
1. Screw the steering rod end to the recorded number of turns, do not tighten the lock nut yet.
2. Insert the joint into the steering knuckle arm.
3. Tighten the lock nut with force 50 Nm and secure new with a cotter pin. If the cotter pin does not fit into the hole, do not loosen the nut, but tighten it further until the cotter pin fits into place.
4. Screw the wheel on, taking into account the mark on the hub. Lower the car and tighten the wheel nuts crosswise with force 100 Nm.
5. Rock the car a little to settle the suspension elements.
6. Check the alignment (is done in the workshop) and tighten the lock nut on the steering rod end with force 40 Nm.