


Versions with petrol engines
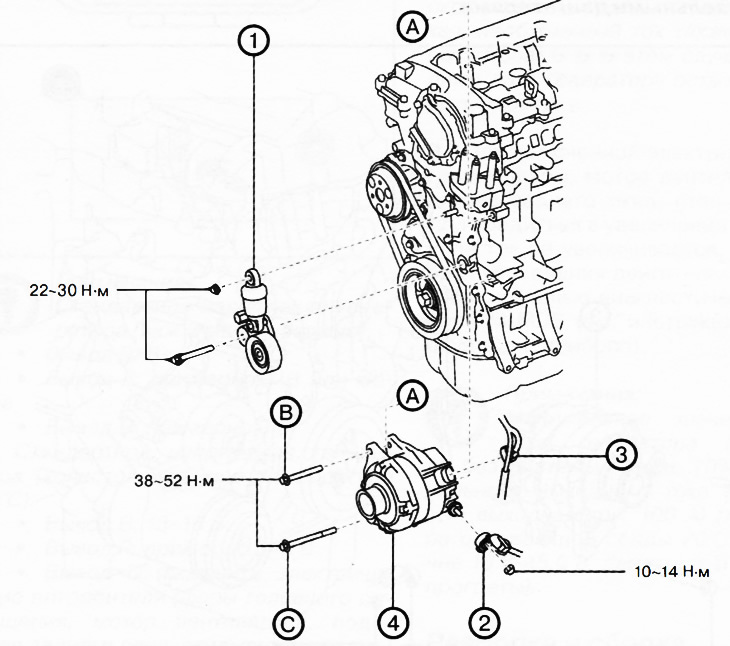
Gasoline Engine Generator:
1. Generator drive belt tensioner.
2. Terminal B of the generator.
3. Generator connector.
4. Generator.
Attention.
- Remove and install all parts only after the engine has cooled down, otherwise various burns may occur.
- After connecting the battery cables, touching the B terminal of the alternator to the vehicle body will cause sparks. This may cause injury, fire, or damage to electrical components. Be sure to disconnect the negative battery terminal before removing and installing the alternator.
1. Disconnect the negative battery terminal.
2. Remove the front protective pan No.2 of the engine.
3. Remove the generator drive belt.
4. Remove the air conditioning compressor without disconnecting the refrigerant hoses and secure it to the body using wire or rope to move it aside.
5. Remove the drive belt tensioner.
6. Disconnect terminal B and the generator connector.
7. Completely unscrew the lower generator bolt and remove it until it makes contact with the body.
Note: The alternator can be removed without completely removing the lower bolt from the engine.
8. Unscrew the upper generator bolt.
9. Remove the generator together with the lower bolt from the engine.
10. Remove the generator from the engine compartment through the top.
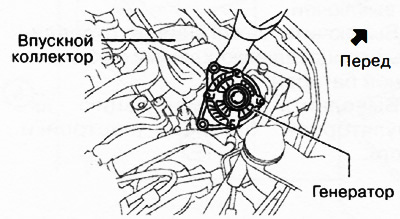
11. Installation is carried out in the reverse order of removal, taking into account the following:
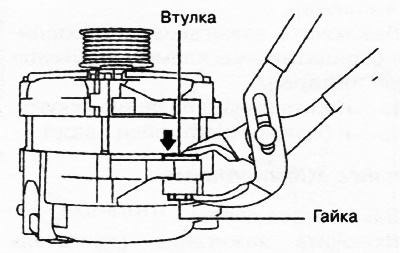
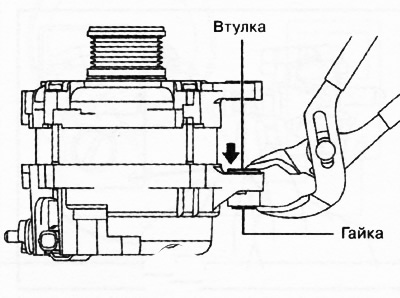
To facilitate installation of the generator on the engine, squeeze the sleeve in the mounting hole of the bolt with pliers and push it towards the nut.
Attach the generator to the engine with bolt C (see general view drawing above).
Align the generator mounting hole with the hole on the engine side, then tighten bolt B (see general view drawing above).
Tighten the generator mounting bolts securely in sequence B, C.
Versions with diesel engines
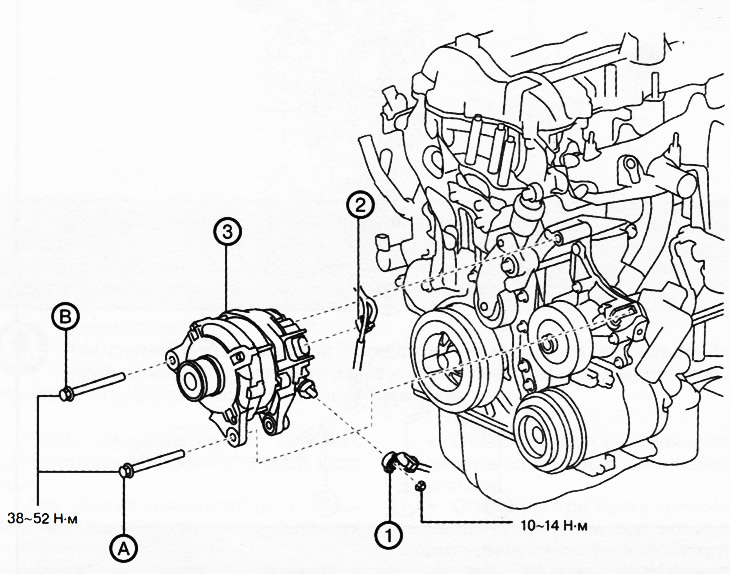
Diesel Engine Generator:
1. Terminal B of the generator.
2. Generator connector.
3. Generator.
Attention.
- Remove and install all parts only after the engine has cooled down, otherwise various burns may occur.
- After connecting the battery cables, touching the B terminal of the alternator to the vehicle body will cause sparks. This may cause injury, fire, or damage to electrical components. Be sure to disconnect the negative battery terminal before removing and installing the alternator.
1. Disconnect the negative battery terminal.
2. Remove the front protective pan No.2 of the engine.
3. Remove the right mudguard.
4. Remove the generator drive belt.
5. Remove the decorative engine cover.
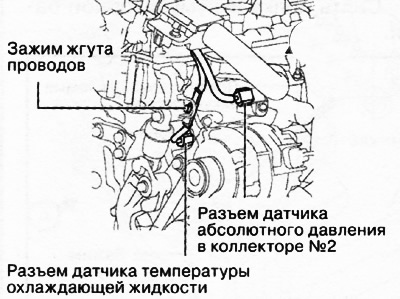
6. Disconnect the connectors and wire harness clamps shown in the figure.
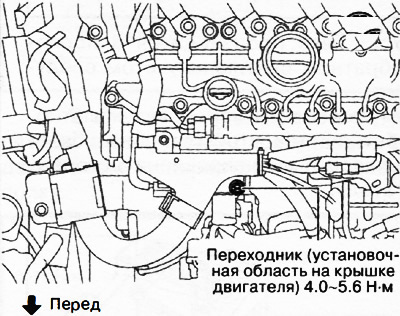
7. Remove the adapter shown in the figure.
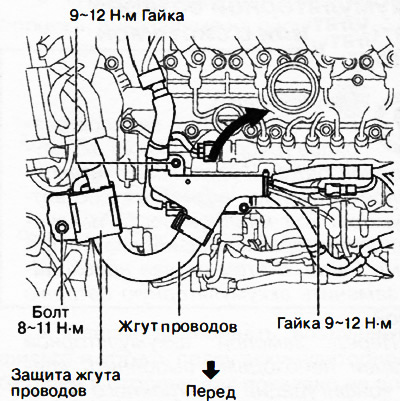
8. Remove the nuts and bolt shown in the figure and move the wiring harness to the side.
9. Completely unscrew the lower generator bolt and remove it until it makes contact with the body.
Note: The alternator can be removed without completely removing the lower bolt from the engine.
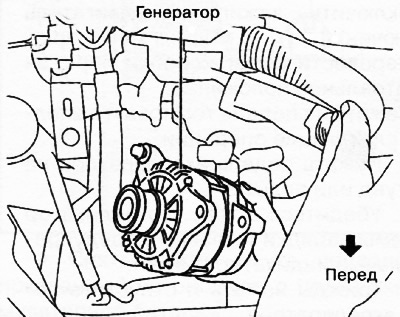
10. Unscrew the upper generator bolt.
11. Remove the generator together with the lower bolt from the engine.
12. Remove the generator from the engine compartment through the top.
13. Installation is carried out in the reverse order of removal, taking into account the following:
To facilitate installation of the generator on the engine, squeeze the sleeve in the mounting hole of the bolt with pliers and push it towards the nut.
Attach the generator to the engine with bolt C (see general view drawing above).
Align the generator mounting hole with the hole on the engine side, then tighten bolt B (see general view drawing above).
Tighten the generator mounting bolts securely in sequence B, C.