


Removal
1. Remove the gearbox, see Chapter Manual gearbox, Chapter Removal and installation the gearbox.
2. Mark the position of the pressure plate on the flywheel with a felt-tip pen or scriber.
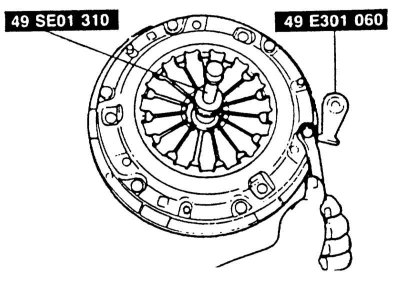
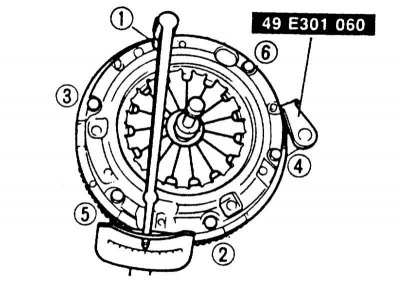
2. To prevent the flywheel from turning when loosening the bolts, lock it on the toothed ring using a screwdriver and a rod. MAZDA workshops use the special device shown.
3. Loosen the pressure plate mounting bolts alternately by 1-1.5 turns until the pressure plate is relieved.
Caution: If the bolts are loosened immediately, the diaphragm spring may be damaged.
4. Unscrew the bolts completely.
5. Remove the pressure and driven disks.
Caution! Do not allow the pressure and driven disks to fall when removing them, otherwise difficulties may arise when engaging and disengaging the clutch after installation.
6. Wipe the flywheel with a rag soaked in gasoline.
Examination
1. Replace oily or mechanically damaged driven disks.
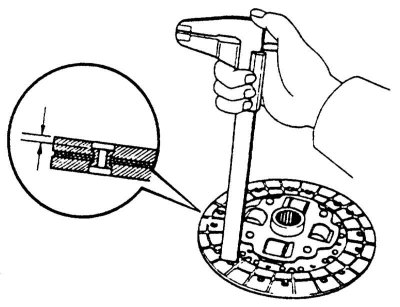
2. Measure the thickness of the driven disk lining using a caliper. The distance to the rivet heads must be at least 0.3 mm, otherwise the driven disk must be replaced. The same if there are cracks in the lining.
3. Check the driven disk for runout. Maximum lateral runout of the disk: 0.7 mm. A special tool is required for checking, but this is only necessary if you are installing an old driven disk that had problems switching on and off.
4. If there were any problems with the clutch operation, check the flywheel lateral runout using a dial indicator. Maximum lateral runout: 0.2 mm.
5. Check the flywheel for traces of carbon deposits and grooves; if necessary, sand with fine sandpaper.
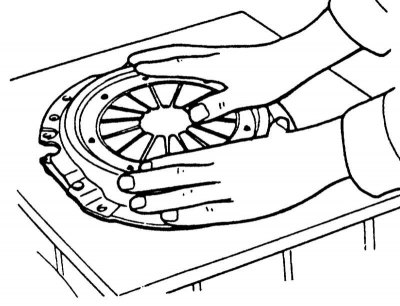
6. Check the wear marks of the release bearing on the diaphragm spring. Smooth out small irregularities with sandpaper; in case of larger damage, replace the pressure plate.
7. Check the spring connections between the pressure plate and the cover for cracks and the tightness of the rivets. A clutch with damaged or loose rivets should be replaced.
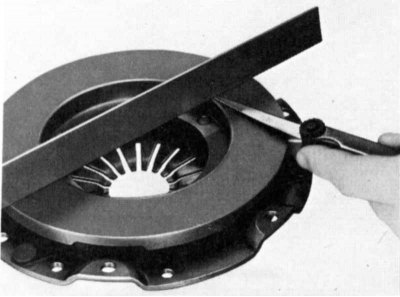
8. Check the contact surface of the pressure plate for cracks, burn marks and wear. Pressure plates with an inward deflection of up to 0.3 mm can still be installed. Check with a ruler and a flat feeler gauge. If necessary, smooth out burn marks and grooves with fine sandpaper.
9. Turn the pilot bearing in the flywheel with your finger, pressing on the bearing. Replace the bearing only if it is jammed or has free play. A special puller is required for removal. The new bearing is driven in with a hammer and rod until it is flush with the flywheel.
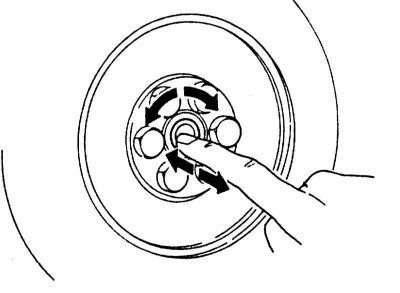
10. Check the ease of movement of the release bearing.
Installation
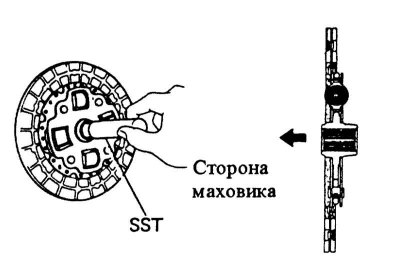
1. Insert the driven disk and the basket with the pressure plate into the flywheel. The flat side of the driven disk hub faces the flywheel. Roughly align the driven disk in the center in the pressure bearing. However, it is better to center the disk with a suitable rod, such as a HAZET or an old primary shaft of the gearbox. If the driven disk is not in the center, the gearbox shaft cannot be inserted.
2. If the old pressure plate is being installed, install the basket according to the mark made during removal. In this case, the guide pins on the flywheel will enter the holes in the basket with the pressure plate.
3. Screw in the basket mounting bolts.
4. Tighten the disc basket mounting bolts in the given sequence in stages by 1 - 1.5 turns until the pressure plate is screwed on. Remove the centering rod.
Attention! Make sure that the basket enters the flywheel evenly and without distortion when tightening the bolts. Tightening torque of the basket mounting bolts: 25 Nm.
5. Remove the locking device from the clutch.
6. Install the gearbox, see Chapter Manual gearbox.
7. Petrol models with front-wheel drive up to 8/89, as well as all station wagon models: Adjust the clutch drive, see Section Adjusting the clutch pedal/cable.
[The original article is available on: mazbook.ru]