


Attention! The balancing unit cannot be disassembled, as it has a high manufacturing precision.
Turn the crankshaft clockwise and set the piston of the first cylinder to the TDC position.
Install the adjusting shim onto the balancing block seating surface.
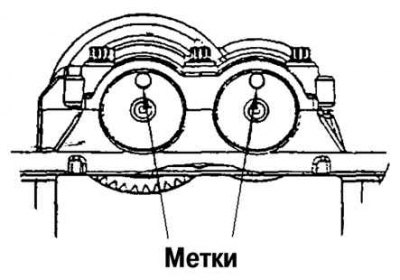
Fig. 2.177. Balancing block marks
Install the balancing block on the cylinder block, having previously set the balancing block marks at the top in the center (fig. 2.177).
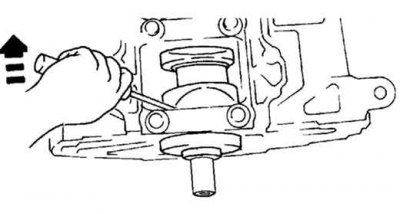
Fig. 2.178. Rotating the balance shaft with a screwdriver
Insert a screwdriver into the crankshaft in the area of the first counterweight, rotate and apply axial force to the crankshaft using the screwdriver, acting as a lever, as shown in Figure 2.178.
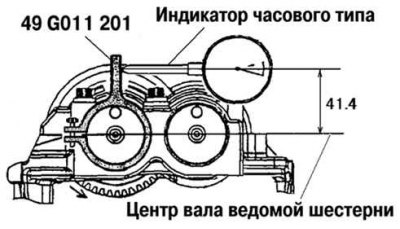
Fig. 2.179. Measuring the clearance in the gear engagement of the driven gear shaft
Install the special fixture as shown in Figure 2.179, then measure the gear clearance using a dial indicator.
If the clearance exceeds the specified value, measure it again and, using the shim selection chart, select the appropriate shim according to the following procedure.
Caution! When measuring the clearance, rotate the crankshaft one full revolution and check the clearance compliance in the following six positions: 10°, 30°, 100°, 190°, 210°, 280° after TDC.
The gap size in the gear engagement: 0.005–0.101 mm.
Using the main adjusting shim (number 50), install the balancing block on the cylinder block, and then measure the clearance.
Select the adjusting shim according to the measurement result.
Install the selected adjusting shim onto the balancing block, then install the balancing block onto the cylinder block.