


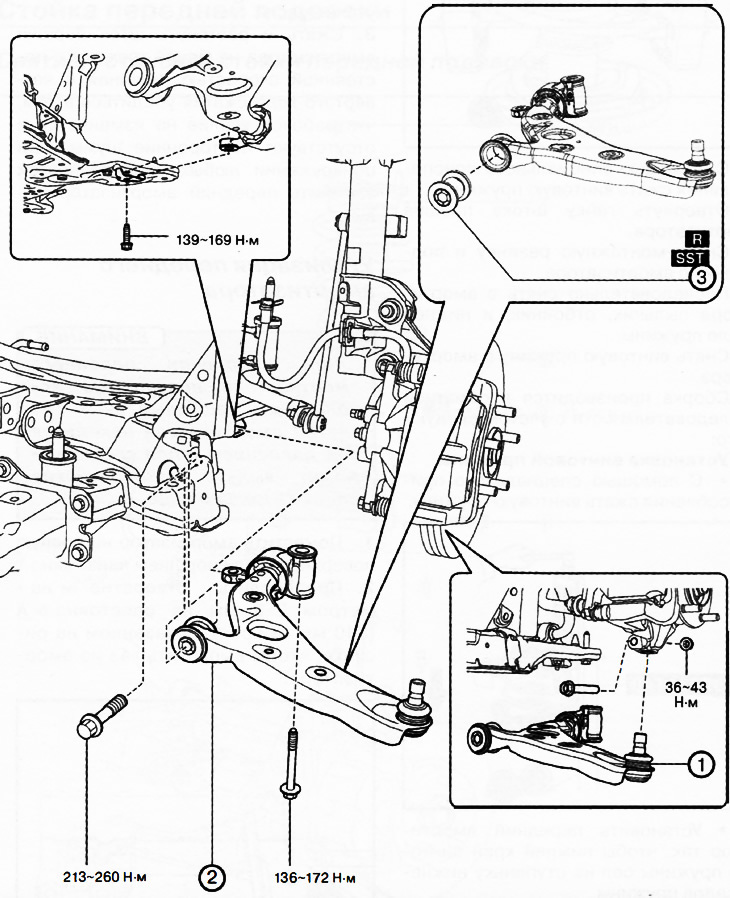
1. Ball joint of the lower arm of the front suspension.
2. Lower arm of the front suspension.
3. Front suspension lower arm bushing.
Note:
: replace the part with a new one after each removal.
: use a special tool or device.
1. Remove the front engine oil pan No.2.
2. Loosen the nut and remove the bolt of the lower ball joint of the steering knuckle, then disconnect the ball joint of the lower suspension arm from the steering knuckle.
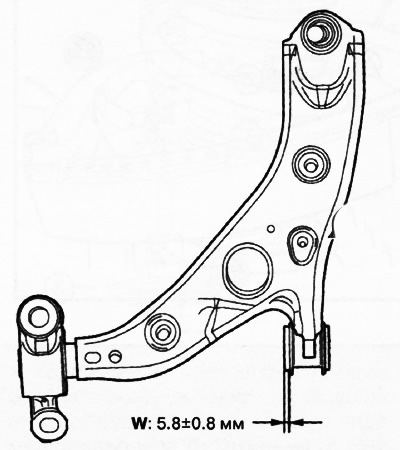
3. Using a hacksaw, cut off the head of the lower suspension arm bushing from the rear side as shown in the figure.
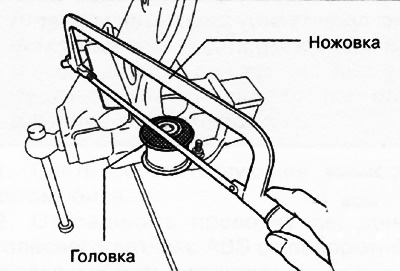
Caution: When using a hacksaw to cut the head off the back of the front lower control arm, be careful not to damage or scratch the front lower control arm.
[The original article is available on MAZBOOK]
4. Using special tools, remove the bushing of the lower arm of the front suspension.
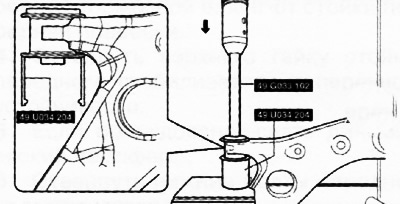
Caution: Install special tool 49 U034 204 as shown in the figure and remove the bushing from the rear side of the front suspension lower arm.
5. Installation is performed in the reverse order of removal. The front suspension lower arm bushing is installed as follows:
Using special tools, install the bushing into the lower arm of the rear suspension.
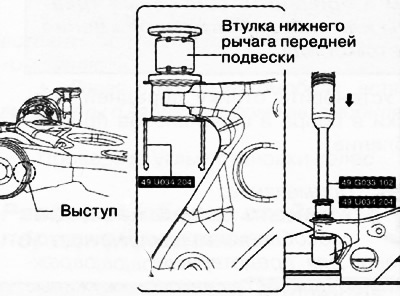
Attention.
- Install special tool 49 U034 204 as shown in the figure and install the rear lower control arm bushing.
- Install the front lower control arm bushing so that the protrusion shown in the illustration faces toward the front of the vehicle.
Note:
- Before installation, apply soapy water to the front lower arm bushings.
- If soap solution gets into the inner tube of the front lower control arm bushing, be sure to remove it with a cloth.
After installing the front lower arm bushing, make sure it is installed as shown in the illustration.
6. Check and, if necessary, adjust the wheel alignment angles.