Contents: Speedometer ⇓ Odometer, trip odometer and…⇓ Tachometer ⇓ Fuel level indicator in the tank ⇓ Instrument cluster backlight…⇓ Outdoor temperature indication ⇓ Cruise control speed setting…⇓ Maintenance Warning - For Vehicles…⇓ Warning messages on the display ⇓
The display shows messages related to the operation of the vehicle systems or their malfunction. If malfunction messages appear on the display, you must check the condition of the vehicle or contact an authorized Mazda dealer service station.
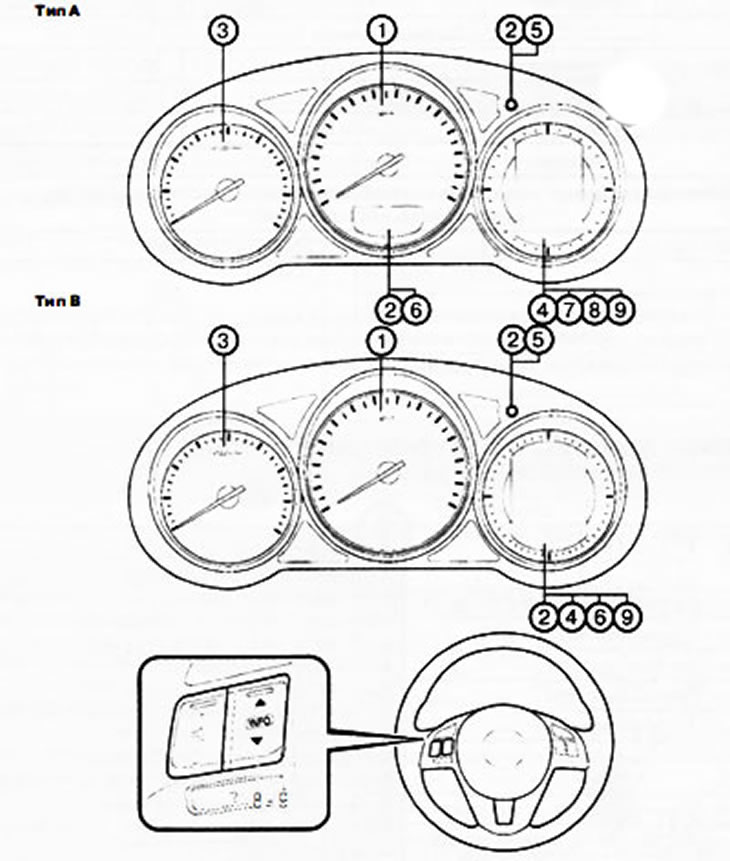
1. Speedometer.
2. Odometer, trip meter and reset/toggle button.
Z. Tachometer.
4. Fuel level indicator in the tank.
5. Instrument panel lighting.
6. Indication of ambient air temperature.
7. Cruise control speed setting indicator (for vehicles with type A instrument cluster).
8. Maintenance Warning (for vehicles with type A instrument cluster).
9. Trip computer and "INFO" switch.
Speedometer
The speedometer shows the speed of the car.
Odometer, trip odometer and reset/toggle button
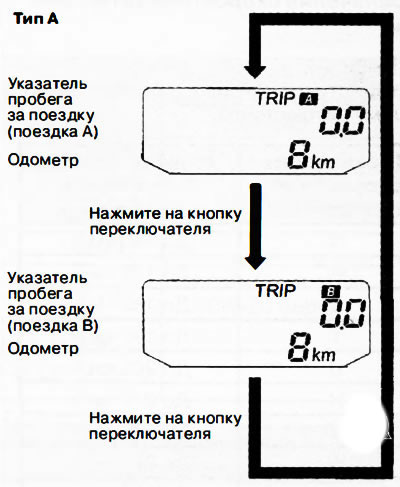
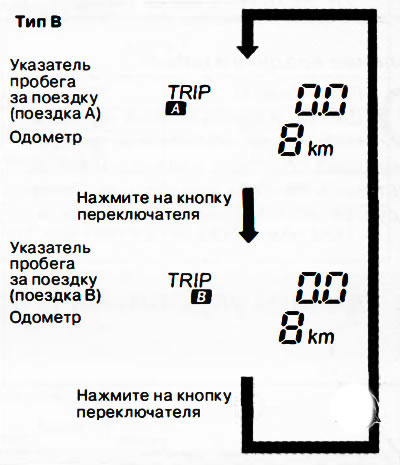
By pressing the switch button in succession, the display will alternately show the mileage for Trip A or Trip B. The indicator of the selected mileage indicator is shown on the display ("Trip A" or "Trip B").
 |
 |
Note:
The odometer and trip meter are not displayed when the ignition switch is in the ACC (Accessory) or OFF (Ignition Off) position. However, the switch button can inadvertently switch from one trip meter to the other or reset the trip meter to zero within 10 minutes of performing one of the following actions:
- the driver switched the ignition switch from the "OFF" position to the "OM" position;
- the driver's door opened.
Odometer
The odometer shows the total mileage of the vehicle since the start of operation.
Trip mileage indicator
Dual trip odometer allows you to simultaneously record distances traveled starting from two different points in time (determined by the moments of resetting the current mileage readings). One of the values of the distance traveled is recorded by the trip odometer A, and the second by the trip odometer B.
For example, using indicator A you can monitor the distance traveled from the starting point, and using indicator B you can monitor the distance traveled after filling the fuel tank.
Switching the display from pointer A to pointer B is done with a short press (no more than one second) by pressing the switch button.
When trip odometer A is selected, "Trip A" is displayed. When trip odometer B is selected, "Trip B" is displayed.
Each mileage indicator for a trip records the distance traveled by the vehicle since the last reading was reset. To reset the current reading to zero, press and hold the switch button for at least one second. Use the trip mileage indicator to determine the distance traveled by the vehicle and calculate the fuel consumption on the road.
Note:
The trip odometer allows you to record the distance traveled with an accuracy of up to a tenth of a kilometre.
The trip odometer readings are reset in the following cases:
- when the power supply is interrupted (the fuse has blown or the battery is disconnected from the vehicle's electrical system);
- upon reaching a route mileage of 9999.9 km.
Tachometer
The tachometer shows the engine crankshaft speed in thousands of revolutions per minute.
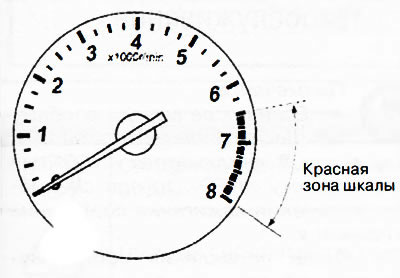
Caution: Do not exceed the maximum permissible engine crankshaft speed (the tachometer needle should not enter the red zone of the scale). Exceeding the permissible speed leads to breakdown of parts and engine failure.
Fuel level indicator in the tank
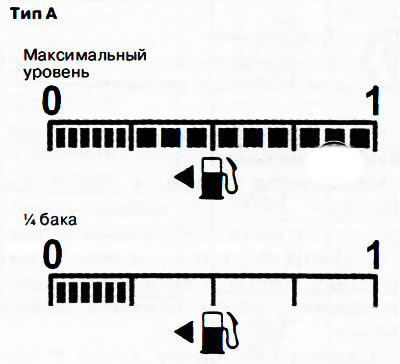
The indicator shows the approximate amount of fuel in the tank. The indicator works when the ignition is on. Fill the fuel tank in a timely manner. Make sure that the amount of fuel in the tank never drops below a quarter of the full capacity of the tank.
 |
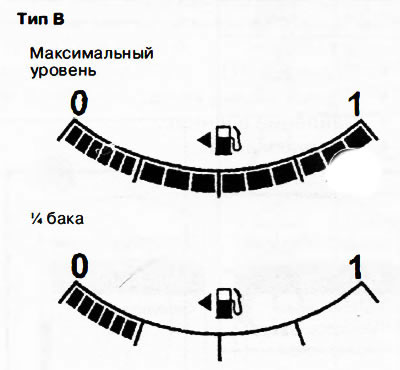 |
If the indicator value is close to zero or the low fuel indicator lights up, refuel the vehicle as soon as possible.
Note:
After filling the fuel tank, it may take some time for the gauge readings to stabilize. In addition, instability and changes in readings may be observed when the car is moving uphill or downhill, as well as when cornering. The reason for temporary instability of the instrument readings is the overflow of fuel in the tank, which affects the fuel level sensor.
Direction of the arrowindicates the location of the fuel filler cap (on the left side of the car).
Instrument cluster backlight brightness control/switch
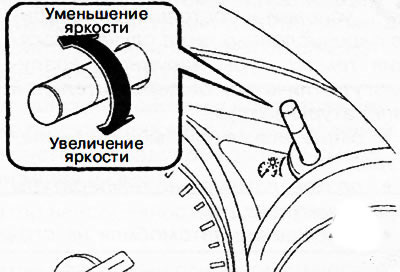
Turn the control knob to set the required brightness of the instrument cluster illumination and the rest of the instrument panel illumination.
Note: The brightness of the instrument panel lighting can only be adjusted when the central lighting switch is in the positionor
. When the upper or lower limits of backlight brightness control are reached, a short sound signal is emitted.
Disabling the instrument panel backlight brightness reduction function
If you set the central light switch to the position
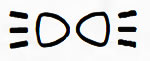 or
or  , then the brightness of the instrument panel backlight will automatically decrease.
When driving on a snow-covered road or in other road conditions where visibility of the instrument cluster becomes insufficient due to high intensity of natural light, turn off the instrument panel backlight dimming function, thereby increasing the backlight brightness.
To turn off the backlight dimming function, turn the control knob clockwise until it stops. The backlight dimming function is turned off with a short beep.
Note:
- Symbol (
) is located on the instrument panel backlight brightness control handle.
- If the control knob is in the dimming function cancel position, the instrument panel illumination intensity will not decrease when the central light switch is turned to the position
or
. Turn the instrument panel light dimmer knob counterclockwise to activate the light dimming function.
Outdoor temperature indication
When the ignition is on, the display shows the outside air temperature.
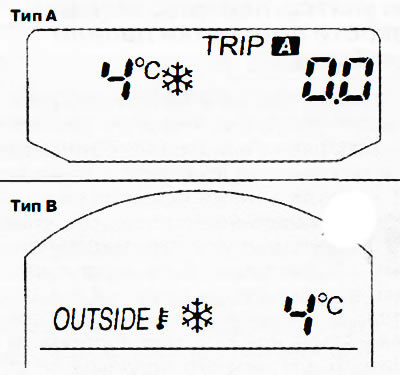
Note:
Depending on the surrounding conditions and the vehicle condition, the outside air temperature reading may differ from the actual air temperature in the following cases:
- very low or high temperature;
- a sharp change in ambient temperature;
- car park location;
- movement of a car at low speed.
Alarm about decrease in ambient temperature
When the outside temperature drops, an alarm is activated: the temperature display starts flashing, and the buzzer is activated at the same time. This is intended to warn the driver of possible ice. When the outside temperature drops below 4°C, a warning sound is emitted, and the temperature display and symbol
 flash for approximately 10 seconds.
Note: When the outside temperature is below -20°C, the warning sound does not work. However, the symbolwill still be displayed on the display.
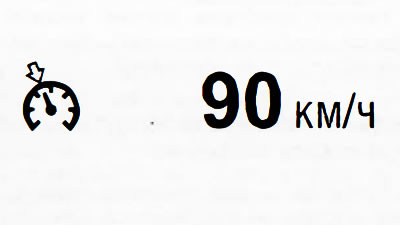
Cruise control speed setting indicator - for vehicles with type A instrument cluster (some performances)
The display shows the value of the stabilized speed set for the cruise control system.
Maintenance Warning - For Vehicles with Type A Instrument Cluster
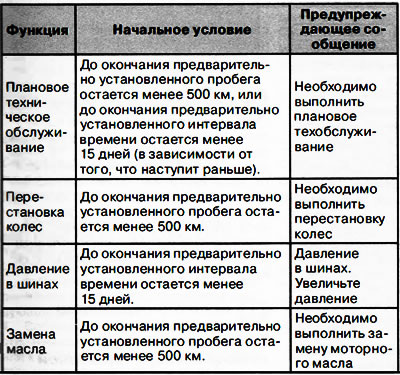
This feature can be programmed to display the following maintenance warnings:
- scheduled maintenance;
- periodic wheel rotation;
- checking tire pressure;
- oil change.
The maintenance warning is displayed on the display when the ignition switch is in the "ACC" or "ON" position.
Note: This function does not work when the vehicle is moving.
Initial setting of service interval
1. Press the "INFO" switch up or down and select "Settings", then press the "INFO" button.
2. Press the "INFO" switch up or down and select "Maintenance", then press the "INFO" button.
3. Press the "INFO" switch up or down and select the function you want to turn on from the list below, then press the "INFO" button.
- Scheduled maintenance.
- Wheel rotation.
- Tire pressure.
- Oil change.
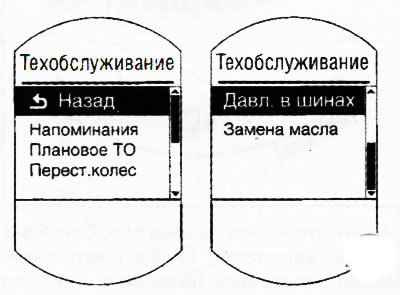
Note: Once the scheduled maintenance warning function has been selected, you can select the time interval and mileage after which the warning will appear. For functions other than the scheduled maintenance warning, you can set either the time interval or the mileage.
Press the "INFO" switch to the "up" or "down" side and select "Set Time" or "Set Mileage", then press the "INFO" button. The display will show the screen for setting the mileage or time interval until the next vehicle service.
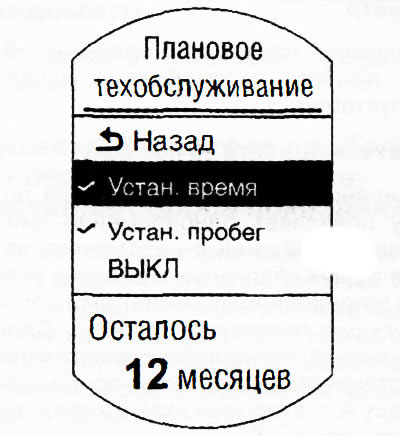
Press the "INFO" switch up or down and change the mileage or time interval, then press the "INFO" button. If you do not need to make any changes, just press the "INFO" button.
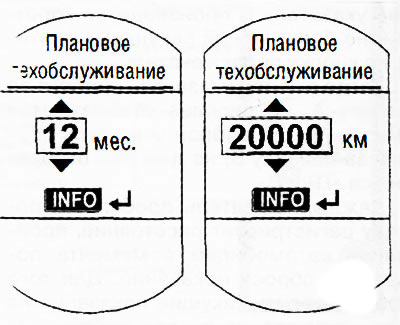
Note:
- The initial mileage or time interval values correspond to the current maintenance regulations (excluding vehicles supplied to certain countries).
- A symbol is displayed opposite the function with the given value.
Warning messages on the display
When the set mileage or time interval value reaches zero, the following message will be displayed each time the ignition is turned on.
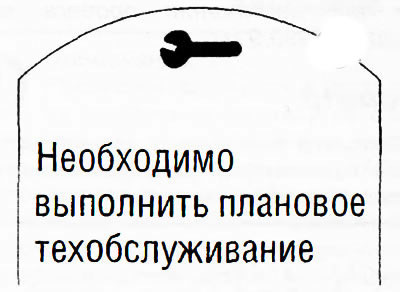
Note:
- If after displaying the message on the display you press the "up" or "down" side of the "INFO" switch or press the "INFO" button, the message will not appear the next time you turn on the ignition.
- Once the vehicle has been serviced and a new time interval or mileage until the next service is entered, the warning message will begin to appear again when the designated time interval or mileage is about to expire (the message is displayed on the display when the engine is started).
- If there are multiple messages, they are displayed on the display one after the other.
- If the "Reminders" function is disabled, no messages are displayed on the display.