


Attention.
- Failure to follow safety precautions when handling air bag modules can result in serious injury. Before working on air bag modules, be sure to read the relevant safety precautions (see chapter "Passive safety").
- Immediately after a long rotation of the steering gear, the temperature of the steering column (electric power steering drive) significantly increases, which can cause burns when touched. Before performing any maintenance, make sure that the steering column has cooled down.
- If the configuration of the electric power steering control unit is not completed, the electric power steering unit will not function correctly. If the components of the steering column or electric power steering control unit have been replaced, it is imperative to perform an automatic configuration for proper operation of the electric power steering.
- If the steering column is dropped, the electric power steering control unit may be damaged internally, which may cause the steering mechanism to lose its functionality and subsequently cause an accident. It is imperative to replace a steering column that has been hit or dropped with a new one.
Note:
- When the ignition is turned on or the engine is started after replacing the electric power steering control unit, data is read from the instrument cluster via the CAN bus to perform automatic configuration.
- The electric power steering control unit to be replaced contains vehicle-specific information, while the new control unit does not contain such information.
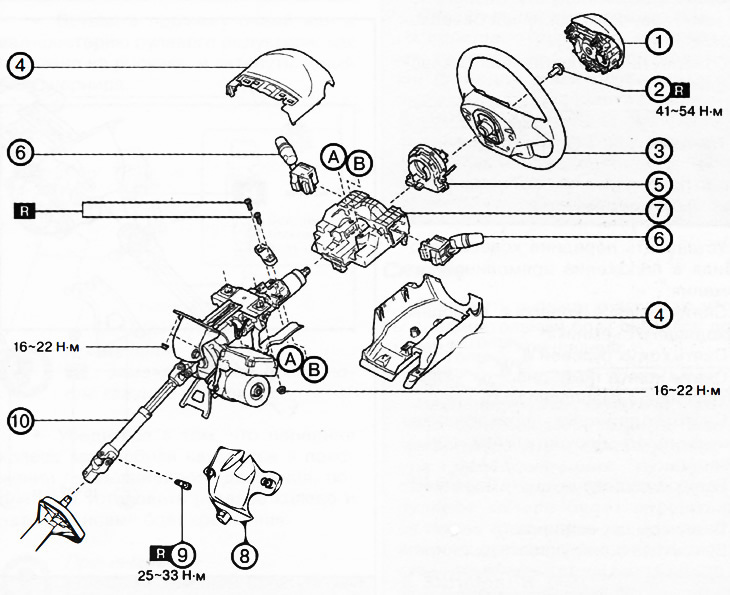
1. Driver airbag module.
2. Steering wheel bolt.
3. Steering wheel.
4. Speaker casing.
5. Contact disk.
6. Steering column switches for lighting, wipers and washers.
7. Start-stop block.
8. Hinge cover.
9. Hinge bolt.
10. Steering column assembly.
Note:replace the part with a new one after each removal.
1. Remove the front door sill trim on the driver's side.
2. Remove the front side trim on the driver's side.
3. Versions with navigation system: remove the vehicle's navigation system unit.
4. Remove the switch panel.
5. Remove the decorative panel.
6. Remove the gear shift knob (versions with manual transmission) or selector lever (versions with automatic transmission).
7. Remove the front console compartment.
8. Remove the shift lever panel.
9. Remove the top panel.
10. Remove the rear console.
11. Remove the side wall.
12. Remove the front console.
13. Disconnect the hood release lever from the lower panel.
14. Remove the bottom panel.
15. Remove the front deflector from the driver's side.
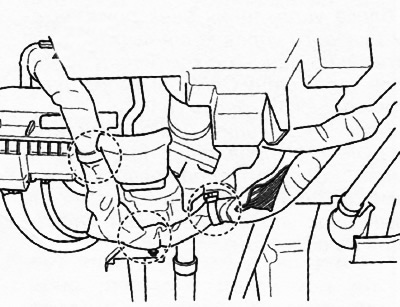
16. Disconnect the wiring clamps shown in the figure.
17. Remove the airbag module (see chapter "Passive safety").
18. Loosen the steering wheel mounting bolt.
Caution: Do not attempt to remove the steering wheel by hitting the steering shaft with a hammer. The steering column may be damaged.
19. Set the front wheels of the vehicle to the straight-ahead position.
20. Remove the steering wheel using a suitable puller.
21. Remove the steering column cover.
22. Remove the contact disk (see chapter "Passive safety").
23. Remove the steering column switches for lighting, windshield wipers and washers.
24. If equipped, remove the startstop unit.
25. Remove the hinge cover.
26. Unscrew the steering joint bolt.
Attention.
- Lock the adjustment lever to prevent damage to the steering column. Also, do not unlock the adjustment lever until the steering column is fully installed.
- When removing the steering column, follow the entire sequence of actions described to prevent damage to the intermediate shaft.
27. Lock the adjustment lever.
28. Loosen the bolt and disconnect the intermediate shaft from the steering gear shaft.
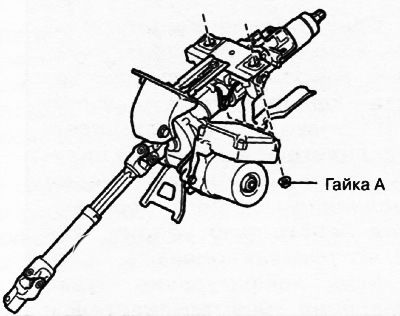
29. Unscrew nut A.
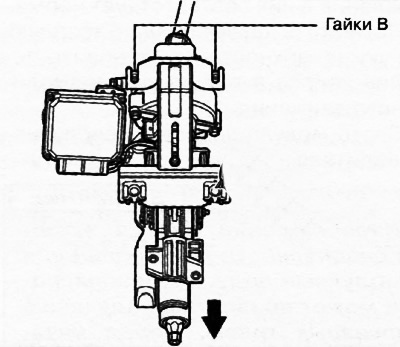
30. Loosen nuts B.
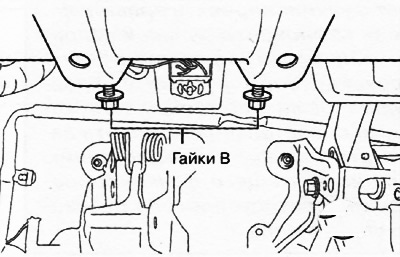
31. Remove the steering column assembly by tilting it towards the loosened nuts B and moving it outward.
Article is available on the website www.MazBook.ru
32. Disconnect the torque sensor connector (from the side of the electric power steering control unit).
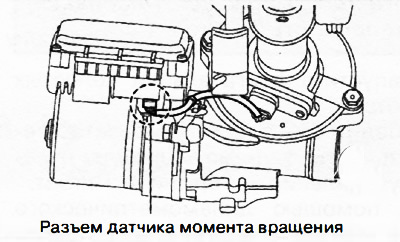
33. Remove the electric power steering control unit.
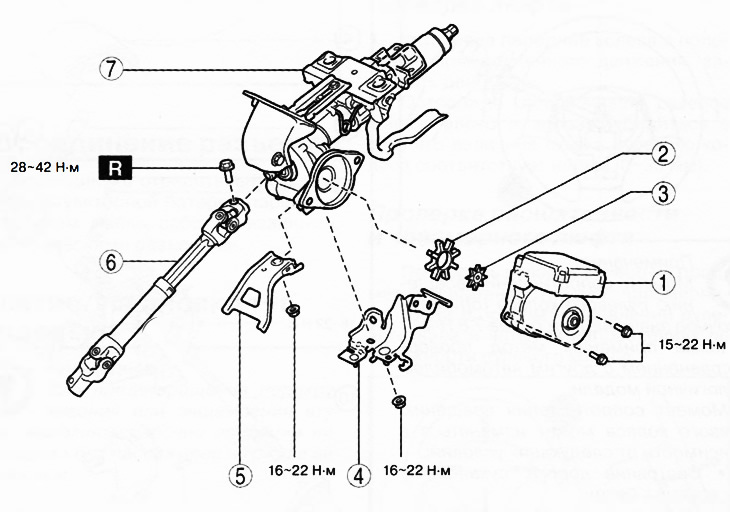
1. Electric power steering control unit.
2. Elastic element.
3. Spacer.
4. Wiring harness bracket.
5. Bracket (versions with manual transmission).
6. Intermediate shaft.
7. Steering column.
Note:replace the part with a new one after each removal.
34. Remove the elastic element and spacer from the steering column.
35. Loosen the mounting nut and remove the wiring harness bracket.
36. Versions with manual transmission: unscrew the mounting nut and remove the bracket from the steering column.
37. Loosen the upper universal joint bolt and remove the intermediate shaft from the steering column.