
Place the spacer and elastic element on the steering column. Install the electric power steering control unit so that the protruding parts of the rotor of the electric power steering control unit engage with the grooves of the elastic element.
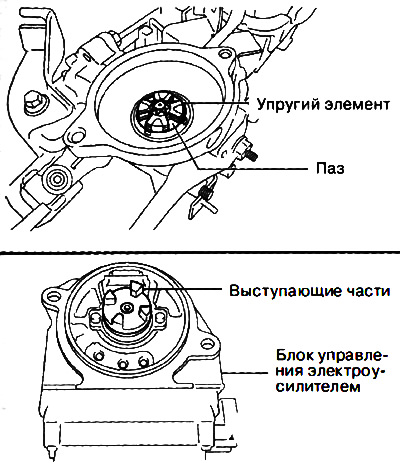
Note: If the protruding parts of the amplifier control box rotor do not engage with the grooves of the elastic element, rotate the control box rotor.
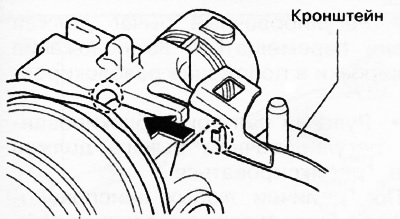
Insert the bracket bolt into the steering column and install the protruding part of the bracket into the steering column installation area.
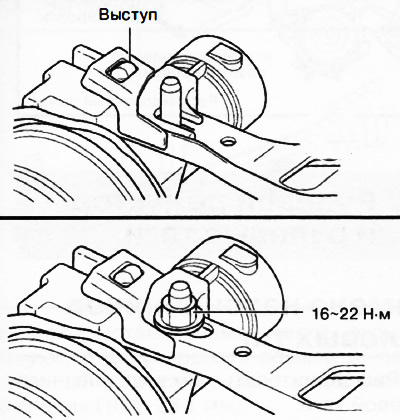
Make sure the steering column protrusion is inserted into the hole of the bracket as shown in the figure, and tighten the nut to the specified torque.
Attention.
- When installing the steering column, follow the entire sequence of steps described to prevent damage to the intermediate shaft.
- Do not unlock the adjusting lever until the steering column is fully installed to prevent damage to the steering column.
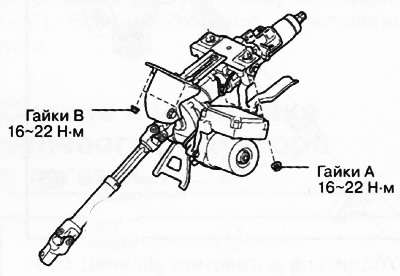
Fit nuts B on the dashboard beam.
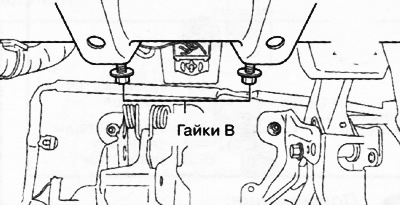
Tilt the steering column assembly towards the screwed nuts B and fix it on the dashboard beam by screwing on the nut A. Tighten the nut A first, and then the nuts B to the specified tightening torques.
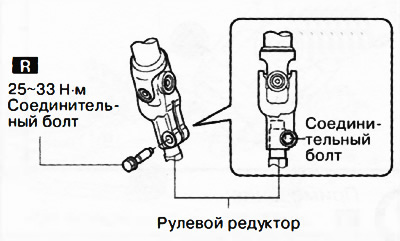
Insert the intermediate shaft into the steering gear shaft as shown in the illustration and tighten the new pivot bolt.
Note:replace the part with a new one after each removal.
Make sure the front wheels of the vehicle are in the straight ahead position, then install the steering wheel and tighten the new mounting bolt.
Note:
If the power steering control unit has been replaced, the following must be done:
- After installation, turn on the ignition or start the engine and wait about one minute for the electric power steering control unit to perform an automatic configuration.
- Switch off the ignition and wait approx. 3 seconds.
- Turn on the ignition (engine can be turned on or off), to allow the control unit to perform automatic configuration.
- Delete trouble codes from the memory of the control unit.