


Note: After replacing shafts, bearings, differential or gearbox housing, it is necessary to adjust the preload of the primary and secondary shaft bearings and differential.
Checking and adjusting the preload of the primary and secondary shaft bearings and differential
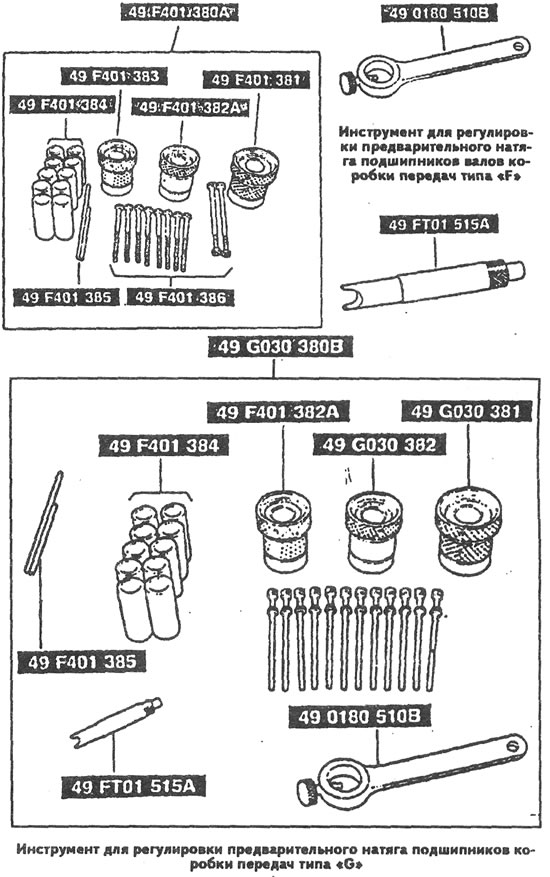
Note: These operations are performed using a special tool, shown in the figure.
Press the outer bearing rings of the primary and secondary shafts into the clutch housing sockets together with the installation rings, but without the adjusting rings.
Press the outer race of the differential bearing together with the installation ring into the socket of the gearbox housing using a 68 mm diameter drift.
Install the differential.
Install the following mandrels on the outer bearing rings:
- mandrel 49 F 401 383 on the outer ring of the primary shaft bearing of the gearbox type "F";
- mandrel 49 F 401 382 A on the outer ring of the primary shaft bearing of the gearbox type "G";
- mandrel 49 F 401 382 A on the outer ring of the secondary shaft bearing of the gearbox type "F";
- mandrel 49 G 030 382 on the outer ring of the secondary shaft bearing of the gearbox type "G";
- mandrel 49 F 401 381 on the outer ring of the differential bearing of the gearbox type "F";
- mandrel 49 G 030 381 on the outer ring of the differential bearing of the gearbox type "G".
Install the primary and secondary shafts together with the gears into the clutch housing at the same time.
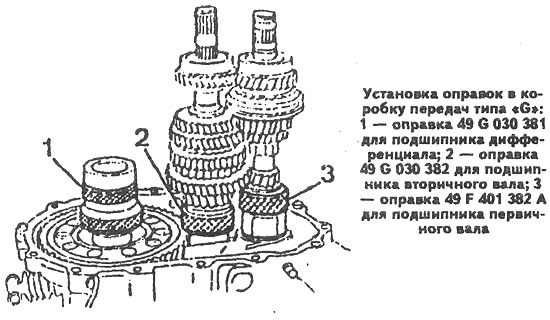
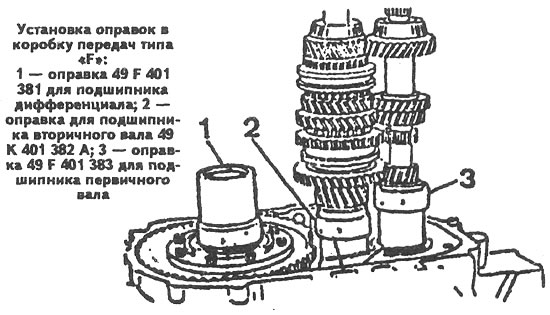
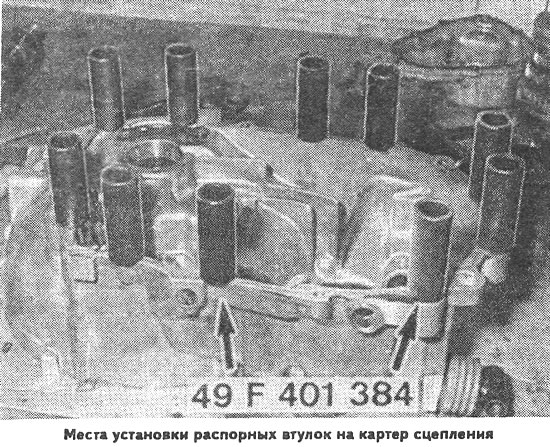
Install spacer sleeves 49 F 401 384 on the clutch housing at the points shown in the photo.
Install the gearbox housing.
Screw in bolts 49 F 401 386 for type "F" gearbox or 49 B 019 021 for type "G" gearbox and tighten them to a torque of 1.8 - 2.0 kgf·m or 3.8-5.3 kgf·m, respectively.
Using two levers 49 F 401 385, turn parts A and B of the mandrels so that the gap shown in the figure is maximum; it is not permitted to use any other instrument.
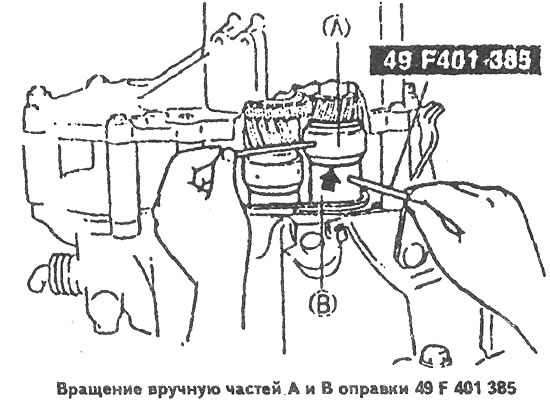
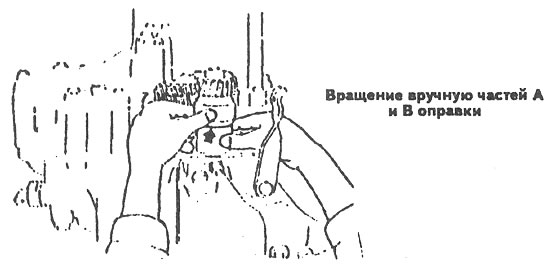
Turn the mandrels in the opposite direction until the gaps are selected.
Manually tighten both parts of the mandrels in the same direction until they stop.
Make sure the shafts rotate freely.
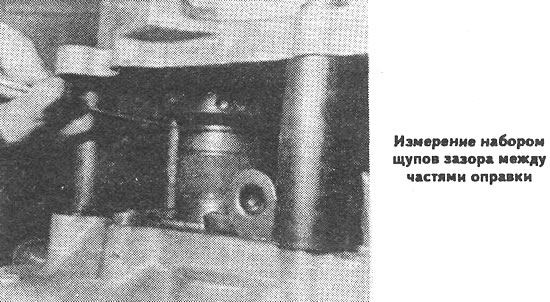
Measure the clearance on the primary and secondary shafts using a set of feeler gauges, inserting the feeler gauges between the mandrel parts, and record its value.
Determine the thickness of the adjusting ring installed under the outer ring of the bearing primary shaft according to the formula:
S = A - B,
where:
S — thickness of the adjusting ring;
A is the gap size between the mandrel parts;
B is the thickness of the spring washer.
Example: The gap between the mandrel parts is 0.94 mm, the thickness of the spring washer is 0.70 mm.
S = 0.94 - 0.70 = 0.24 mm.
Select the adjustment ring that is closest in thickness to 0.24 mm, i.e. in this case 0.20 mm.
(For details, see the website: «mazbook»)
Determine the thickness of the adjusting ring installed under the outer ring of the secondary shaft bearing of the type "F" gearbox, which should be as close as possible to the value of the gap between the parts of the mandrel.
For example; if the gap between the mandrel parts is 0.39 mm, then an adjusting ring with a thickness of 0.40 mm should be used.
Determine the thickness of the adjusting ring installed under the outer ring of the secondary shaft bearing of the type "G" gearbox, using the formula S=AB (see above); In this case it is equal to 0.25 mm.
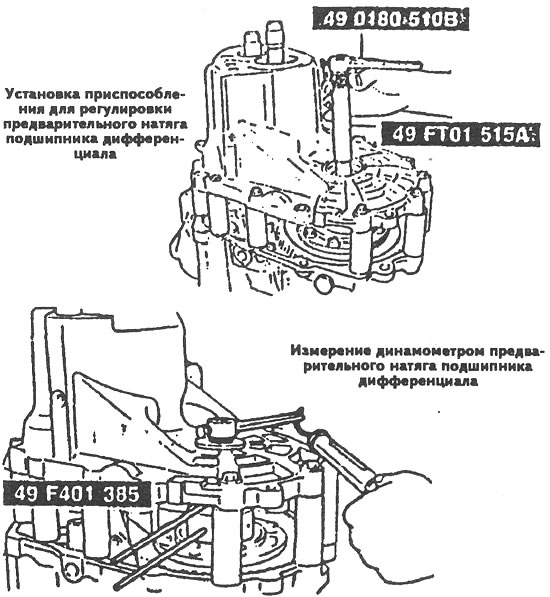
Insert the differential bearing preload adjusters 49 FT 01 515 A and 49 180 510 B into the hole in the axle gear.
Measure the differential bearing preload using a special dynamometer; it should be within 0.03-0.75 Nm.
If necessary, use two levers 49 F 40 385 to turn both parts of the mandrel until the required bearing preload is achieved.
Measure the gap between the mandrel parts at several points using a set of feeler gauges.
Select an adjusting ring whose thickness should be as close as possible to the largest value of the gap between the mandrel parts.
Disconnect the gearbox housing from the clutch housing.
Remove the primary and secondary shafts and differential.
Press out the outer bearing rings.
Replace the mounting rings with the selected adjusting rings.
Press the outer bearing rings into the appropriate seats.