


The following spare parts must be purchased:
- Injection engines: 2 copper gaskets.
- Fuel filter for the corresponding engine. When purchasing, please provide the year of manufacture and model of the car.
Diesel engine
Draining sediment/replacing the fuel filter
[Original version of the article on the website: mazbook.ru]
A suitable vessel is required to collect the sludge.
Caution! Leaking diesel fuel must be removed from rubber parts immediately (coolant hoses), otherwise the rubber parts will be destroyed over time.
Draining sludge
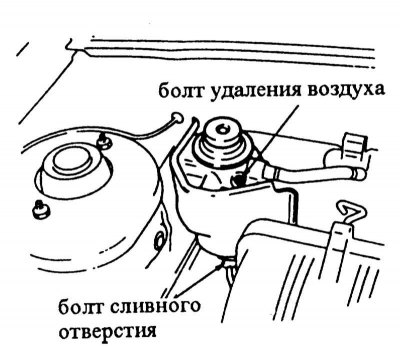
1. Place a suitable bathtub under the drain fitting.
2. Loosen the drain bolt by hand about one turn.
3. Pump with a hand pump (about 7 times) until unmixed diesel fuel starts to come out.
4. Tighten the sediment drain bolt by hand.
5. After draining the sediment from the fuel system, it is necessary to remove air.
Filter replacement
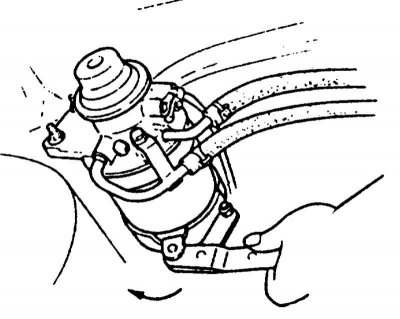
1. If equipped, disconnect the sludge level sensor plug.
2. Loosen the tension bolt -arrow- of the fuel filter mounting clamp.
3. Unscrew the fuel filter from the holder using a special key and remove it.
4. If equipped, unscrew the sediment level sensor with water pump pliers, insert and screw it into the new filter.
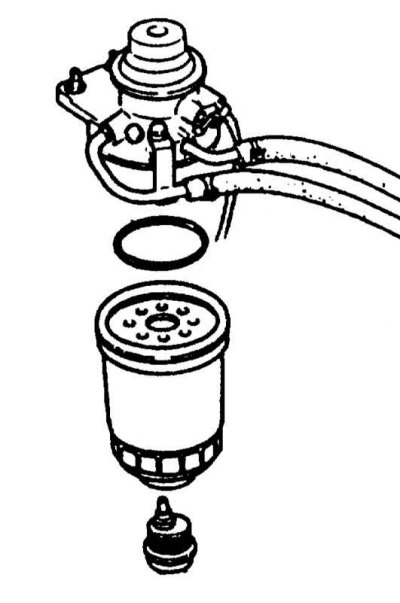
5. Cover the new gasket with diesel fuel and install it.
6. Fill the filter to the brim with diesel fuel and screw it on by hand.
7. Remove air from the fuel system.
8. After completing a test drive, check the fuel system for leaks.
Removal air from the fuel system
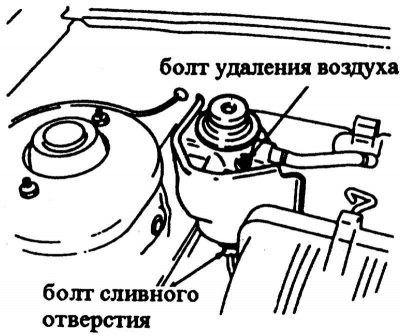
1. Loosen the air bleed bolt.
2. Pump with a hand pump until the air bubbles in the fuel coming out of the air bleed screw disappear.
3. Tighten the bolt while pressing the hand pump.
4. Pump with a hand pump (about 15 times) until you feel resistance when pressing.
5. Turn on the preheater and then start the engine.
6. If the engine does not start, bleeding should be repeated.
7. Visually check the tightness of the fuel system, especially the fuel filter connections.
Carburetor engines
The fuel line is located in the engine compartment in the fuel supply line. To disconnect the supply and return lines, you will need 2 clamps. You can use two clamps.
Removal
Warning! Do not work near open flame. Fire hazard!
1. Disconnect the ground cable from the battery.
Warning! This will erase the engine fault memory or the radio security code. Before disconnecting the battery, read the instructions in Section Removal and installation the battery.
2. Clamp the supply and return lines before and after the fuel filter.
3. Loosen the hose clamps and disconnect the lines from the filter.
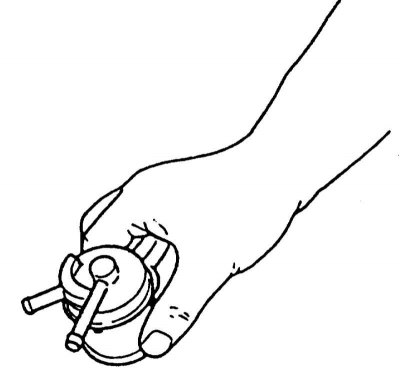
4. Remove the fuel filter.
Installation
1. Place the pipes on the new filter and secure with clamps. The arrow on the filter indicates the direction of fuel flow.
2. Remove the clamps.
3. Connect the ground cable to the battery.
4. If available, set the time on the clock and set the security code for the radio receiver.
5. After a test drive, check the tightness of the connections.
Engines with injection system
When removing the fuel filter, a large amount of fuel will leak out, a suitable container is needed to collect it. Two rubber plugs are needed to close the fuel lines.
Removal
Warning! Do not work near open flame. Fire hazard!
1. Reduce fuel pressure.
2. Disconnect the ground cable from the battery.
Warning! This will erase the engine fault memory or the radio security code. Before disconnecting the battery, read the instructions in Section Removal and installation the battery.
3. Place a suitable container under the fuel filter.
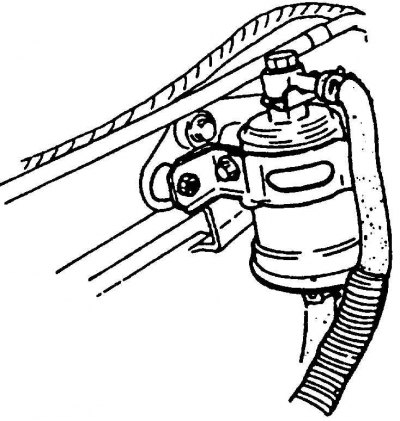
4. Slowly remove the lower fuel line, having first loosened the clamp. Close the line with a rubber plug.
5. Allow the fuel to drain into the container.
6. Unscrew the upper connecting bolt and remove the fuel line with 2 gaskets.
7. Release the fuel filter from the mount.
Installation
1. Insert the fuel filter into the mount.
2. Install the upper connecting bolt with 2 gaskets and tighten.
3. Remove the plug from the lower pipeline, connect it and secure it with a clamp.
4. Connect the ground cable to the battery.
5. If available, set the time on the clock and set the security code for the radio receiver.
6. Connect the fuel pump plug.
7. Install the rear seat, see Section Back seat.
8. After a test drive, check the tightness of the connections.