
Removal and installation of the Common Rail fuel rail
Attention.
- Leaks in the fuel lines of a pressurized system are dangerous. Fuel can ignite and cause equipment damage, serious injury or even death. In addition, fuel can get on the skin and in the eyes of a person. To prevent this, it is imperative to perform a pressure relief procedure in the power system.
- A person carrying static electricity can cause a fire or explosion that could result in death or serious injury. Before working on the fuel system, you must remove the static charge from yourself by touching the car body.
- If fuel comes into contact with engine parts, it may cause these components to malfunction or cause a fire. Be sure to clean up any spilled fuel with a clean rag.
- Do not allow foreign material to enter the high pressure fuel line. To do this, always tighten the high-pressure fuel line connections to the specified tightening torque.
Note. In the case of replacing the common rail fuel rail, it is necessary to carry out the procedure for learning the amount of fuel injected by the injection system.
Removing the common rail fuel rail
1. Disconnect the negative battery terminal.
2. Complete the power system maintenance preparation procedure.
3. Remove the decorative engine cover.
4. Remove all high pressure fuel lines.
5. Disconnect rail fuel pressure sensor connector.
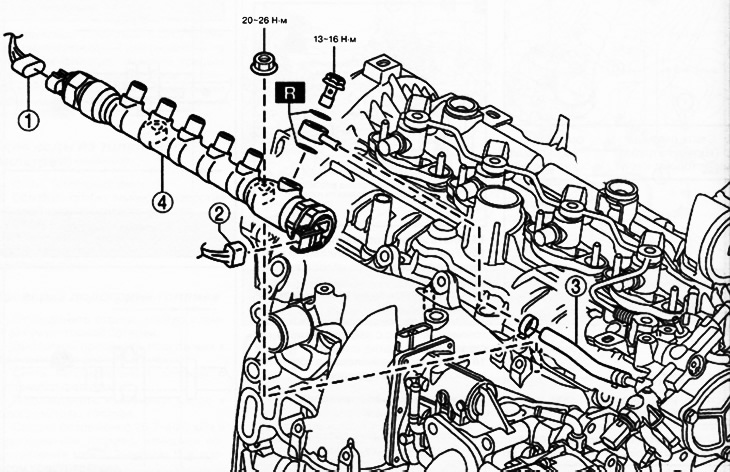
1. Fuel pressure sensor connector.
2. Fuel pressure relief valve connector.
3. Fuel return hose
4. Common rail fuel rail.
Note:: replace the part with a new one after each removal.
6. Disconnect the fuel pressure relief valve connector.
7. Disconnect the fuel return hose by removing the clamp or by unscrewing the hollow bolt from the fuel rail.
8. Unscrew the fastening nuts and remove the Common Rail fuel rail from the engine.
Common rail fuel rail installation
1. Install the fuel rail on the engine and screw on the fastening nuts.
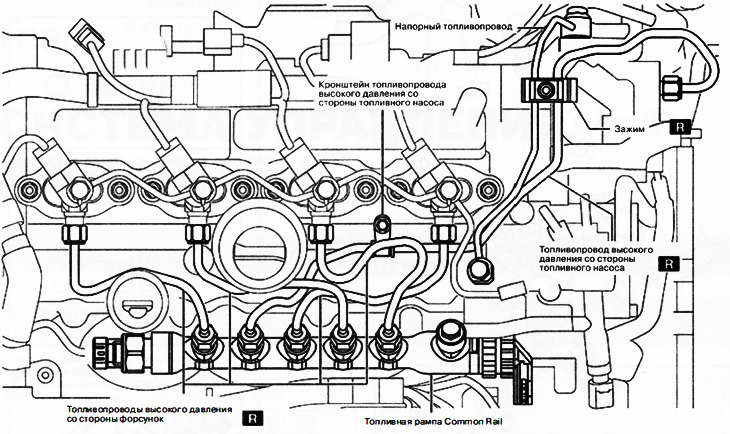
2. Fit the union nuts of the new high pressure fuel line on the fuel pump side.
3. Fit the union nuts of the new high pressure fuel lines on the injector side.
4. Connect fuel return line.
5. Tighten the new clamp to 4.2-5.2 Nm.
6. Tighten the high pressure fuel line bracket on the fuel pump side to 8-11 Nm.
7. Tighten the union nuts of all high pressure fuel lines on the side of the fuel rail to a torque of 32-42 Nm.
8. Tighten the connecting nuts of all high-pressure fuel lines on the side of the high-pressure fuel pump and injectors to a torque of 32-42 Nm.
9. Tighten the Common Rail fuel rail nuts to 20-26 Nm.
10. Tighten the hollow bolt of the return fuel line to a torque of 13-16 Nm.
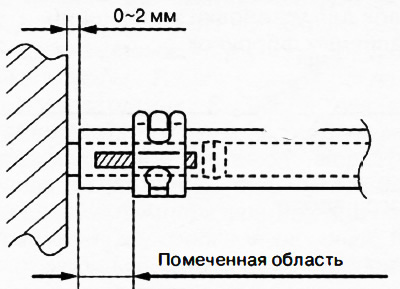
Note. Install the fuel return hose as shown.
Checking the Common Rail Fuel Rail
Attention. It is extremely dangerous to remove the fuel pressure sensor and pressure limiting valve from the common rail fuel rail as this can lead to fuel leaks later on. Do not remove the pressure sensor and fuel pressure limiting valve from the common rail fuel rail.
Visually inspect the common rail fuel rail for cracks, damage or rust. If any defects are found, replace the fuel rail with a new one.