
Removing
Attention! The clearance between the brake light switch and the brake pedal is adjusted automatically when the brake light switch is inserted into the hole on the brake pedal and rotated to lock. If the brake light switch is not properly installed, the gap may not be correct, resulting in the brake lights not working properly. Therefore, before installing the brake light switch on the pedal, always check the correct installation and position of the brake pedal (completely released).
Once the brake light switch gap has been automatically adjusted, it cannot be re-adjusted. Therefore, replace the switch with a new one when replacing the brake booster or pedal, or when doing any work that changes pedal travel.
Remove the battery and battery tray.
Disconnect the brake line (from the side of the master cylinder).
Remove the brake pedal bolts and nuts.
Move the brake booster to the front of the vehicle so that the brake booster fork does not come into contact with the brake pedal lever.
Remove the brake pedal.
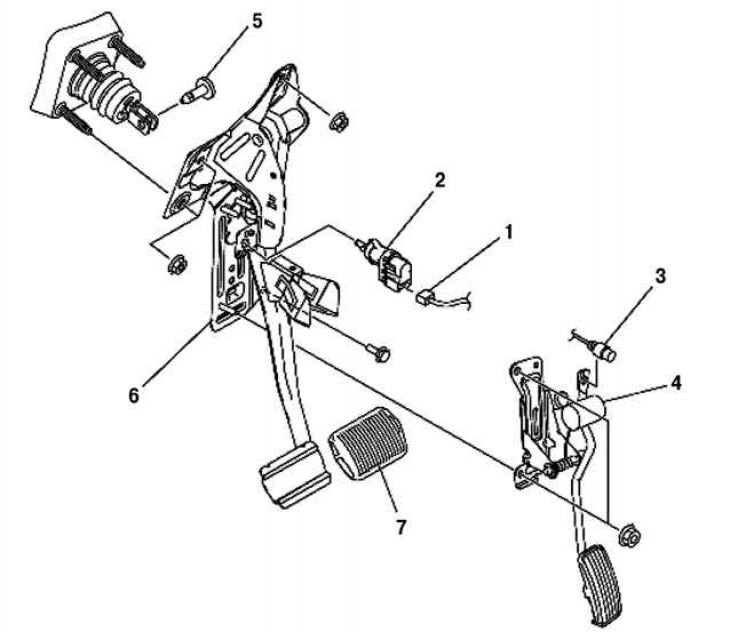
Pic. 6.19. How to remove brake pedal parts: 1 – a socket of the switch of signals of braking; 2 – the switch of signals of braking; 3 - throttle cable; 4 – a pedal of management of giving of fuel; 5 - hinge axis; 6 – brake pedal; 7 – a basic platform of a pedal
Installation
Install the new pivot pin by aligning the holes in the brake booster yoke and the brake pedal.
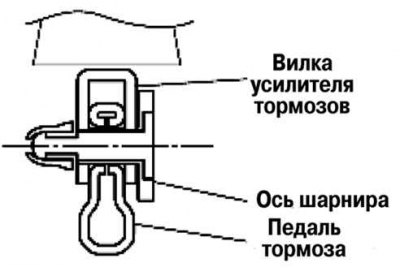
Pic. 6.20. Checking the installation of the hinge axis
Make sure that the pivot pin touches the brake booster yoke completely (pic. 6.20).
Check the brake pedal.
With the brake pedal fully released, insert the new brake light switch into the hole on the brake pedal.

Pic. 6.21. Turning the brake light switch 45°
Secure the brake light switch by turning it counterclockwise 45° (pic. 6.21).
Adjustment of the limiter bolt and pedal limiter clearance after the brake light switch is securely locked is not required.