
Removal and installation of the main brake cylinder
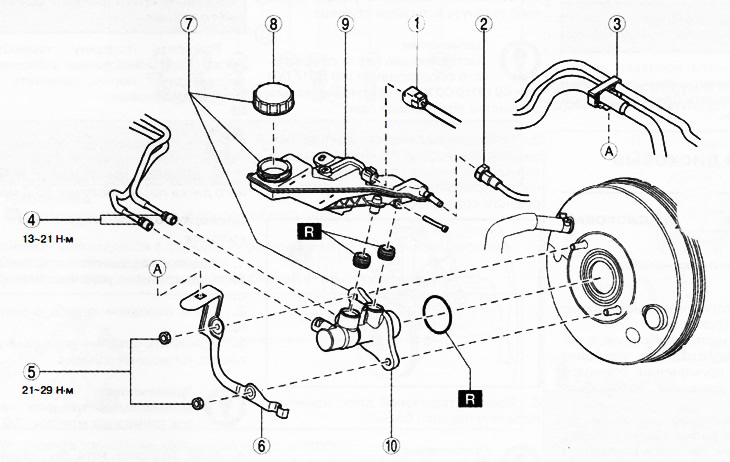
1. Brake fluid level sensor connector.
2. Clutch backup hose (versions with manual transmission).
3. Hose holder.
4. Brake pipelines.
5. Nuts.
6. Bracket.
7. Master brake cylinder assembly.
8. Cover.
9. Brake fluid reservoir.
10. Master brake cylinder.
Note:replace the part with a new one after each removal.
1. Remove the battery from the shelf.
2. Disconnect the brake fluid level sensor.
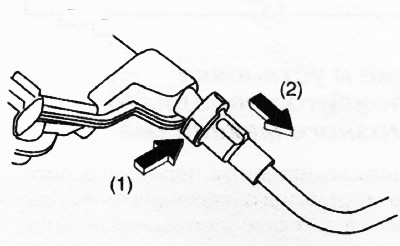
3. Disconnect the reserve hydraulic clutch hose in the sequence shown in the figure.
4. To release holders of hoses and to disconnect brake pipelines from the main brake cylinder.
5. To turn away nuts and to remove an arm from the main brake cylinder.
6. Remove the brake cylinder assembly with the brake fluid reservoir.
7. Remove the tank cover, then unscrew the fixing screw and remove the tank from the brake master cylinder.
8. Installation is made in an order, the return to removal.
Note: Insert the reserve hose of the hydraulic clutch and, by pulling, make sure that it is securely fixed, then insert completely.
9. After installation, add brake fluid to the reservoir, remove air from the brake system and check the brake fluid level in the reservoir again.
Checking the brake fluid level sensor
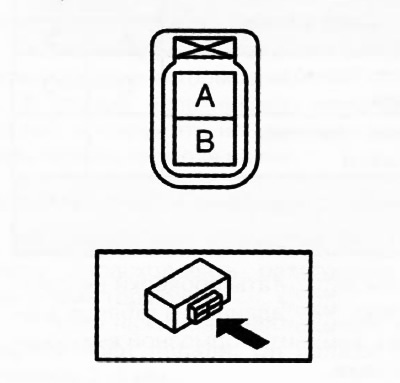
1. Disconnect the brake fluid level sensor connector from the brake master cylinder.
2. To check up presence of conductivity between conclusions of a socket of the gauge of level of a brake liquid according to the table below.
 | 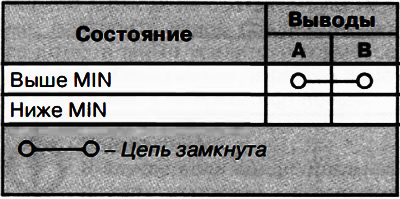 |
3. If the test results do not match the values given in the table, replace the brake fluid reservoir with a new one.