
Checking the technical condition
Thoroughly clean all parts. Clean the mating surfaces of the parts with solvent. Never clean the mating surfaces with sharp objects and abrasive materials.
Check the mating surfaces for signs of wear, scratches or nicks.
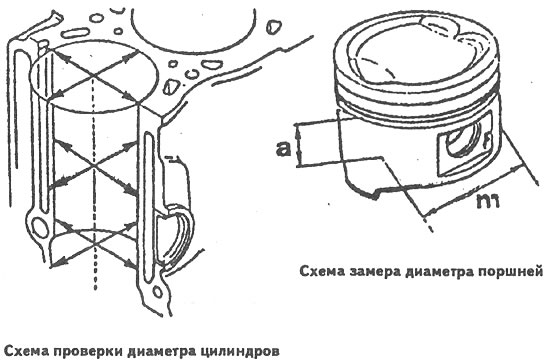
Measure the dimensions of cylinders, crankshaft, pistons and other parts (see nominal and repair dimensions in subsection «Detailed Specifications»).
Check the condition of the pistons and connecting rods.
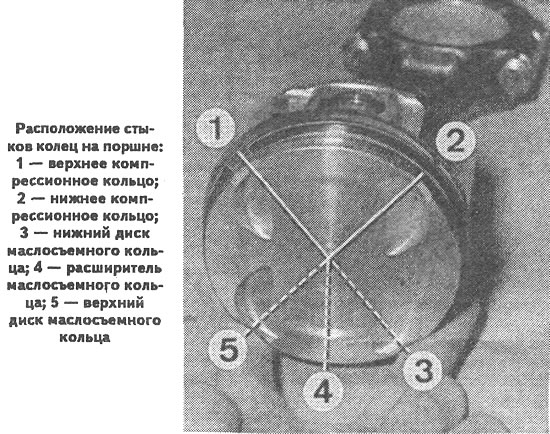
Remove piston rings.
Separate the piston and connecting rod. To do this, remove one of the circlips from the piston pin and press out the pin.
Check the condition of the main and connecting rod bearings. No adjustments can be made on the inserts. If scuffed, scratched or peeled, replace the liners with new ones.
Check the markings on the pistons and connecting rods.
Replace the connecting rod bolts and the connecting rod bushing if necessary.
Assembly
Replace the gaskets and rings, lock washers and nuts every time the engine is reassembled.
As the engine is assembled, lubricate the rubbing surfaces of the parts with engine oil.
When assembling the engine, install parts in accordance with the factory marks and marks made during disassembly, install unnoticed parts in their original places (liners, piston rings, pistons, etc.).
Turn over the block of cylinders and establish it on the stand.
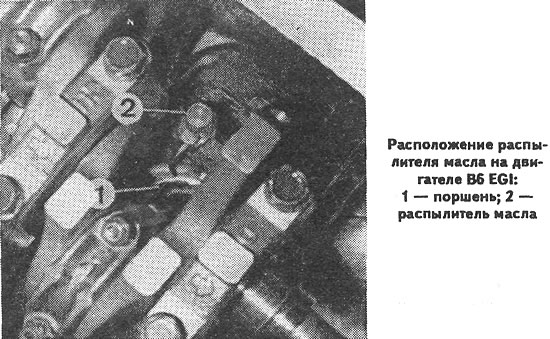
On the B6 EGI engine, install piston oil sprayers.
Lubricate the main bearing shells with engine oil and install them in the cylinder block seats and main bearing caps, making sure the lubrication holes are in the correct position.
Lay the crankshaft in the main bearings and insert the thrust half rings into the sockets of the 4th main bearing. Establish covers of radical bearings and tighten bolts of their fastening.
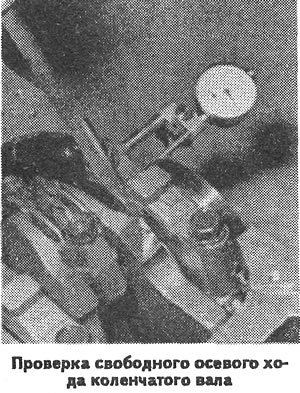
Check the axial play of the crankshaft using an indicator, the leg of which should rest against into the crankshaft flange.
Press the crankshaft rear oil seal into the holder, having previously lubricated its edges with engine oil, and install the holder with a new gasket.
Connect the pistons to the connecting rods so that the mark on the bottom head of the connecting rod is opposite the mark «F» (see photo) on the piston, which should be directed towards the camshaft drive.

Install the bearings lubricated with engine oil into the connecting rods and into the connecting rod caps. Install the connecting rods and caps on the crankshaft journals, tighten the connecting rod bolts. Connecting rod caps must be installed so that the marks on the cap and on the lower head of the connecting rod are opposite each other.
Lubricate the cylinder walls with engine oil.
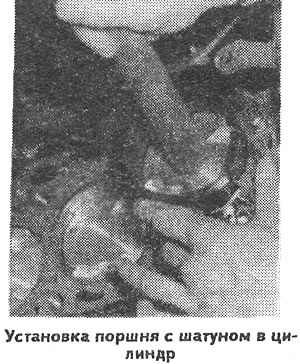
Using a piston ring compressor, insert the pistons with connecting rods into the cylinders so that the marks «F» on the pistons were directed towards the camshaft drive.
Install the front cover assembly with the oil pump to the crankshaft and replace the oil pump receiver.
Press a new front crankshaft oil seal into the front cover.
Install the oil pan.
Install the water pump with a new gasket.
Install the thermostat, new gasket and thermostat housing with the steam outlet facing up.
Install the flywheel on the crankshaft, block the flywheel with the Mazda 49E 301 060 retainer and tighten the mounting bolts.
Install the crankshaft sprocket.
Install the cylinder head.
Install the camshaft drive belt.