
1. Remove the radiator cap and check the pipe and cap for rust and lime deposits, if necessary, remove them.
Attention! Only remove the cover when the radiator is at least at hand temperature, otherwise there is a risk of scalding from the hot coolant. For safety, lay a rag around the nozzle.
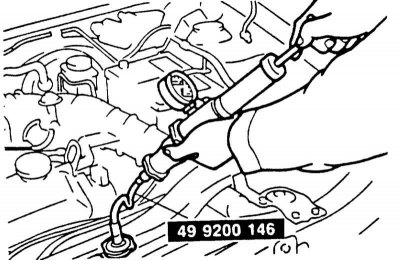
2. Screw on the connecting element of the tester instead of the radiator cap.
3. Create pressure in the system by pumping. The pressure should be around 1.1 bar.
4. The pressure created must be kept constant for 2 minutes. If the pressure drops, look for leaks in the cooling system.
5. Release the pressure and slowly unscrew the fitting.
Checking the pressure reducing valve
1. The pressure reducing valve is located in the radiator cap. Its task is to open the cooling system in the event of excess pressure and return the overflowing liquid to the expansion tank.
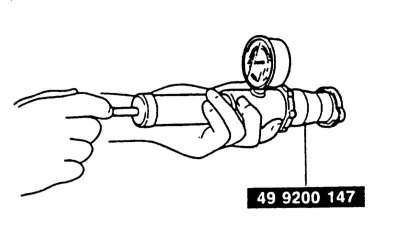
2. To check, screw the radiator cap onto the tester.
3. Create pressure. Load the valve with a pressure of 0.7 - 1.0 bar. After 10 seconds, check if the pressure has dropped. If the pressure has dropped, the cap should be replaced.
Checking the reduced pressure valve
1. The low pressure valve is also located in the radiator cap. After cooling the coolant in the system, it allows the coolant to flow out of the reservoir.
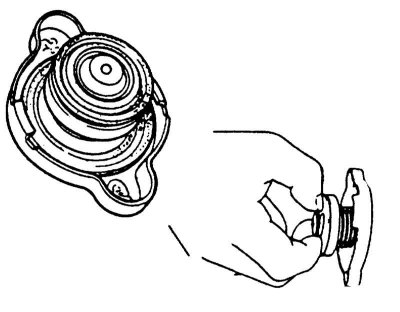
2. Remove the reduced pressure valve and check that it closes completely when released. If it does not close completely or if the gasket is damaged, the cover must be replaced.
3. Screw the cover onto the radiator; if damaged, replace the rubber gasket.