
Attention! Lambda probe connection cables must not be repaired or soldered. If the cable is damaged, replace the lambda probe as a set.
Examination
1. Warm up the engine, the pointer of the coolant temperature gauge should be in the middle of the scale.
2. Leave the engine to idle.
3. Disconnect the electrical connection and connect a voltmeter between the contact of the lambda probe and the vehicle ground.
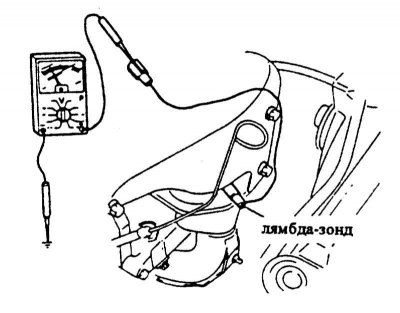
4. At a speed of 3000 rpm, the voltage should be approximately 0.55 V, to do this, apply a little gas with the throttle lever.
5. Increase the speed several times quickly and let it decrease. With an increase in the number of revolutions, the voltmeter should show a voltage of 0.5 to 1.0 V, with a decrease in revolutions from 0 to 0.4 V, otherwise the lambda probe should be replaced. (Sensitivity can be checked in the workshop using a diagnostic tool).
Removing
1. Disconnect the plug.
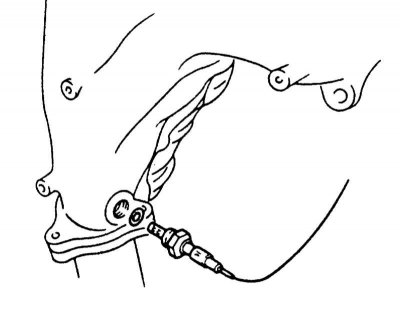
2. Unscrew the lambda probe on the exhaust manifold and remove with gasket. If necessary, unscrew the heat shield first.
Installation
MAZDA 323 4 WD (four-wheel drive)
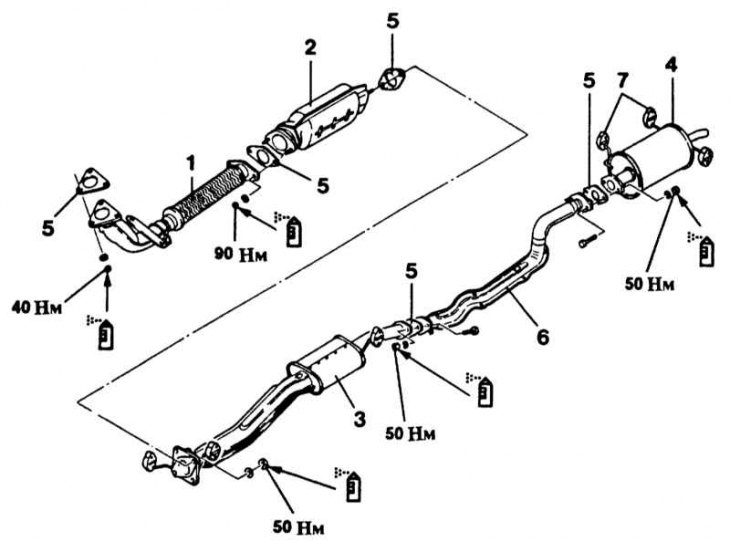
1 - exhaust pipe of the muffler; 2 - catalyst; 3 - middle muffler; 4 - rear muffler; 5 - gasket (replace); 6 - intermediate pipe; 7 - rubber mount
Attention! When replacing, take a lambda probe only of the same version.
1. Clean the thread.
2. Apply BOSH special grease to the threads of the lambda probe only. New probes are already coated with this lubricant. Grease must not get on the splines or holes of the sensor body. If possible, do not touch the body of the new lambda probe, do not stain it.
Attention! If the sensor is screwed in without a special high-temperature paste, over time the thread will stick firmly and the lambda probe cannot be unscrewed.
3. Screw in the lambda probe with gasket and tighten firmly 40 Nm.
4. Connect the plug to the lambda probe.