
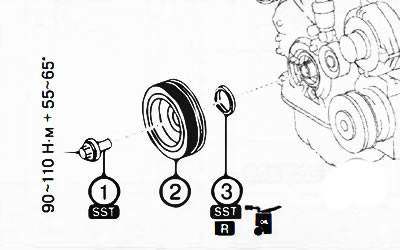
1. Crankshaft pulley bolt.
2. Crankshaft pulley.
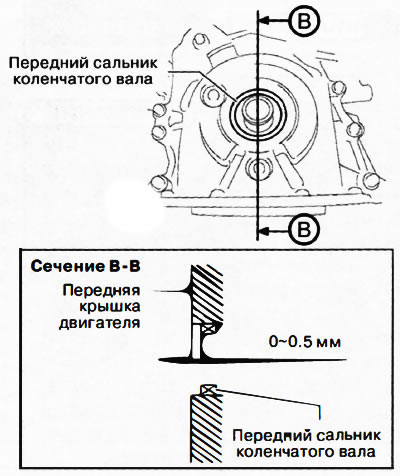
3. Front crankshaft oil seal.
Attention. A hot engine can cause burns. Before starting work, turn off the engine and wait until it cools down.
1. Remove front protective tray #2.
2. Remove mudguard.
3. Remove the attachment drive belt.
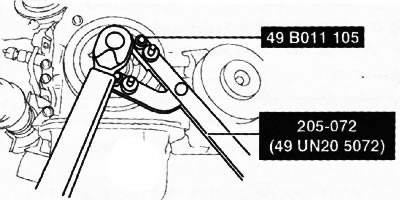
4. Install special tools on the crankshaft pulley to fix it from turning.
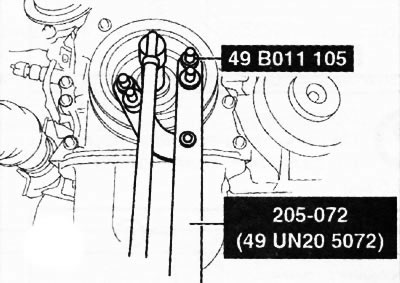
Attention.
- To prevent damage to the crankshaft pulley, it is necessary to protect it with a clean cloth so that the rod part (205-072) special tool did not touch the crankshaft pulley.
- To prevent damage to the engine front cover, keep tabs out of (49 VO11 105) special tool between the crankshaft pulley and the engine front cover.
5. To turn away a bolt of fastening of a pulley of a cranked shaft.
6. Remove the crankshaft pulley.
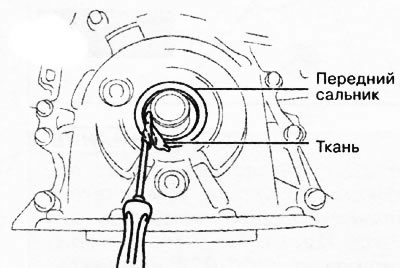
7. Cut off the edges of the stuffing box with a regular knife.
8. Remove the oil seal using a flat screwdriver wrapped in a clean cloth so as not to damage the surfaces of the crankshaft.
9. Apply clean engine oil to the inside surfaces of the new front crankshaft oil seal.
10. Manually insert the front crankshaft oil seal into the engine front cover.
11. Press in the oil seal evenly using a suitable mandrel and hammer.
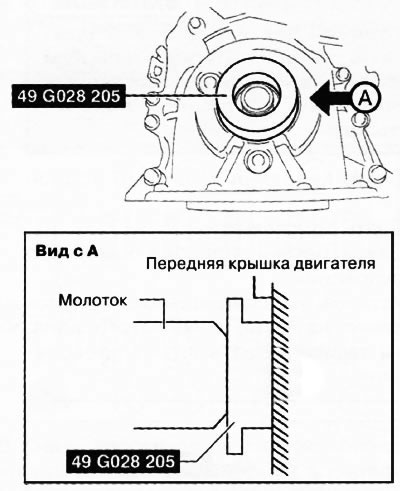
Note: Pressing depth of the crankshaft front oil seal: 0-0.5 mm.
12. Install the crankshaft pulley.
13. Install special tools on the crankshaft pulley to. secure it from turning.
Attention.
- To prevent damage to the crankshaft pulley, it is necessary to protect it with a clean cloth so that the rod part (205-072) special tool did not touch the crankshaft pulley.
- To prevent damage to the engine front cover, keep tabs out of (49 8011 105) special tool between the crankshaft pulley and the engine front cover.
14. Tighten the crankshaft pulley bolt in two steps:
- Stage 1: 90-110 Nm.
- Stage 2: 55-65°.
15. To establish other parts of the engine in an order, the return to removal.