
2. Drain the coolant (see chapter "Maintenance and general inspection and adjustment procedures").
3. Remove the upper radiator hose.
4. Remove the cooling fan shroud and cooling fan (see chapter "Cooling system").
5. Remove the parts in the order they are numbered in the figure.
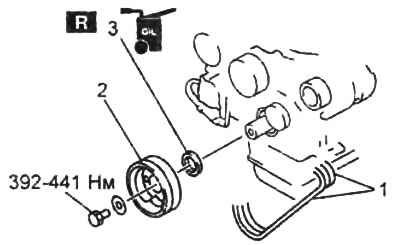
1 - drive belts for attachments,
2 - crankshaft pulley,
3 - stuffing box (P/N - WE01-10-602).
6. Installation of parts during assembly is carried out in the reverse order of removal.
7. Check the engine oil level in the engine.
8. Adjust the tension of the accessory drive belts (see chapter "Maintenance and general inspection and adjustment procedures").
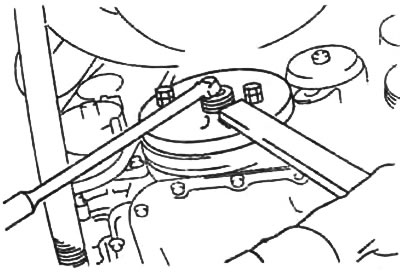
Note on removing the crankshaft pulley
1. Using the clamp, fix the crankshaft pulley.
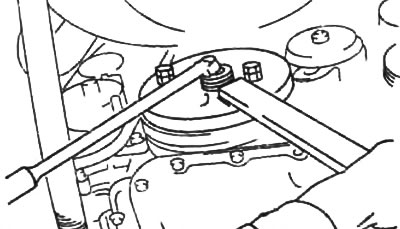
2. Remove the crankshaft pulley.
Attention:
- After removing the crankshaft pulley, do not rotate the crankshaft.
- Do not remove the key from the crankshaft toe.
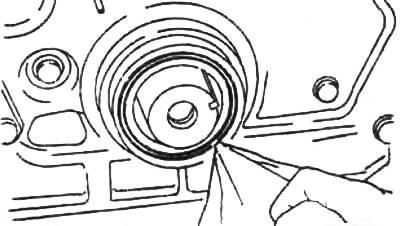
Note on removing the front oil seal
1. Cut off the lip of the gland.
2. Using a screwdriver wrapped in cloth, remove the gland.
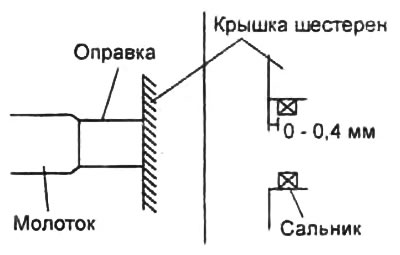
Front oil seal installation note
1. Apply a coat of engine oil to the lip of the new crankshaft front oil seal.
2. Carefully preinstall the oil seal into the gear cover by hand.
3. Using a hammer and a mandrel of suitable diameter, press the oil seal into the gear cover.
Note: The oil seal must be flush with the gear cover by 0-0.4mm.
Crankshaft pulley installation note
1. Using the clamp, fix the crankshaft pulley.
2. Tighten the crankshaft pulley bolt.
- Tightening torque - 392-441 Nm