Contents: Note on removing the timing belt…⇓ Note on removing the timing belt ⇓ Timing Belt Installation Note ⇓ Timing Belt Cover Installation Note ⇓
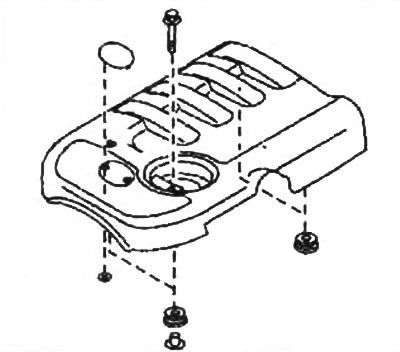
1. Remove the engine trim panel.
2. Disconnect the cable from the negative terminal of the battery.
3. Remove the parts in the order they are numbered in the figure "Removing and installing the timing belt".
4. Installation of parts during assembly is carried out in the reverse order of removal.
5. Start the engine and check that the pulleys are free of runout and that the belts are correctly positioned on the pulleys.
Note on removing the timing belt tensioner
1. Turn the crankshaft clockwise and align the timing marks as shown in the figure.
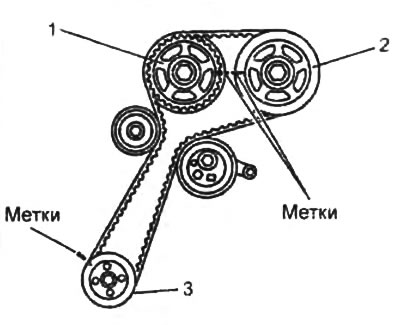
1 - intake camshaft pulley,
2 - exhaust camshaft pulley,
3 - fuel injection pump pulley.
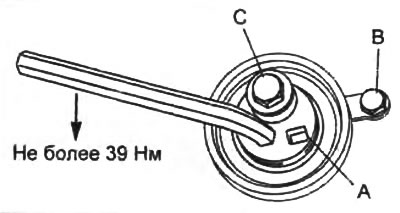
2. Using an Allen key, turn the timing belt tensioner counterclockwise.
Note: When turning the tensioner, do not exceed 39 Nm.
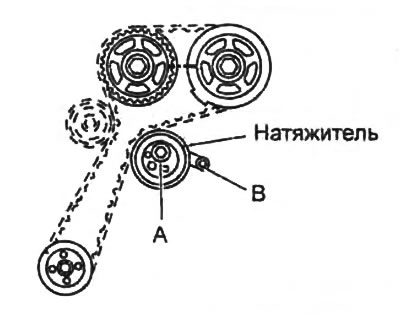
3. Insert a pin with a diameter of about 6 mm into the hole (A) to fix the tensioner.
4. First unscrew the tensioner mounting bolt (B), then the bolt (C). Remove the timing belt tensioner.
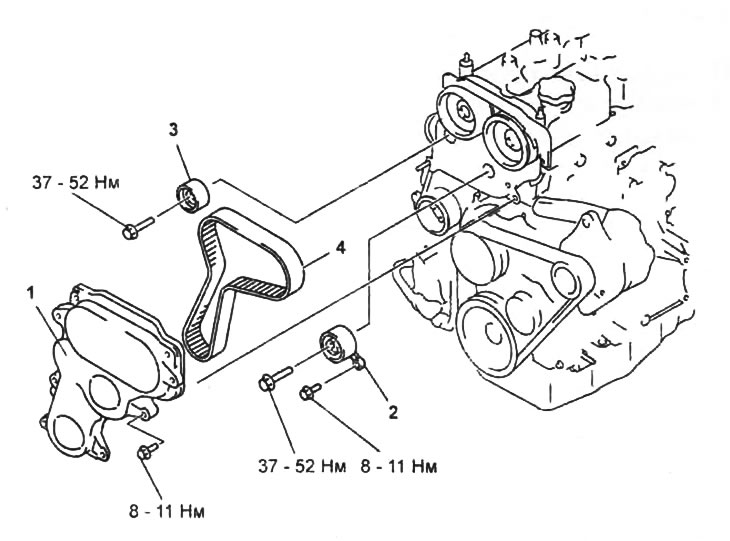
Removal and installation the timing belt.
1 - timing belt cover,
2 - timing belt tensioner (P/N - WE01-12-700),
3 - intermediate roller (P/N - WE01-12-730),
4 - timing belt (P/N - WE01-12-205).
Note: If, after removing the tensioner from the engine, the tensioner lever has moved and air has entered the tensioner, causing the lever to move freely, then the tensioner should be bled by performing the operations described below.
5. Install the tensioner on the engine.
6. Install the hex key on the tensioner and turn the tensioner counterclockwise with a torque of no more than 39 Nm, then slowly turn the tensioner to its original position. Repeat this operation several times.
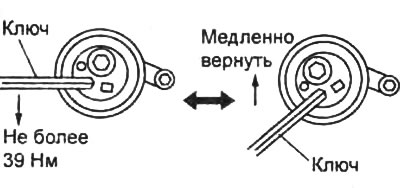
7. Check that resistance is felt when pressing the tensioner lever in the fully retracted position. If resistance is not felt, repeat the procedure again.
Note on removing the timing belt
1. Remove the timing belt tensioner.
2. Remove the timing belt.
Attention:
- After removing the timing belt, mark the belt with an arrow pointing in the direction of rotation.
- After removing the timing belt, do not rotate the crankshaft or camshafts, as this may cause damage to the pistons, valves and adjacent parts due to collision.
- Excessive belt twisting, belt turning inside out, or exposure to oil or grease may damage or significantly reduce the life of the belt.
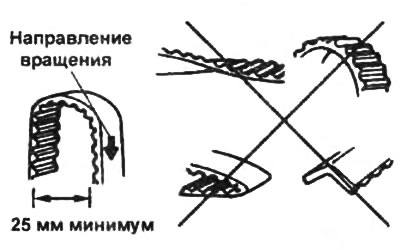
Timing Belt Installation Note
1. Align the marks on the pulleys shown in the figure with the installation marks.
Caution: To avoid excessive tension on the timing belt, before installing the timing belt, make sure that the fuel injection pump mounting bolts and nuts are tightened to the specified torque.
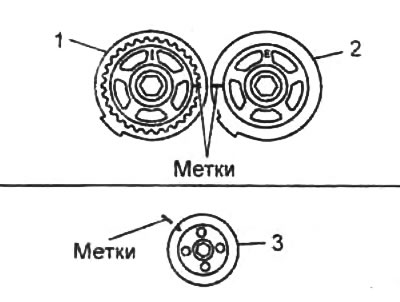
1 - intake camshaft pulley,
2 - exhaust camshaft pulley,
3 - fuel injection pump pulley.
2. Install the tensioner on the engine and tighten the tensioner mounting bolts (A and B).
[Original version of the article on the website MazBook.ru]
3. Install the timing belt.
4. Install the intermediate roller.
- Tightening torque - 37-52 Nm
5. Tighten bolt (A), then tighten tensioner mounting bolt (B).
6. Remove the locking pin from the tensioner.
7. Rotate the crankshaft pulley two full turns (720°) and make sure that the marks on the pulleys, indicated in the figure in point "1", coincide with the installation marks. If the marks do not coincide, remove the timing belt and repeat the installation procedures again.
Timing Belt Cover Installation Note
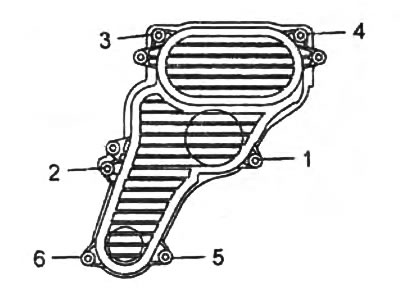
Tighten the timing belt cover mounting bolts in the sequence shown in the illustration.
- Tightening torque - 8 - 11 Nm