


1. Rear nuts.
2. Front nuts.
3. Central support bearing nuts.
4. Spacers.
5. Cardan shaft.
Caution. If the constant velocity joint was bent during removal/installation or during transportation of the cardan shaft, the joint boot could touch metal parts, causing damage. Before starting repair work, insert a rag between the boot and the metal cover to protect the boot.
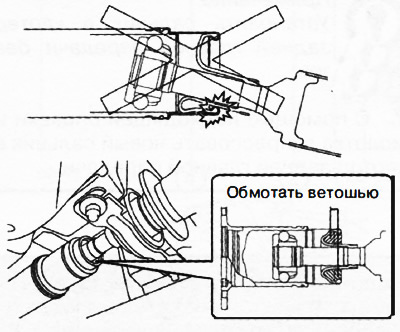
1. Remove the support cover from the bottom of the body
2. Remove the central protective tray.
3. Remove the exhaust pipe insulator.
4. Remove the tunnel cross member.
5. Remove the bracket from the bottom of the car.
6. Loosen the rear nuts of the propeller shaft.
7. Before loosening the nuts, apply alignment marks to the front coupling flange and constant velocity joint, as well as the rear coupling sleeve and cardan shaft yoke, as shown in the figure.
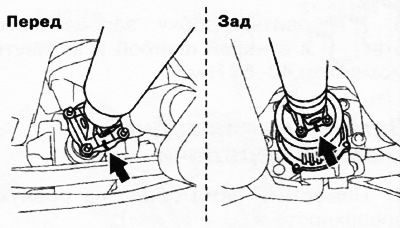
Caution: Do not use punching to mark the alignment to prevent imbalance.
8. Loosen the nuts (front, rear and central support bearing).
9. Remove the front and rear driveshaft nuts.
Caution: The cardan shaft must be installed on threaded studs.
10. Press the cardan shaft and remove it from the rear side.
Caution: Do not bend the propeller shaft to avoid damaging its boot.
11. Loosen the nuts securing the central support bearing and remove the propeller shaft from the vehicle.
12. Installation is carried out in the reverse order of removal, taking into account the following:
Attention.
- If the nuts are loose, make sure that the threaded studs are screwed into the coupling with a torque of at least 6.4 Nm (if necessary, tighten the studs to a torque of 6.4-9.6 Nm).
- If, when unscrewing the nut, it unscrews together with the stud, replace the stud with a new one.
- When replacing threaded studs, remove oil and other contaminants from them and from the mounting surfaces.
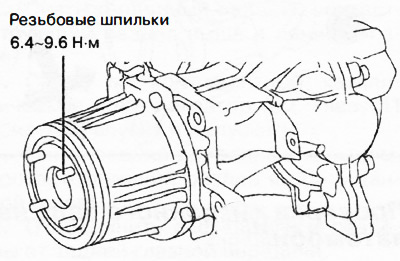
Note: The continuous thread studs are the same for the front and rear of the driveshaft.
Degrease the areas to be tightened.
Align the alignment marks and tighten the nuts (front, rear and central support bearing).
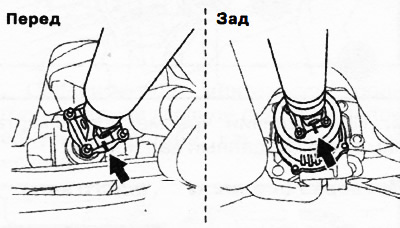
Caution: Do not bend the propeller shaft to avoid damaging its boot.
First tighten the front propeller shaft nuts to the specified torque, then tighten all other nuts.
Perform a test drive to ensure there are no extraneous noises or vibrations.