
Attention! Do not apply too much sealant and work especially carefully in the area of the oil passages. Parts must be assembled within 30 minutes of sealant application. After this time, the sealant must be removed and reapplied.
Removing
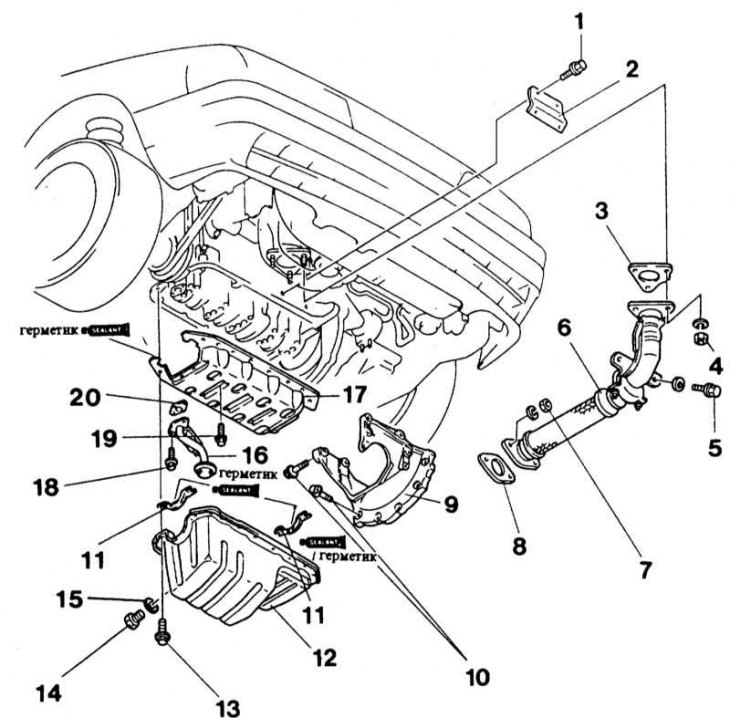
1 - bolt, 50 Nm; 2 - mounting plate; 3 - gasket, always replace; 4 - nut, 45 Nm; 5 - bolt, 50 Nm; 6 - exhaust pipe of the muffler; 7 - nut, 90 Nm; 8 - gasket, always replace; 9 - stiffener (On models with an aluminum sump, built into the sump.); 10 - bolts 50 Nm; 11 - gasket, always replace; 12 - oil pan; 13 - bolt, 10 Nm; 14 - oil drain plug, 40 Nm; 15 - gasket, always replace; 16 - mesh filter; 17 - bearing support; 18 - bolt, 10 Nm; 19 - bolt, 20 Nm; 20 - Gasket, always replace
1. Disconnect the ground cable from the battery.
Attention! This erases the data from the engine fault memory or the radio's security code. Before disconnecting the battery, read the instructions in Section Removing and installing the battery.
2. Raise the vehicle.
3. Drain engine oil.
4. Unscrew the exhaust pipe of the muffler, lower the exhaust system and tie it with wire, see Section Removal and installation of the generator.
5. B3, B6 (SOHC) from 9/89 issue: Unscrew the stiffener.
6. To unscrew bolts and nuts of fastening of the pallet crankcase.
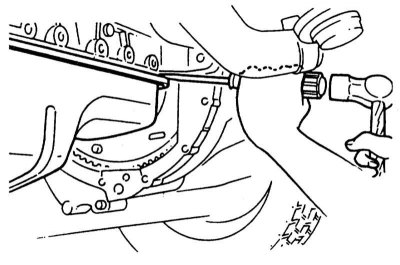
7. Steel pallet: To push out the pallet, install a screwdriver between the support bracket and the pallet.
Attention! A screwdriver must not be installed between the bearing support and the cylinder block. In addition, when removing the sump, make sure that the sealing surfaces of the sump and cylinder block are not damaged.
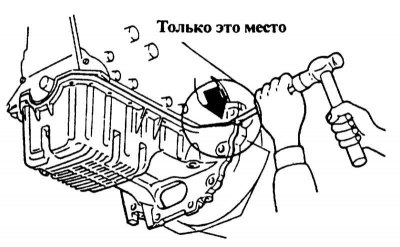
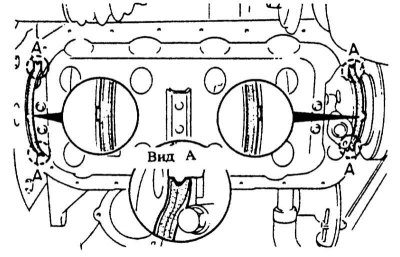
8. Aluminum pallet: Hammer a screwdriver into the indicated place between the pallet and the cylinder block.
Attention! The screwdriver must not be installed in any other place, otherwise the sealing surfaces of the oil pan and cylinder block will be damaged.
9. Remove the oil pan.
10. If present, unscrew the bearing support and remove it.
Installation
1. Carefully release the sealing surfaces of the oil pan, bearing housing and cylinder block from the old seal using a triangular scraper and a razor blade.
2. Thoroughly wipe the cylinder block, crankcase and oil pump. Otherwise, the seal may be damaged by escaping oil.
3. Wipe the sealing surfaces on the oil pan, bearing support and cylinder block with grease solvent and dry them. Alcohol or acetone can be used as a cleaner.
Attention! Do not use cleaners that corrode varnish surfaces.

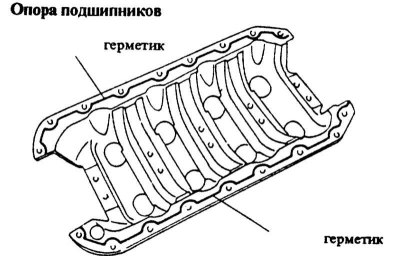
4. Apply silicone-based sealant to the shaded areas (e.g. DOW CORNING Q3 - 7057).
5. Apply silicone based sealant (e.g. DOW CORNING Q3 - 7057).
6. Install the bearing support and tighten it firmly 20 Nm.
7. Apply silicone based sealant (e.g. DOW CORNING Q3 - 7057) on the gaskets and install the gaskets.
 |  |
Attention! The tabs on the gaskets should face outward, the ends should fit cleanly.
8. Apply silicone based sealant (e.g. DOW CORNING Q3-7057).
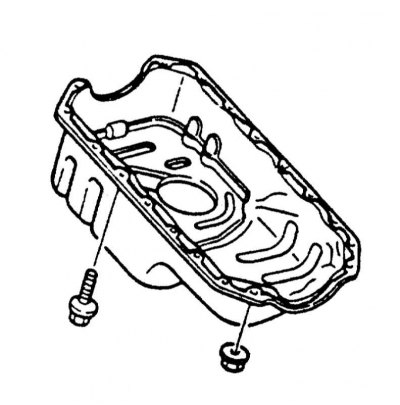
Steel pallet
1. Install the drip tray and screw evenly with force 10 Nm.
2. Install the stiffening element and screw the fastening bolts with force 50 Nm.
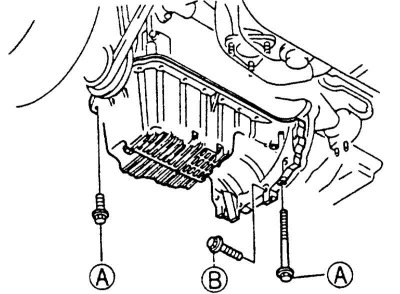
3. Aluminum pallet: Install the pallet and evenly tighten the bolts -A- with a force 10 Nm, bolts -B- with force 50 Nm.
4. Install the muffler downpipe.
5. Lower the car.
6. Fill in engine oil.
7. Connect the battery ground cable.
8. If available, set the clock and set the radio security code.
9. Carry out a test drive, check the oil level and the tightness of the oil pan, possibly carefully tighten the bolts.