


2. Remove the screws and take out the cover, pressing the bimetallic spring away from the damper holder.
3. Installation is carried out in the following sequence, but before tightening the screws, align the mark on the cover with the central mark on the body.
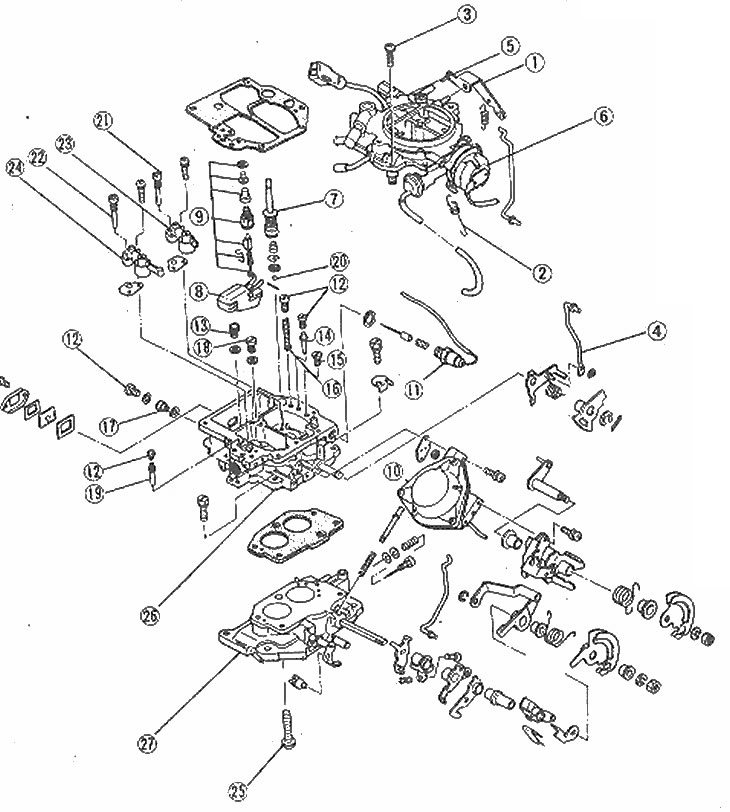
Disassembled view of a carburetor with an automatic choke
1. Lever; 2 Spring; 3. Screw; 4. Damper rod; 5. Air vents; 6. Automatic air damper assembly; 7. Accelerator pump; 8. Float; 9. Needle valve; 10. Secondary throttle diaphragm; 11. Fuel shut-off valve; 12. Locking screw; 13. Primary main jet; 14. Primary idle jet; 15. Primary idle air jet (No. 2); 16. Injection valve; 17. Secondary main jet; 18. Power jet; 19. Secondary idle jet; 20. Accelerator pump locking ball; 21. Primary main air jet; 22. Secondary main air jet; 23. Primary air diffuser and atomizer; 24. Secondary air diffuser and atomizer; 25. Bolt (with a vacuum channel); 26. Throttle body; 27. Throttle body
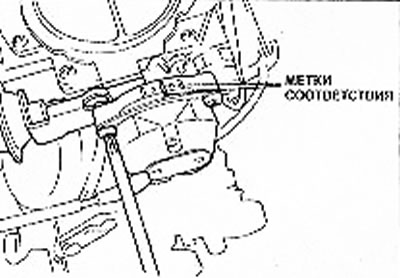
Alignment marks for the automatic choke cover (Chapter 5) |
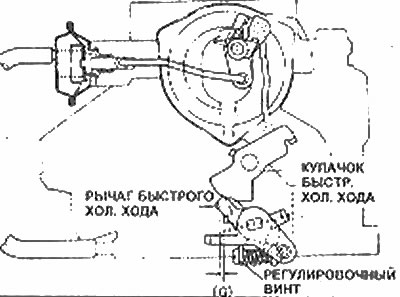
Adjusting the fast cooling gap. move - G (Chapter 5) |
[Original version of the article on the website: MAZBOOK.RU]