
Removal and installation
Caution: Do not allow clutch fluid to come into contact with painted surfaces. If this happens, wash off the spill immediately.
1. Remove the parts in the order they are numbered on the assembly drawing "Removal and installation of the clutch master cylinder".
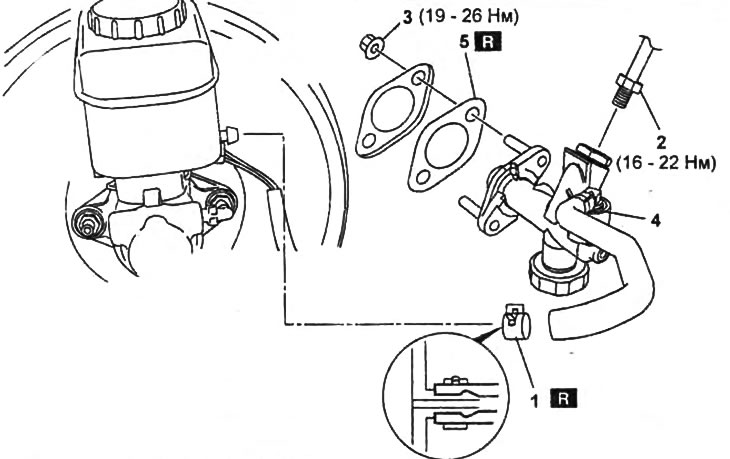
Removing and installing clutch master cylinder
1 - collar,
2 - tube,
3 - nut,
4 - clutch master cylinder,
5 - gasket.
2. Install in the reverse order of removal.
3. After installation, bleed the clutch hydraulic (see section "Clutch bleeding").
4. After installation, check and, if necessary, adjust the free play and travel of the clutch pedal (see section "clutch pedal").
Disassembly and assembly
When assembling and disassembling the master cylinder, follow the assembly drawing "Clutch Master Cylinder".
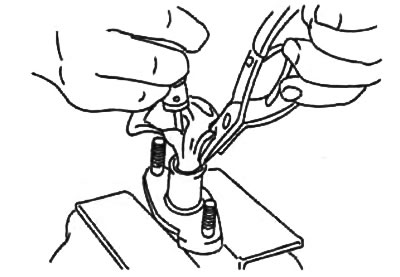
Disassembly/Assembly Note
Using a screwdriver wrapped in rags, push the piston into the cylinder and hold it down. Remove/install retaining ring.
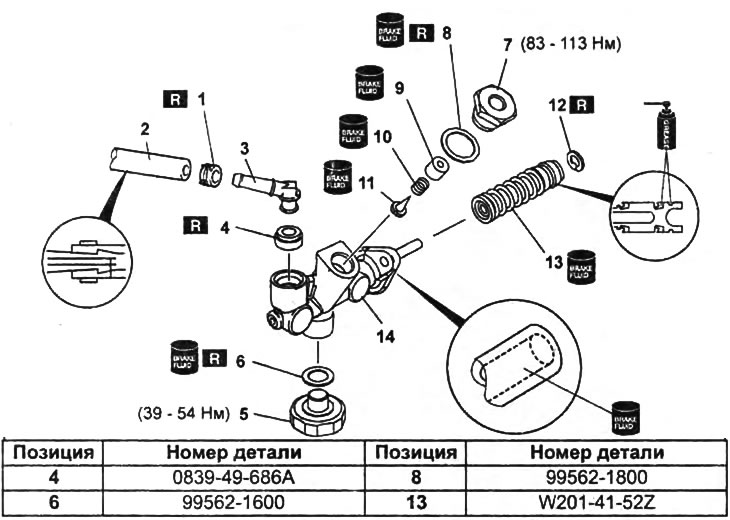
Clutch Master Cylinder.
1 - collar,
2 - supply hose,
3 - fitting,
4 - connecting sleeve,
5 - damper,
6 - gasket,
7 - bolt,
8 - gasket,
9 - one-way valve piston,
10 - return spring,
11 - one-way valve pin,
12 - retaining ring,
13 - piston assembly,
14 - clutch master cylinder housing.