


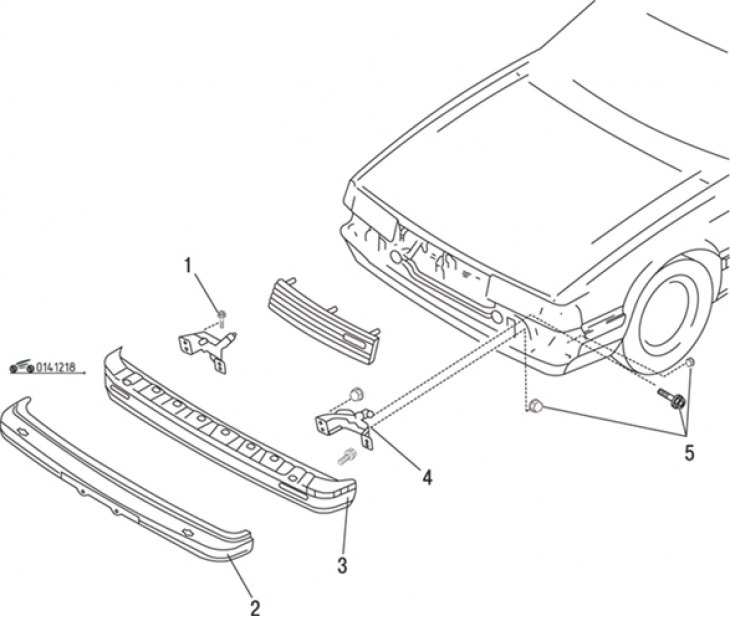
Figure 12.18. Front bumper: 1 – nut; 2 – front bumper; 3 – bumper reinforcement; 4 – side bracket; 5 – bolt and nuts
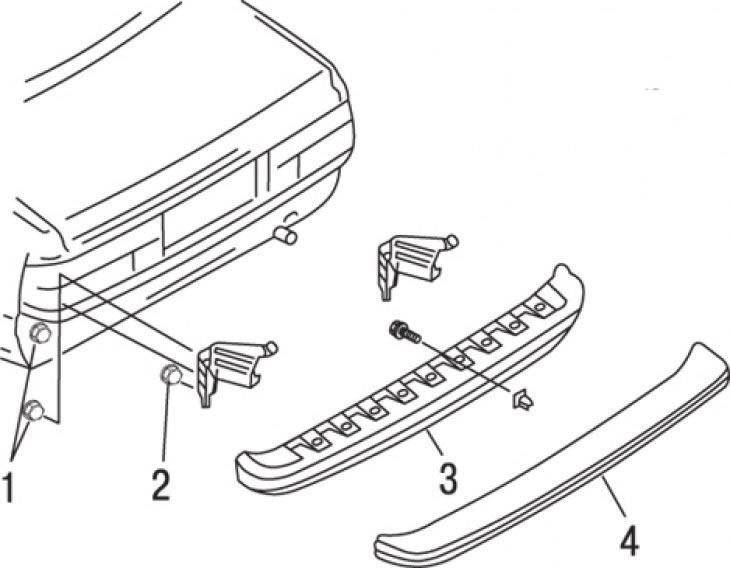
Figure 12.19. Rear bumper: 1, 2 – nuts; 3 – bumper reinforcement; 4 – rear bumper
Unscrew the bolts securing the bumper brackets and remove it together with the brackets (figure 12.18, 12.19).
Align the end of the trim with the fender and tighten the screws firmly, starting at the fender line.
Installation is carried out in the reverse order of removal.
(For details, see the website mazbook.ru)