


Contents: Removal ⇓ Installation ⇓
Removal
Disconnect the negative cable from the battery with the ignition off.
Caution: This will erase the data in the electronic memory units. See the instructions in the "Electrical equipment" chapter.
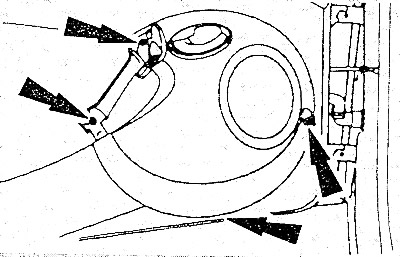
Unscrew the four screws securing the door trim.
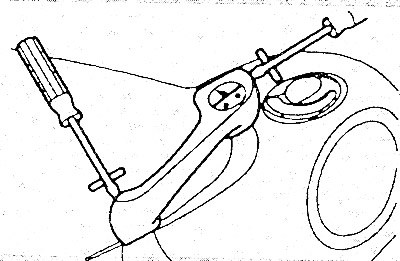
Use a screwdriver to pry up the cover of the inner door handle, placing a piece of paper under the screwdriver to avoid damaging the trim.
If present, pull the plug off the window control switch.
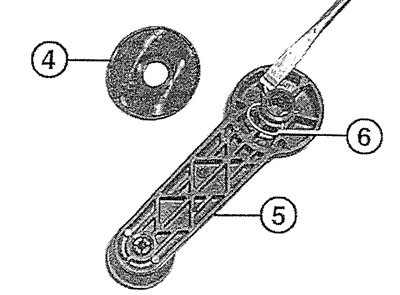
Manual windows: remove the window handle. To do this, insert a screwdriver between the socket (4) and the handle (5) near the window lifter shaft and press out the mounting bracket (6), as shown in the figure.
Note: The mounting bracket may be turned 180° during installation (the hole in the bracket faces the handle). Pull the handle off the window lifter shaft. Immediately after removal, insert the bracket back into the handle.
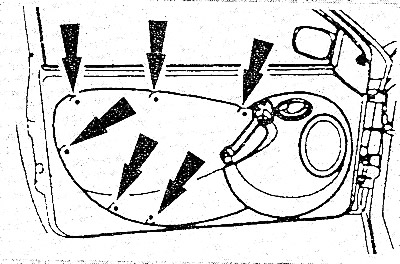
Pull the door trim around the door frame and unhook it from the clamps. To make the job easier, you can use a wide plastic or wooden spatula.
Loosen the four speaker mounting screws, pull off the plug and remove the speaker.
Loosen the screws securing the inner door handle drive and detach it from the door frame.
If necessary, carefully remove the protective film. To do this, pull the film away from the door frame and cut the adhesive layer with a sharp knife.
Warning: Do not attempt to pull the protective film off the door without cutting the adhesive strip. Do not touch the adhesive surfaces of the film, otherwise the adhesive properties of the film will deteriorate. If the film is removed completely, it must be stored so that the adhesive layers do not become dirty. If the film is removed only partially, then fold it aside and secure it with adhesive tape.
If the film is also attached with clamps, then pull the film up to the first clamp of the door trim. Cut the film with a sharp knife around the clamp, pull it further and cut it further around the remaining clamps.
Caution: Cut the film as close to the clamps as possible. Do not tear the film when tightening.
Installation
Note: The door protective film must be glued evenly, tightly and without folds, otherwise it may be pulled inside the door. In case of major damage, replace the protective film. To do this, place the film on the removed door trim and cut it so that the film is shorter than the trim by about 5 mm. Then stick the double-sided adhesive tape to the door frame at a distance of 6-8 mm from the edge. Remove the protective paper from the adhesive tape, align the film and press it lightly. Strengthen the film so that no bubbles or folds form and the adhesive tape is completely covered.
Attach the inner door handle drive and secure it with screws.
Place the plug on the speaker and secure the speaker with four screws.
Check the condition and tightness of the plastic clips for fastening the door trim. Replace damaged clips.
Install the door trim onto the door frame. Align the trim so that the clips are over the holes in the door frame.
Press the trim and hit the trim with your palm in the places where the fastening clamps are located.
If removed, install the window lift handle. To do this, insert the clamp (bracket) into the handle. Put the handle on the splines of the window lift axis. The window lift handle should point forward when the window is closed. Secure the handle.
If removed, put the plug on the window lift control switch.
Press the cover of the inner door handle.
Screw in four screws.
Connect the negative cable to the battery.
Set the clock readings and enter security codes if necessary.